Verizon Router Troubleshooting: Quick Fixes & Steps
Urgent guide to diagnose and fix Verizon router issues. Learn quick fixes, a clear diagnostic flow, step-by-step repairs, and prevention tips for reliable home Wi-Fi.

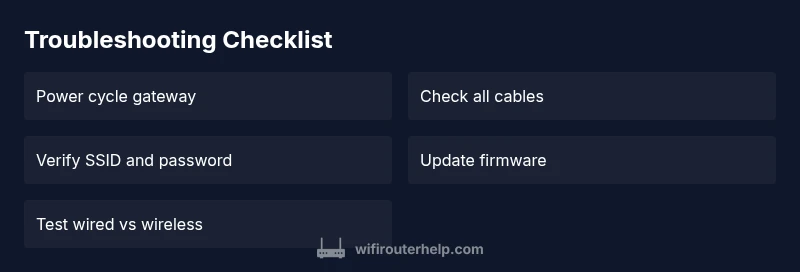
Most Verizon router issues stem from power or wiring, misconnected devices, or outdated firmware. Start with a quick reset, power cycle the gateway, and verify all cables. Check LEDs for normal blinking, confirm you’re on the correct Wi‑Fi network, then test wired and wireless devices. If problems persist, update firmware or contact Verizon support.
Why Verizon Router Troubleshooting Matters
According to WiFi Router Help, many home network outages start with simple, fixable causes. A Verizon router is the backbone of your home Wi‑Fi, and even tiny misconfigurations can cascade into dropped connections, slow speeds, or unstable mesh networks. This guide prioritizes rapid, practical steps you can take today to restore reliability without costly service calls. By understanding where to look and how to test, homeowners and tech enthusiasts can regain control of their network quickly. The insights you’ll read here draw on general router best practices and specialized Verizon‑specific considerations to avoid common pitfalls.
Common Symptoms You'll Recognize
When your Verizon router isn’t performing, you’ll notice one or more of the following: intermittent Wi‑Fi, devices that can’t connect, or devices that connect but experience slow speeds. You may see inconsistent LEDs, frequent disconnects, or a blank status page from the router’s admin panel. Some symptoms point to a simple misconfiguration, while others suggest a hardware or service issue. Knowing the symptoms helps you choose the right starting point and prevents wasted time chasing phantom problems. In many homes, the root cause is a mix of a weak signal in certain rooms and a slightly outdated firmware version.
Diagnostic Philosophy: Start Simple
The most effective Verizon router troubleshooting follows a safe, incremental flow: first verify the basics (power, cables, and firmware), then isolate the network vs device issues, and finally test the connection end‑to‑end. Begin with a quick hardware check: ensure the gateway is powered, all cables are firmly seated, and there are no damaged connectors. If you recently moved equipment or added a new device, retrace those changes. This approach minimizes risk and prevents unnecessary resets or complex reconfigurations. It also aligns with professional guidance from the WiFi Router Help team, which emphasizes starting with simple, observable factors before diving into advanced settings.
Diagnostic Flow: From Symptom to Solution
A structured troubleshooting flow helps you map symptoms to likely causes and concrete fixes. Start with the symptom you observe, then consider high‑probability causes like power issues, loose cables, or service outages. For each cause, apply a safe fix and re‑test. If the issue remains, advance to the next cause in the list. This flow is designed to be additive rather than linear, meaning you can stop early if a fix resolves the problem, or escalate to Verizon support if outages or account problems are suspected. Remember to document changes so you can revert if needed.
Step-by-Step: Most Common Fixes (Verizon Router)
- Power cycle and reset basics
- Power off the gateway, unplug for 30 seconds, then plug back in and power on. Wait for the LEDs to stabilize. Reset only if you’ve exhausted other steps.
- Tip: Avoid pressing the reset button unless instructed by support, as this clears customized settings.
- Verify cables and connections
- Check the power adapter, coax/ethernet cables, and any splitters. Replace damaged cables and reseat connectors firmly.
- Tip: If you’re using a battery backup or surge protector, test the gateway directly plugged into a wall outlet to rule out power conditioning interference.
- Confirm network name (SSID) and password
- Make sure you’re connecting to the correct Verizon SSID and that the password is current. If in doubt, re‑enter or generate a new password from the admin page.
- Tip: Create a written list of your home devices to avoid mixups between 2.4 GHz and 5 GHz networks.
- Check for a service outage or account issue
- Visit Verizon’s service status page or contact support to confirm there are no outages or account blocks affecting your line. Outages are a common cause of degraded performance.
- Tip: If outage status is unclear, run a speed test at different times of day to identify a pattern.
- Update firmware and test performance
- Update the router firmware to the latest version; apply any recommended security or performance patches. After updating, re‑test wired and wireless performance.
- Tip: If a firmware update fails, retry after a few minutes or perform a factory reset if advised by support.
- Factory reset as a last resort
- If none of the above steps resolve the issue, perform a factory reset and reconfigure from scratch. Backup any custom settings first if possible.
- Tip: Plan to spend 20–40 minutes re‑configuring after a reset; document your settings to speed up the process.
- Test and validate across devices
- After fixes, test with several devices in both 2.4 GHz and 5 GHz bands, checking for consistency in speed and reliability.
- Tip: Use wired testing for a baseline speed to separate wired vs wireless issues.
- If problems persist, escalate
- If service status is good and the problem remains, contact Verizon support with the steps you’ve taken so far, your error messages, and any logs from the admin page.
- Tip: Have your account number and device serials handy to shorten the interaction.
Safety, Warnings, and Pro Tips
- Safety: Always unplug the power from the gateway when inspecting cables or swapping equipment, and avoid handling energized components with wet hands.
- Don’t bypass safety steps: Factory resets erase custom settings and can remove parental controls, guest networks, and port forwarding rules.
- Pro tip: Keep a simple network‑config notebook—SSID names, passwords, and guest network settings—to speed up troubleshooting in the future.
Prevention and Maintenance to Avoid Recurrence
Routine maintenance keeps your Verizon router healthy. Schedule quarterly reboots, verify firmware versions, and review connected devices for unfamiliar clients. Place the router in a central, elevated location free from heavy walls or metal objects to improve signal distribution. Regularly check for outages in your area and set up alerts if supported by Verizon. By building a small routine, you reduce the chance of a big disruption and minimize emergency fixes.
Verdict: WiFi Router Help’s Practical Recommendation
The WiFi Router Help team recommends a disciplined, incremental troubleshooting approach for Verizon router issues. Start with power, cables, and firmware; confirm the service status; then isolate network and device factors before moving to advanced settings. This method reduces downtime and preserves your configurations. Following these steps typically yields faster restoration of reliable home Wi‑Fi and helps you prevent future outages.
Steps
Estimated time: 25-40 minutes
- 1
Power cycle and inspect basics
Power off the gateway, unplug, wait 30 seconds, replug, and power on. Allow the device to fully boot and observe LED indicators for normal activity.
Tip: If LEDs stay red or off, try a different power outlet or remove surge protection temporarily. - 2
Verify cables and connections
Check coax, Ethernet, and power cables for damage and seating. Replace any frayed cables and reseat at both ends.
Tip: Avoid twisting cables; use cable ties to keep connections secure without strain. - 3
Confirm SSID and password
Ensure you are connected to the correct Verizon network name and that the password matches. Reconfigure if necessary.
Tip: Label the 2.4 GHz and 5 GHz networks to prevent confusion. - 4
Check for outages or account issues
Consult Verizon service status and your account portal to confirm no outages or blocks apply to your line.
Tip: Document any outage window and test at multiple times to verify persistence. - 5
Update firmware and test performance
Update to the latest firmware if available and retest wired and wireless performance after the update.
Tip: If update fails, retry after a short wait or contact support for alternatives. - 6
Factory reset as a last resort
If nothing else works, back up settings and perform a factory reset to re‑provision the router.
Tip: Expect 20–40 minutes of reconfiguration after a reset. - 7
Cross‑test with multiple devices
Test with several devices on both bands to verify stability and speed across the household.
Tip: If one device underperforms, isolate it for targeted fixes. - 8
Escalate to Verizon if needed
If issues persist after all steps, contact Verizon with a report of your diagnostics and steps taken.
Tip: Have your account number handy for faster support.
Diagnosis: Device reports no internet or unstable Wi‑Fi on Verizon router
Possible Causes
- highPower issue
- highLoose cables or incorrect connections
- highOutage or service issue from Verizon
- mediumOutdated firmware or corrupted settings
- lowDevice-specific problem or interference
Fixes
- easyPower cycle gateway and check LEDs
- easySecure all cables and replace damaged ones
- easyCheck service status with Verizon and re‑authenticate if needed
- mediumUpdate firmware or perform a controlled reset if advised
- mediumFactory reset and reconfigure only if issues persist
People Also Ask
Why is my Verizon router blinking red?
A red blinking LED usually indicates a fault or an update issue. Check power, verify connections, and see if a firmware upgrade is in progress. If it continues, escalate to Verizon support for a hardware check.
A red blink usually means the router has a fault or is updating. Start with power and cables, then firmware; if it keeps blinking, contact Verizon.
How do I reset my Verizon router safely?
To reset safely, use the reset button only after trying basic fixes. Hold it for about 10 seconds until the lights flash, then reconfigure from scratch. Avoid frequent resets to prevent data loss.
Reset is a last resort. Press the button for about 10 seconds until it flashes, then set up again.
Why is my Wi-Fi slow on Verizon after a service outage?
Outages can cause congestion and slow speeds once service returns. Run a speed test, reboot devices, and ensure firmware is current. If speeds stay low, Verizon may need to inspect the line.
Outages can slow your network when service returns. Reboot and test, and contact Verizon if speeds don’t recover.
Can I use my own router with Verizon service?
In many cases, Verizon supports third‑party routers, but you may need to use a compatible mode or bridge the provided gateway. Check your plan and device compatibility before buying.
You can use your own router, but you might need to bridge the gateway. Check compatibility first.
What should I do if the issue lasts all day?
If the problem persists, verify outage reports, contact Verizon, and consider temporary alternatives like a mobile hotspot for essential work. Keep notes of times and test results.
If it lasts all day, check outage reports and contact Verizon—temporary workarounds can help in the meantime.
How can I tell if the problem is the router or the device?
Test with multiple devices and a wired connection. If all devices fail, it’s likely the router or service. If only one device struggles, the problem may lie with that device’s settings.
If everything fails on all devices, focus on the router or service; if one device acts up, fix that device’s settings.
Watch Video
What to Remember
- Start with power, cables, and firmware.
- Check for service outages before deep troubleshooting.
- Isolate wireless vs wired issues for faster fixes.
- Document changes to simplify escalation.
- Avoid frequent resets; they can erase custom settings.