How to Set Up Verizon Router: A Clear, Step-by-Step Guide
Learn how to set up a Verizon router in your home with clear steps, from activation to securing Wi‑Fi and firmware updates. This guide covers FiOS and gateway configurations, safe defaults, and practical troubleshooting tips for reliable, people-friendly connectivity.

Goal: Set up and secure your Verizon router for reliable home Wi‑Fi. You’ll connect the gateway, activate service, and customize your network. Essential items include your Verizon account, the router, a modem if required, a computer or mobile device, and an Ethernet cable. According to WiFi Router Help, start with a fresh power cycle for best results.
Why a Proper Verizon Router Setup Matters
A proper Verizon router setup matters because it directly affects speed consistency, coverage, and security across your home. A well-configured gateway reduces dead zones and keeps your devices protected from common online threats. The WiFi Router Help team notes that a clean activation, correct network naming, and timely firmware updates are the best defenses against slow speeds and unwanted access. Investing time upfront prevents repeated troubleshooting later, especially in multi‑story homes or spaces with thick walls. This guide focuses on FiOS and standard Verizon gateways, offering practical steps that work for most households without requiring advanced networking knowledge.
Prerequisites and What You’ll Need
Before you begin, gather the essentials so you can finish without interruptions. You’ll need your Verizon account credentials, the router/gateway provided by Verizon, the internet service cable (coax or fiber ONT), a computer or mobile device for the setup interface, and a spare Ethernet cable if you’re configuring via a wired connection. If your service uses a separate modem, have it on hand as well. Optional items include a notebook for password notes and a secondary device for testing the connection in other rooms. Preparation reduces delays and makes the activation flow smoother.
Activate and Connect the Gateway to Your Service
Activation typically starts when you power up the gateway and ensure the service line is live. Connect the coax or fiber line, plug in the power, and allow the gateway to boot for a few minutes. If activation prompts appear on your screen or via the Verizon app, follow the on-screen instructions to link the device to your account. During this phase, avoid changing settings too quickly; a calm, step‑by‑step approach minimizes the chance of misconfigurations that could lock you out of the admin panel. WiFi Router Help’s guidance emphasizes patience during activation to prevent repeat attempts that slow down setup.
Accessing the Router Admin Page and Initial Configuration
Once the gateway is activated, connect a device to the router (via Ethernet or Wi‑Fi) and open a web browser to the router’s admin page. The typical address is http://192.168.1.1, but you may need http://192.168.0.1 or a dedicated Verizon URL if your model differs. Log in with the default credentials found on the label or in the manual, then immediately change the admin password to a strong, unique value. From here, configure the Wi‑Fi network name (SSID) for both bands, set their passwords, and verify that the security protocol is at least WPA2; WPA3 is preferred if available. This step is critical for ongoing protection and stability.
Optimizing Wi‑Fi: Naming, Security, and Guest Networks
A strong Wi‑Fi setup starts with two distinct networks: a 2.4 GHz network for older devices and a 5 GHz network for newer ones. Give each network a unique, memorable name and a strong password. For security, enable WPA2 or WPA3 and disable WPS if your router still supports it. Consider enabling a guest network for visitors to keep your main network private. If you have smart home devices, assign them to a separate network or create a dedicated IoT VLAN if your router supports it. Regularly review connected devices to catch unfamiliar connections early and improve overall security.
Advanced Settings: Firewall, DHCP, Bridge Mode, and Port Forwarding
The firewall should be enabled by default; confirm it’s active and review any preset rules. DHCP should be enabled to automatically assign IPs within your home network; if you plan to connect an independent router, you may enable bridge mode to avoid double NAT. Port forwarding is useful for specific apps or services (for example, gaming or remote access) but should be configured sparingly to minimize exposure. If you’re unsure about a setting, document the current value before changing it so you can revert if needed. The goal is to maintain a balance between performance, security, and accessibility for all devices.
Troubleshooting Common Issues and When to Reset
If devices won’t connect, verify that the unit is serving a network and that you’re using the correct password. Check for firmware updates in the admin interface, as updates often fix bugs and improve performance. A factory reset should be a last resort; it returns settings to defaults, which you’ll need to reconfigure. If activation stalls, confirm that your service line is active with your account, and consider rebooting the gateway after a few minutes. Persistent problems may require a quick call to Verizon support to verify line status and device compatibility.
Final Checks Before You Finish
Run a quick speed test on multiple devices in different rooms to identify any coverage gaps. Confirm your guest network works by connecting a test device. Save all changes and keep the admin credentials in a secure place. If you’re upgrading from an older gateway, take note of new features or security improvements you can leverage. The goal is a reliable, secure network with consistent performance across your home.
Tools & Materials
- Verizon router/gateway(Model varies; have account credentials handy)
- Coaxial or fiber connection(Ensure service line is active and properly seated)
- Computer or mobile device(Used to access the router admin page and verification steps)
- Ethernet cable(Helpful for a stable initial setup by wired connection)
- Verizon account login(Phone number or account user ID for activation)
Steps
Estimated time: 30-60 minutes
- 1
Gather and verify prerequisites
Collect your Verizon account credentials, the gateway, and the necessary cables. Verify service is active and that you have a device ready to access the admin interface. This upfront check prevents mid‑setup interruptions.
Tip: Keep a notebook with account IDs and default passwords in case you forget them later. - 2
Connect power and service line
Attach the gateway to power and connect the coaxial/fiber line. Wait 2–3 minutes for the device to boot and establish a link with Verizon’s network. A good boot is essential for a smooth activation.
Tip: Avoid unplugging the unit during boot; repeated power cycles can complicate activation. - 3
Activate the device via Verizon flow
Open the Verizon app or go to the activation page and follow the prompts to link the gateway to your account. Confirm the on‑screen status indicates successful activation before continuing.
Tip: If you encounter an error, retry after a short pause and check service status in your account. - 4
Log in to the admin page
From a connected device, open http://192.168.1.1 (or the standard admin URL) and sign in with the default credentials. Change the admin password immediately to a strong one.
Tip: Use a password manager to generate and store a unique admin password. - 5
Configure Wi‑Fi names and security
Create distinct SSIDs for 2.4 GHz and 5 GHz networks, set strong passwords, and enable WPA2/WPA3. Disable WPS if supported to improve security.
Tip: Label networks clearly (e.g., “Home-2.4G” and “Home-5G”). - 6
Test connectivity and update firmware
Run tests on multiple devices to confirm coverage. Check for firmware updates in the admin panel and install them if available.
Tip: Regular updates reduce security risks and improve performance.
People Also Ask
Do I need an active Verizon account to set up the router?
Yes. Activation requires an active Verizon service and account. Have your login handy during setup.
Yes. You’ll need your Verizon account to activate and configure the router.
Can I use my own third‑party router with Verizon service?
You can use your own router, but you may need to bridge the Verizon gateway to avoid double NAT and ensure proper functionality.
You can use your own router, but bridging the gateway is often needed.
What should I do if I can’t access the admin page after setup?
Ensure you’re connected to the router’s network and using the correct admin URL. If problems persist, reset to factory settings and retry.
Make sure you’re on the router’s network and try resetting if needed.
How do I update the router firmware?
Check the admin page for a firmware update option and enable automatic updates if available. Installing updates helps with security and performance.
Look for firmware updates in the admin menu and install when available.
Why is my Wi‑Fi slow after setup?
Slow speeds can be caused by interference, wrong channel selection, or devices on the wrong band. Verify 2.4 GHz vs 5 GHz usage and optimize placement.
Interference or wrong band can slow Wi‑Fi; check channels and placement.
Watch Video
What to Remember
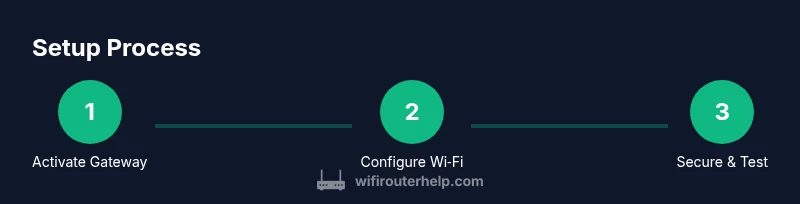
- Activate the gateway before configuring Wi‑Fi.
- Create separate 2.4 GHz and 5 GHz networks with strong passwords.
- Enable updates and secure admin access to protect your network.
- Test across rooms to ensure full coverage, not just strong signals near the router.