How to Get Router Out of AP Mode: Step-by-Step Guide
Learn how to exit AP mode on your router with a clear, model-agnostic guide. Restore full routing, restore DHCP/NAT, and keep your home network stable. WiFi Router Help provides practical steps and safety tips.

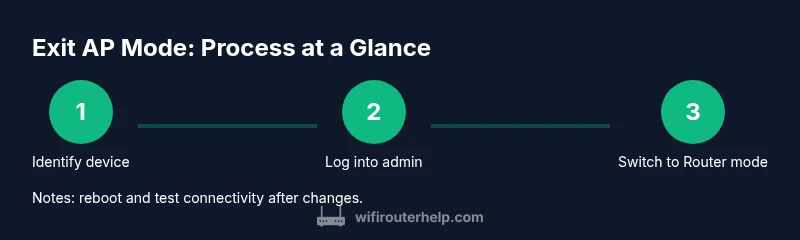
Goal: exit AP mode and regain full routing capability on your router. Before you begin, identify the device and ensure you can access its admin page. You’ll disable AP/Bridge mode, save changes, and reboot. If the interface varies, consult model-specific instructions, and remember: WiFi Router Help recommends testing the network after reboot.
Understanding AP mode and why exit it
AP mode (access point mode) converts a router into a wireless bridge rather than a full router. In this setup, the device typically does not manage DHCP or routing between networks, which helps extend wireless coverage without creating a second NAT. People use AP mode to simplify a large home or to integrate an existing gateway with a separate router. If you’re trying to simplify your network or merge devices under a single subnet, you’ll likely want to exit AP mode.
If you’re wondering how to get router out of ap mode, the path is fairly standard across brands: access the device’s admin page, locate the AP/Bridge or Network mode setting, switch to Router mode or disable AP, save your changes, and reboot. This process is often straightforward, but some models hide the option in submenus like Advanced Settings or LAN. According to WiFi Router Help, maintaining a single DHCP server and a single NAT boundary helps avoid IP conflicts and connectivity hiccups.
After the reboot, verify that your main router maintains the gateway for all devices and that clients pull IPs from the primary DHCP server. The guide you’re about to read from WiFi Router Help walks through common layout patterns and label names, so you can translate the generic steps into your specific model.
Identify the right device and prerequisites
Before changing anything, identify which device is currently acting as the AP. In many homes, the AP is a dedicated router, a secondary router, or a mesh node that has been configured to operate in bridge-like mode. If you’re unsure, log into your primary router’s admin interface first and note devices connected to the LAN that are not connected to the WAN side. Gather prerequisites: you will need a computer or mobile device with a browser, your admin credentials for the AP device, and a stable local network connection. Keep a power source handy to avoid interruptions, and consider a backup plan (a phone hotspot) if the change temporarily disrupts service. Finally, check that you have a quiet window to perform the change, because reboot times vary by device and firmware.
Access the admin interface safely
To exit AP mode, you must access the router’s admin interface. Use a wired connection if possible, or connect to the AP’s Wi‑Fi network. Open a browser and navigate to the device’s private IP address or hostname (the exact address is usually printed on the device label or your network’s default gateway). Enter the admin username and password. If you don’t know them, check the label on the device, consult the manual, or use the brand’s recovery process. Do not use public Wi‑Fi to make these changes. If the login fails, ensure you are not logged into the primary gateway, and try a reset only as a last resort.
Exiting AP mode: the practical steps you’ll take
This section discusses the typical actions; the STEP-BY-STEP block contains the exact actions. You will switch the device from AP/Bridge mode to Router mode, or disable AP entirely. After changing mode, you should enable or confirm DHCP and NAT on the device so it can issue IP addresses on the LAN. Save the settings and reboot the device. If the device does not support a direct Router mode, you may need to switch to a 'gateway' or 'router' profile and keep a single LAN subnet.
After you exit AP mode: verify settings and test connectivity
Once the reboot completes, test by connecting a client and confirming it obtains an IP address from the main DHCP server. Verify internet access, local network access, and device management access from a wired or wireless client. Check your LAN IP range to ensure there is no overlap with other devices. If you run into a double-NAT or IP conflict, revisit the AP settings or ensure the main router is the only device performing DHCP.
Brand differences and troubleshooting tips
Branding variations exist in where the AP or Bridge switch is located and how the options are labeled. Some brands call it 'AP mode', others 'Bridge mode' or 'wireless extender mode'. If you cannot find the setting, consult the model’s manual or the online support page. A common approach is disabling 'AP mode' under Advanced Settings, then selecting 'Router' or 'Gateway' mode. If you still cannot access the admin page after a change, consider temporarily resetting the AP to factory defaults and starting over, but only if you know the default credentials.
Troubleshooting and final checks
Keep monitoring for connectivity issues in the days after the switch. If devices fail to connect, verify DHCP is enabled on the correct device and that there is no duplicate DHCP server. Ensure you are not running two devices with conflicting subnets. If devices show limited connectivity, try flushing DNS or renewing the IP on the client. Maintaining a single subnet simplifies management and improves stability.
Tools & Materials
- Computer or mobile device with web browser(Used to access the router's admin interface on the local network)
- Router admin credentials (username & password)(Check the device label or manual; you may need to reset if forgotten)
- Ethernet cable (optional but recommended)(A wired connection is more reliable for configuration)
- Stable power supply(Keep the router powered during changes to avoid bricking the device)
- Brand-specific quick-start guide(Helpful for model-specific menus or terminology)
Steps
Estimated time: 15-25 minutes
- 1
Prepare and connect to admin page
Ensure you have a stable connection to the AP router. Use a wired link if available, open a browser, and navigate to the device's admin page. Have your login details ready and avoid editing settings on a guest network.
Tip: A wired Ethernet connection minimizes dropouts during changes. - 2
Find the AP/Bridge or Network mode setting
Once logged in, locate the section that controls operation mode. It may be labeled as AP mode, Bridge mode, Wireless Repeater, or Gateway. If you cannot find it, try the Advanced Settings menu or consult the manual.
Tip: Use the device’s search or help feature if available to locate mode settings quickly. - 3
Switch to Router mode or disable AP
Change the mode to Router mode or disable AP entirely. This step reassigns the device from a bridge to a full router, enabling NAT and DHCP to manage IP addresses on the LAN.
Tip: If you see multiple sub-options, choose the one that clearly enables routing and DHCP. - 4
Enable DHCP and NAT on the device
Ensure DHCP server and NAT are active on the device you’re switching to router mode. This allows connected devices to obtain IP addresses and access the internet.
Tip: Only one device on the network should handle DHCP to avoid IP conflicts. - 5
Save changes and reboot
Apply the new configuration and reboot the device. Do not unplug power during the reboot. Some devices require you to click an Apply button before reboot.
Tip: If the reboot takes longer than usual, wait a full couple of minutes before testing. - 6
Verify connectivity and LAN settings
After the reboot, test a client device to confirm it receives an IP from the main DHCP server and that you have internet access. Check LAN IP range and ensure devices can reach the gateway.
Tip: Run a quick ping to the gateway and perform a browser test to confirm access.
People Also Ask
What is AP mode and why should I exit it?
AP mode turns a router into a simple access point that extends your network. Exiting AP mode returns the device to a full router, enabling NAT, DHCP, and firewall features. This helps unify your home network under a single subnet.
AP mode makes the device act as a bridge; exiting it restores full routing with NAT and DHCP.
Can I disable AP mode without resetting the router?
Yes. In most cases you can switch the device from AP/Bridge to Router mode via the admin interface without performing a factory reset. If you cannot find the option, consult the model's documentation.
You can usually switch modes in the admin panel without resetting.
What if I can’t access the admin page after switching?
Verify you are connected to the correct device, try a wired connection, and ensure the subnet hasn’t changed. If needed, reset to factory defaults as a last resort, then reconfigure from scratch.
Check your connection and subnet; a factory reset should be last resort.
Will exiting AP mode cause downtime for connected devices?
There may be brief network interruption while the device reboots. Plan changes during low-usage times and communicate the brief outage to household members.
There may be a brief outage during reboot.
Is it necessary to use Ethernet for this change?
Ethernet is recommended for reliability, but many changes can be done over Wi‑Fi if the AP’s admin page is reachable. A wired connection minimizes dropouts.
Wired is best, but Wi‑Fi can work if stable.
Watch Video
What to Remember
- Prepare with admin access and a plan.
- Know the difference between AP mode and router mode.
- Disable AP mode safely by following steps.
- Test connectivity after reboot to confirm success.
- If issues persist, consult model-specific guides.