How to Put Your Router in Modem Mode (Bridge Mode)
Learn how to put your router into modem mode to create a clean bridge, simplify networking, and avoid double NAT. This step-by-step guide covers prerequisites, compatibility, and safe recovery with practical tips from WiFi Router Help.

Learn how to put your router into modem mode to create a true bridge between devices, which can improve stability and simplify your network. This guide covers prerequisites, common ISP constraints, and step-by-step actions you can perform safely without losing internet access. We’ll explain when it’s appropriate, what to expect, and how to recover if you need to revert. According to WiFi Router Help, bridging is most effective when you’re using a separate ISP modem and want one cohesive network layer.
What is modem mode and why it matters
In most home networks, a modem from your ISP provides a single connection to the internet, while a separate router manages Wi‑Fi, devices, and local traffic. Putting your router into modem mode (often called bridge mode) disables the router’s NAT and firewall features and passes the public IP directly to the modem. This reduces double NAT and can improve online gaming, port forwarding, and VPN performance. According to WiFi Router Help, bridging is especially effective when you’re using a separate ISP modem and want one cohesive network layer. Before you toggle anything, understand that you may lose some router‑specific features and you should have a recovery path in case you need to revert.
Bridge mode vs standard router mode: Key differences
Bridge mode changes how traffic flows. In standard router mode, your router handles NAT, DHCP, firewall, and sometimes UPnP. In bridge mode, the modem takes on the primary routing function, and the router operates mostly as a passive access point or is fully demoted to a bridge device. Expect NAT and firewall functions on the router to be disabled or limited, IP addressing to come from the upstream device, and some advanced features (like parental controls) to behave differently. This isn’t a one‑size‑fits‑all change; it’s about creating a single point of control for IP routing.
When to use bridge mode in your home network
Bridge mode is most beneficial when you have a separate modem and want to prevent double NAT, which can disrupt port forwarding, gaming, and VPNs. If your ISP provides a modem/router combo and you’re trying to connect a more capable router, enabling bridge mode on the gateway can reduce conflicts and improve wireless performance by dedicating routing duties to your preferred router. It’s also helpful if you want to centralize QoS or traffic shaping on one device. If you rely on the gateway’s built‑in features, bridge mode may not be ideal for you.
Compatibility and common obstacles
Not all devices support true bridge mode, and some ISPs lock certain features behind the gateway device. Some router interfaces label bridge mode differently (often as “bridge,” “IP passthrough,” or “DMZ”). Before starting, verify your equipment supports bridge mode and check your ISP’s policy on bridging. If you have a combined modem/router, bridging may disable VOIP or TV services that rely on the device. Inadequate firmware or a nonstandard UI can make locating the right setting challenging; plan accordingly and be ready to revert.
Prerequisites and safety checks before you begin
Plan to perform this change with a wired connection when possible, so you don’t lose access if the wireless link drops during configuration. Back up current router settings, note the default gateway, and collect login credentials for both the modem and the router. Confirm you know how to revert (restore factory defaults or save a backup). If your ISP requires PPPoE authentication, have those credentials handy. Finally, check for any active QoS rules or firewall settings that you’ll need to reconfigure after bridging.
Understanding the network changes you’ll see
After enabling bridge mode, your router’s NAT and most firewall features are effectively bypassed. Your modem becomes the primary router, issuing the public IP to connected devices. This can improve performance for certain applications but may require reconfiguring firewall rules, port forwarding, and VPN settings. Wireless networks may need to be re‑configured on the new primary router to ensure coverage and security. Expect IP addresses to be assigned by the upstream device or DHCP server rather than your former router.
Step-by-step overview of the switch (conceptual)
This section explains what happens during the transition so you’re prepared for changes in routing, NAT, and device addressing. You’ll typically disable NAT on the router, enable the bridge/passthrough option on the gateway, and test connectivity through a connected computer. Expect a brief downtime during the change as devices reconnect and new IP assignments propagate. By planning ahead, you’ll minimize disruption and preserve network security.
Recovery and troubleshooting after enabling bridge mode
If you lose internet after switching, first verify that the bridge/nat settings were applied correctly and that the upstream device is functioning. Restart both devices and recheck the connection status lights. If necessary, revert to the original configuration from a saved backup or reset to factory defaults and re‑attempt bridging with careful verification. Common issues include IP conflicts, DHCP scope overlaps, or misconfigured firewall rules on the primary router. Document changes so you can undo them easily if something goes wrong.
Advanced tips for performance and security
For best results, place the primary router in a central location, ensure firmware is up to date, and re‑establish QoS policies to protect latency‑sensitive traffic. Consider setting a static DHCP reservation on the primary router to keep devices stable when the IP address changes. If you use VPNs, test them after bridging since some configurations behave differently when NAT is disabled. Maintain a security baseline with essential firewall rules, keep default admin credentials disabled, and schedule regular backups of configuration settings.
Tools & Materials
- Computer or smartphone with web browser(For accessing admin pages and making changes)
- Ethernet cable(Wired connection recommended for reliability during setup)
- ISP PPPoE credentials (if required)(Have them ready if your ISP uses PPPoE authentication)
- Router and modem manuals(Guides can help locate the right bridge mode setting)
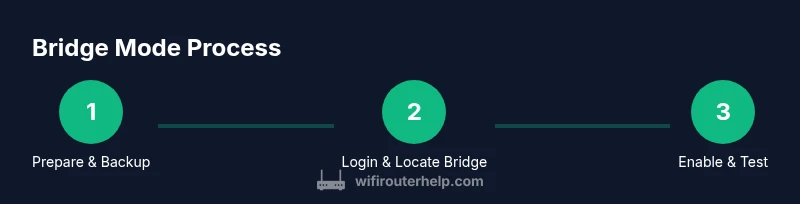
Steps
Estimated time: 20-40 minutes
- 1
Prepare and back up today’s settings
Power on all devices and back up current router configuration. Document current DHCP ranges and port‑forward rules so you can restore them if you revert. This helps protect you against accidental loss of services during the transition.
Tip: Create a quick restore point before changing NAT or firewall rules. - 2
Log in to the router’s admin interface
Connect a computer via Ethernet or Wi‑Fi to the router. Open a browser and enter the router’s IP address (commonly 192.168.1.1). Enter admin credentials and navigate to the network or advanced settings area.
Tip: If you’ve changed the default IP, use the new address to access settings. - 3
Find the bridge/modem mode option
Look for terms like Bridge, IP Passthrough, DMZ, or Modem Mode. The exact path varies by brand; common locations include WAN, Internet, or Advanced settings. Make sure you understand what’s being bridged to avoid disabling essential services.
Tip: If you can’t find it, consult the manual or manufacturer support pages. - 4
Enable bridge mode and apply changes
Toggle the bridge mode option on, apply, and let the devices reboot. You may be prompted to disable NAT or firewalls on the router. Confirm prompts and allow the modem to allocate the public IP as needed.
Tip: Do not power off devices mid‑transition—wait for the lights to stabilize. - 5
Test connectivity and adjust as needed
After the switch, test by connecting a device and confirming internet access. Check whether the WAN IP is assigned by the upstream modem and verify that critical services (VPN, gaming, port forwarding) function as expected.
Tip: If something fails, revert using your backup or reset the devices and reattempt with careful steps.
People Also Ask
What is bridge mode and why would I use it?
Bridge mode disables the router’s NAT and passes IP routing duties to the upstream gateway. It’s useful to avoid double NAT when you have a separate modem and want a single, predictable network path for gaming, VPNs, and port forwarding.
Bridge mode disables router NAT to let the modem handle routing, which helps certain apps. It’s worth it when you use a separate modem and want a clean, single routing point.
Will enabling bridge mode disable my Wi‑Fi on the router?
Bridge mode primarily affects routing and NAT. Your router can still provide Wi‑Fi if configured as an access point or if the bridge mode is implemented in a way that preserves wireless function. Check your device’s documentation.
If bridged, your router can still offer Wi‑Fi when set up as an access point or when the bridge mode supports wireless broadcasting.
Do I need to contact my ISP to enable bridge mode?
Often you can enable bridge mode without ISP intervention, but some ISPs require them to activate certain features or provide a specific IP passthrough method. Check your ISP’s policy and user agreement to confirm.
Usually you can bridge it yourself, but some ISPs have rules. It’s a good idea to check first.
What if I lose internet after enabling bridge mode?
If internet stops, verify that bridge mode is correctly applied, reboot both devices, and confirm the upstream gateway is providing a valid IP. Use your backup to revert if necessary and retest.
If the internet goes away, reboot and verify the bridge is enabled and the upstream modem is providing an IP. Revert if needed.
Can I revert bridge mode easily?
Yes. Reverting typically involves returning the gateway to its default settings or applying a saved backup. After reverting, test to ensure services return to normal.
You can revert by restoring defaults or loading your backup, then testing your connection.
Are there security risks when using bridge mode?
NAT and basic firewall protections on the router may be reduced or absent in bridge mode. Maintain a strong firewall policy on the primary router and keep firmware up to date to mitigate risks.
Bridge mode reduces NAT protection, so keep the main router’s security tight and up to date.
Watch Video
What to Remember
- Bridge mode creates a single routing point by bypassing router NAT.
- Verify compatibility and back up settings before changes.
- Test all critical services after bridging and have a rollback plan.
- Expect some reconfiguration of firewall rules and port forwards after bridging.