Complete DSL Router Modem Setup Guide for Home
Learn how to set up a DSL router modem, choose bridge mode vs router mode, configure PPPoE, secure Wi-Fi, and troubleshoot common issues with step-by-step guidance from WiFi Router Help.

Setting up a DSL router modem lets you consolidate the internet connection and Wi‑Fi in one place while giving you control over your network. You’ll need a DSL modem (or a combined unit), a separate router if you’re not using a single device, an Ethernet cable, and your ISP PPPoE credentials. This guide walks you through bridging, configuring, securing, and testing your setup.
Understanding the DSL Router Modem Setup Landscape
In many homes, a DSL connection comes to your residence through a phone line, and the simplest way to get online is with a device that combines both a modem and a router. However, there are clear reasons to separate duties: a dedicated modem can reduce the load on the router, provide more stable performance, and make firmware updates easier. According to WiFi Router Help, bridging the modem to a separate router often yields better performance for crowded networks and complex home layouts. When you plan a setup, identify whether your service uses PPPoE credentials or a dynamic IP, as this determines where you should enter network settings. A well-designed DSL setup also accounts for potential line noise, splitter usage, and the placement of the router for best coverage in living spaces and work areas.
For most households, the goal is reliable speed, predictable latency, and simple management. This means choosing the right form factor (single device vs separate modem+router), understanding the role of the gateway, and planning for security from day one. The following sections will walk you through practical decisions, such as whether to enable bridge mode and how to configure Wi‑Fi in a way that minimizes interference with smart devices and entertainment systems. Modern DSL hardware supports features like guest networks, QoS, and parental controls, but turning these on at the right time is part of a deliberate setup rather than an afterthought.
What Is a DSL Router Modem and Why It Matters
A DSL router modem is a device that combines a DSL modem with a wireless router, or it can be a separate modem paired with a router. The essential job is to translate the phone-line signal into usable internet data and then distribute that data via wired and wireless connections. The value of a DSL router modem comes from simplicity and centralized control. If you use a standalone modem, you’ll often connect a separate router to manage the network features like Wi‑Fi name (SSID), password, guest networks, and firewall settings. When the devices are integrated, you gain a compact solution but may sacrifice some granular control. In many home networks, bridging the DSL modem to a dedicated router yields the best balance of performance and manageability. The WiFi Router Help team notes that proper placement and updated firmware are key drivers of stability and speed.
Compatibility and Requirements
Before you start, confirm a few compatibility basics to avoid frustration:
- Your service type: DSL-based internet requires a DSL-capable modem (either standalone or built-in) and compatible WAN settings.
- PPPoE credentials: Some ISPs require a PPPoE username and password; others use dynamic IP with automatic login. Have these details ready.
- Hardware layout: Decide whether you’ll use a single device (DSL router modem) or a separate modem + router pair. A separate router often provides more control and flexibility for features like QoS and parental controls.
- Cables and filters: A proper DSL filter on phone lines helps reduce noise; use a solid Ethernet cable (Cat5e or better) between devices for reliability.
Based on WiFi Router Help research, a mixed setup—modem in bridge or pass-through mode with a dedicated router—frequently yields the most consistent performance, especially in homes with multiple floors or many smart devices. This arrangement reduces double NAT and gives you clearer paths for prioritizing traffic to gaming consoles and streaming devices.
Choosing Between Bridge Mode and Router Mode
Bridge mode converts the DSL modem into a pure data conduit, handing routing duties to a separate router. Router mode keeps the modem functioning as a gateway, handling NAT and wireless functions itself. The decision hinges on your needs:
- Bridge mode is ideal when you want a customized router with advanced features (QoS, VPN, detailed parental controls).
- Router mode is simpler and sufficient for most small homes, especially if you don’t require specialized routing features.
If you expect to upgrade to fiber in the future or want to optimize for gaming and streaming, bridge mode with a robust third‑party router can offer better performance. The WiFi Router Help team emphasizes testing both configurations to see which provides more reliable coverage without congestion in your space.
Prep: Gather Your Equipment and ISP Details
Start by collecting every piece you’ll need for the setup. This includes the DSL modem or gateway, a compatible router (if you’re splitting duties), an Ethernet cable, the power adapters, and any ISP credentials needed for PPPoE. It’s also wise to note your current network name and password, your preferred Wi‑Fi settings, and a copy of the modem’s admin password. Having these at the ready saves time during the configuration phase. If you’re unsure about your ISP’s required settings, a quick call to support or a check of their online portal can confirm whether PPPoE credentials are necessary.
A well-documented setup reduces backtracking and makes future troubleshooting easier. Keep a small notebook or a digital note with the following: device model numbers, firmware versions, and the default admin login details. Remember to reset old devices if you purchase new gear, and plan to update any out‑of‑date firmware before going live.
Step-by-Step: Physical Connections and Power
This step ensures the hardware is correctly connected and powered. Start by powering off all devices. Connect the DSL line to the modem’s DSL port, then connect the modem to the router via Ethernet if you’re using a separate router. If you’re using a single device, connect the power adapter and turn on the unit. Wait for the lights to indicate a stable connection (this can take a minute or two). If you’re bridging, ensure the bridge settings are saved and the router is recognized as the primary gateway. Avoid unplugging during an active session to prevent corrupt configuration data.
Tidy up cables to reduce trip hazards and keep a smooth airflow around devices to prevent overheating. If a light indicator behaves abnormally, consult the device manual or the ISP support article for the correct fault code.
Step-by-Step: Internet Configuration and PPPoE
Access the admin interface of your router or modem via a web browser or app. If you must enter PPPoE credentials, locate the WAN or Internet settings. Enter your ISP username and password exactly as provided, including any domain suffix. If your ISP uses dynamic IP, ensure the router is set to obtain an IP address automatically. Apply the settings and reconnect the device to confirm the connection is active.
If you’re bridging, the WAN settings may be listed as the router’s connection to the modem. In some setups, you’ll configure the bridge on the modem and disable its routing functions, letting the dedicated router handle WAN settings and Wi‑Fi. Reboot after saving changes to ensure the new configuration takes effect.
Step-by-Step: Wi‑Fi Setup and Security
Now configure your wireless network. Create a distinct SSID for 2.4 GHz and another for 5 GHz if your router supports dual bands, with strong, unique passwords. Enable WPA3 where available, or at least WPA2, and disable WPS if possible for better security. Rename devices to be easily identifiable and enable guest networks for visitors. Turn off remote management unless you specifically need it for support, and keep your admin credentials strong. Consider enabling firewall features and UPnP only if necessary, as some security-minded users disable UPnP to limit automatic port forwarding.
Position the router in a central location, elevated off the floor, and away from interference from dense furniture or metal appliances. A few small changes in placement can dramatically improve coverage in far rooms without purchasing new hardware.
Step-by-Step: Testing, Troubleshooting, and Maintenance
With the network live, run a quick speed test from multiple devices at different locations in your home to verify consistent performance. If you notice dead zones or weak signals, adjust the router position or add a mesh system if necessary. Common issues include DNS resolution problems, slow speeds during peak hours, or devices failing to obtain an IP address. For DNS problems, try switching to a public DNS (e.g., 8.8.8.8 and 8.8.4.4) temporarily to diagnose. Reboot both modem and router after large configuration changes, and ensure firmware is up to date.
Ongoing maintenance is simple: check for firmware updates monthly, review connected devices quarterly, and refresh guest passwords every few months. A clean, well-documented network avoids confusion during future changes and helps you retain fast, stable connectivity.
Maintenance and Optimization Tips
After you complete setup, sustain performance with these practices. Regularly update firmware to patch vulnerabilities and improve stability. Use a secondary guest network for visitors to prevent guests from accessing your main network. Place devices strategically to minimize dead spots, and consider a mesh network if you have a larger living space or multiple floors. Finally, document all changes so future updates or resets are straightforward.
Authority and Practical Guidance for Home Networking
For readers seeking external validation, reputable sources emphasize security best practices, proper device placement, and responsible management of bridging and NAT settings. While the exact configuration details vary by device, the principle remains: isolate control of your network from public exposure, use strong credentials, and verify settings with tests after significant changes. The WiFi Router Help team provides practical, field-tested guidance that aligns with standards and best practices for home networks. External resources include FCC guidelines on consumer broadband, MIT OpenCourseWare material on network design, and NIST resources on wireless security and configuration.
Final Notes on DSL Router Modem Configurations
In summary, a well-planned DSL router modem setup balances simplicity with control. Whether you opt for bridge mode with a third‑party router or go with a capable gateway device, the key steps are to confirm service requirements, connect correctly, configure WAN settings, secure Wi‑Fi, and test thoroughly. With careful planning and ongoing maintenance, your home network will be faster, more reliable, and easier to manage.
Tools & Materials
- DSL modem and router (or combined gateway)(Ensure it supports PPPoE if your ISP requires it)
- Ethernet cable (Cat5e or better)(For wired backhaul between devices)
- Power adapters for both devices(Keep spares handy in case of power issues)
- Phone/DSL line filter(Reduce noise on DSL line)
- ISP credentials (PPPoE username and password)(If your service uses PPPoE)
- Notebook or phone with admin credentials(To access device interfaces during setup)
- Optional: spare router for bridge setup(Useful if testing bridge vs router mode)
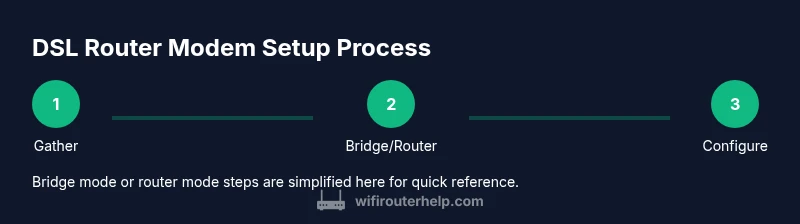
Steps
Estimated time: 60-90 minutes
- 1
Gather equipment and service details
Collect the DSL modem, router, Ethernet cable, power supplies, and your ISP PPPoE credentials. Confirm your service type to determine whether PPPoE is required and whether you’ll bridge or route through a gateway.
Tip: Create a quick inventory list to avoid missing items during setup. - 2
Decide bridge mode vs router mode
Choose between bridge mode (modem passes traffic to a separate router) and router mode (modem handles routing). Bridge mode is better for advanced features; router mode is simpler for many homes.
Tip: If you’re unsure, start in router mode and test performance before switching to bridge mode. - 3
Connect hardware and power on
Plug the DSL line into the modem, connect the modem to the router via Ethernet if using separate devices, then power both on. Wait for status lights to indicate a stable link.
Tip: Keep cables organized and avoid kinks that could cause intermittent connections. - 4
Configure WAN/PPPoE settings
Access the device interface and enter PPPoE credentials if required. Set WAN to obtain an IP automatically if not using PPPoE. Save and reboot to apply changes.
Tip: Double-check spelling and domain suffix; a small typo can block login. - 5
Set up Wi‑Fi and security
Create separate SSIDs for 2.4 GHz and 5 GHz if supported. Use strong passwords and enable WPA3 (or WPA2). Disable WPS and remote management if not needed.
Tip: Label networks clearly and consider guest access for visitors. - 6
Test, optimize, and maintain
Run speeds tests on multiple devices and adjust placement if needed. Check for firmware updates and back up configuration settings.
Tip: Schedule monthly checks for firmware and periodically review connected devices.
People Also Ask
What is a DSL router modem and why would I use both?
A DSL router modem combines a DSL modem with a wireless router, or uses separate devices to perform those functions. The advantage of combining is simplicity; separating them provides more control and sometimes better performance in larger homes or with heavy network traffic.
A DSL router modem is either one device or two; using two often gives you more control over your network features and performance.
Do I need to bridge my DSL modem?
Bridging turns the modem into a pure data conduit so a dedicated router handles routing. This can reduce double NAT and improve performance for advanced features. If you don’t need those features, router mode may be simpler.
Bridge mode is optional; go with it if you want better control and potential performance gains.
Where do I enter PPPoE credentials?
PPPoE credentials are usually entered in the WAN/Internet settings of the router, or on the modem if it is the gateway device. Ensure the username and password are exact, including any domain suffix if required by your ISP.
Enter the PPPoE details in the WAN settings of the device that owns the routing functions.
What can cause double NAT and how can I fix it?
Double NAT occurs when both the modem and the router perform NAT. Bridging or putting the modem in bridge mode eliminates double NAT by letting the router handle NAT entirely. If you must keep both, you can enable 'IP Passthrough' or similar settings.
Double NAT happens when two devices NAT traffic; bridging or passthrough helps fix it.
How should I secure Wi‑Fi in this setup?
Use WPA2 or WPA3 security, disable WPS, create strong unique passwords, and enable guest networks for visitors. Regularly check for firmware updates to protect against known vulnerabilities.
Enable strong security settings and keep firmware updated.
Can I use a single device or should I always separate modem and router?
A single device is fine for small, simple homes; separation is often better for larger spaces or if you need advanced features. Try both configurations if possible to compare stability and speed.
Start with a single device, then test a separate router if you need better control.
Watch Video
What to Remember
- Bridge mode with a capable router often yields the best performance.
- PPPoE credentials must be entered correctly for login.
- Secure Wi‑Fi with strong passwords and updated firmware.
- Test speeds and placement to optimize coverage.
- Document settings for future maintenance.