How to Setup Router and Modem: A Complete Guide
Learn how to set up your router and modem with a clear, step-by-step plan. This guide covers cables, login, configuring Wi‑Fi, security, and troubleshooting for a reliable home network.

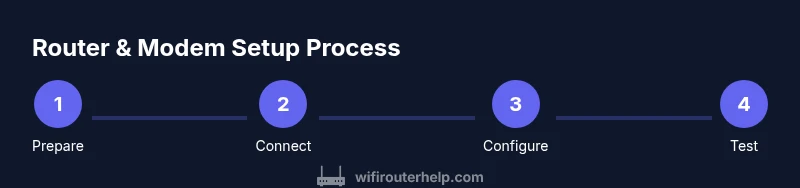
You're going to set up a home network by connecting your modem to a router, then configuring Wi‑Fi and security. In 3 steps: power up the modem, link the router to the modem with an Ethernet cable, and access the router's admin page to set the network name, password, and security settings. According to WiFi Router Help, this guided setup yields a reliable, secure home network.
Understanding the Setup: Modem vs Router and Prerequisites
In the context of how to setup router and modem, the most important thing is to understand the roles of each device. The modem connects you to the internet service, while the router distributes that connection to all your devices, wired and wireless. This understanding helps you plan cabling, placement, and security. According to WiFi Router Help, starting with proper hardware placement and default security reduces most setup headaches. Before you begin, confirm you have an active modem, a compatible router, at least one Ethernet cable, and a web-enabled device to access the admin interface. Remember that login pages and default credentials vary by brand, so have the manuals handy for reference. If you’re unsure, follow this guide and verify each step before moving on to the next.
Tools and Materials You’ll Need
Before you start, gather the essential tools and components so you can complete the setup without interruptions:
- Coaxial cable from wall outlet (required) — ensure it's the correct type for your modem.
- Modem (required) — the device provided by your ISP or rented.
- Router (required) — a model that supports current Wi‑Fi standards.
- Ethernet cables (2 recommended) — one to connect the modem to the router and one for a direct PC setup if needed.
- Web-enabled device (required) — laptop, smartphone, or tablet to access admin pages.
- Power adapters for both devices (required) — keep a spare outlet handy if you’re using a power strip.
- Optional: paper and pen to record network credentials and SSID/password details.
Tip: Label cables as you go so you can reconfigure later without confusion.
Connect the Hardware Correctly
This phase covers the physical connections that establish the path from the internet to your home network. Start by connecting the coaxial cable from the wall outlet to the modem and plugging the modem into power. Next, use an Ethernet cable to connect the modem’s Ethernet port to the router’s Internet/WAN port. Place the router in a central location away from thick walls and metal appliances to optimize coverage. Power on the modem first, wait for the indicator lights to show connectivity, then power on the router. Give both devices a minute to boot before proceeding. The goal is a clean, active link from the ISP to the router, which provides the doorway to your home network.
Accessing the Router Admin Page and Initial Config
With the hardware in place, you’ll configure the router settings. Open a web browser on your connected device and go to the router’s admin page (the address is usually printed on the device or in the manual). If prompted, log in using the default username and password supplied by the manufacturer, and then immediately change those credentials for security. You may need to select an Internet or WAN option and set the connection type to DHCP if your ISP assigns IPs automatically. Save changes and proceed to the wireless settings. Eventually, you’ll set a friendly network name (SSID) and a strong password. If your router supports it, enable WPA3 or at least WPA2 security and disable WPS for better protection. After saving, reboot the router to apply changes and test connectivity with a connected device.
Note: The exact login details vary by brand, so consult the manual if you encounter a login prompt that differs from the defaults.
Internet Connection and DHCP: WAN Setup and Local Network Basics
In most home networks, the modem provides the internet connection and the router creates a local network. You’ll likely use DHCP so the router assigns IP addresses to devices automatically. During initial setup, ensure the router’s WAN/Internet settings are configured to obtain IP addresses automatically from the modem, and verify the LAN IP range is conservative enough for your devices. If your ISP requires a specific login, or uses PPPoE, you’ll need to enter those credentials in the WAN settings. Remember that a correctly configured DHCP server reduces address conflicts and ensures devices can reliably reach the internet. This step is foundational, so take a moment to review any ISP-specific requirements and adjust accordingly.
Wireless Configuration: SSID, Password, and Encryption
The next stage is to configure wireless access. Choose a clear, non-personal SSID that’s easy to recognize for family members and guests. Create a strong passphrase using a mix of uppercase and lowercase letters, numbers, and symbols. Select WPA2 or WPA3 encryption, and disable WPS to prevent easy unauthorized access. If your router supports separate 2.4 GHz and 5 GHz networks, give each band its own name or enable smart switching so devices can automatically choose the best signal. Position the router for optimal coverage, avoiding placing it behind large metal objects or inside cabinets. After saving, reconnect your devices to the new network and test speed and stability. As you check settings, compare performance between bands and adjust channels if interference is present.
Tip: If you have smart devices that only support 2.4 GHz, ensure you maintain a robust 2.4 GHz presence while keeping faster 5 GHz options for overhead tasks.
Security Essentials: Firewalls, Firmware, and Access Controls
Security should be addressed early in the setup. Enable the router’s firewall and consider turning on UPnP only if you need it for certain devices. Check for firmware updates on the manufacturer’s site and apply them through the admin panel to patch known vulnerabilities. Create strong admin credentials and store them securely. Consider enabling parental controls or guest network isolation to keep guests from accessing your main devices. Review the device list periodically and revoke access for devices you no longer use. If you’re using a modern mesh-capable router, keep the primary router as the hub and add satellites without changing the core security configuration. Staying proactive with updates and access controls helps maintain a safer home network.
Performance Tuning: Channel Optimization and Coverage Testing
After basic setup, test your network across different rooms to locate dead zones. Use the router’s built‑in tools or a reliable speed test to gauge real‑world performance. If signals seem weak, reposition the router to a more central height, away from thick walls, and reduce interference from cordless phones and microwaves. For large homes, you may consider a mesh system or a Wi‑Fi range extender for seamless coverage. If your router supports band steering, enable it to guide devices toward the best available band. Periodically reassess placement and channel usage to keep buffering and latency to a minimum. Remember that optimal placement can significantly improve both coverage and speed.
Troubleshooting Common Issues: Quick Fixes that Save Time
When things don’t work as expected, start with simple steps before calling support. Reboot both the modem and the router, verify the coaxial connection, and confirm that the internet light indicates a live connection. Check that cables are firmly connected and that the router is broadcasting the network. If devices fail to obtain an IP address, reset the DHCP pool, and ensure there are no IP conflicts. If you can access the admin page but cannot connect devices, test with a wired computer to isolate whether the problem is wireless or broader. For stubborn issues, reset the router to factory defaults and reapply your settings from the start, ensuring you save credentials and configuration details as you go.
Maintenance: When to Update and How to Stay Secure
Regular maintenance keeps your setup reliable. Check for firmware updates at least every few months or when the manufacturer issues a security notice. Keep strong passwords for admin access and Wi‑Fi, and rotate them periodically. Back up your configuration settings if the router supports it so you can restore quickly after a reset. If you’re expanding your network with additional devices like a mesh system, plan the rollout to avoid disrupting current connections. Finally, maintain a centralized documentation of your network layout, including SSIDs, passwords, device IPs, and firmware versions to simplify future upgrades.
Final Thoughts on How to Setup Router and Modem for a Modern Home Network
A thorough approach to how to setup router and modem combines solid hardware, thoughtful placement, secure settings, and ongoing maintenance. By starting with the right hardware, connecting correctly, configuring DHCP and Wi‑Fi, enabling security features, and testing thoroughly, you create a resilient network that supports work, learning, and streaming. This comprehensive process from WiFi Router Help emphasizes clarity, repeatability, and security, helping homeowners and tech enthusiasts achieve dependable home coverage with less frustration. Remember that every ISP and device may have small differences, so adapt these steps to your gear and keep manuals handy. The overarching goal is a stable, secure, and scalable network that you can manage with confidence.
Tools & Materials
- Coaxial cable from wall outlet(Ensure it's compatible with your modem (often RG-6).)
- Modem(Provided by your ISP or rented; verify it’s active.)
- Router(Supports current Wi‑Fi standards (Wi‑Fi 5/6).)
- Ethernet cables (RJ-45)(Two cables recommended for initial setup.)
- Web-enabled device(Laptop, smartphone, or tablet to access admin pages.)
- Power adapters(One for the modem and one for the router.)
- Documentation or notes(Record SSIDs, passwords, and admin credentials.)
Steps
Estimated time: 45-60 minutes
- 1
Prepare hardware and workspace
Clear a stable area for the modem and router. Gather cables, power adapters, and a web-enabled device. Verify you have the necessary manuals. This preparation reduces mid‑setup delays and helps you follow a clear path.
Tip: Label each cable with its purpose to avoid accidental swaps. - 2
Connect modem to wall outlet and service line
Attach the coaxial (or appropriate) line from the wall to the modem and plug the modem into power. Wait until the status lights indicate a stable link with the service.
Tip: If the modem shows a “no signal” error, check the wall outlet and the service line. - 3
Connect modem to router via Ethernet
Use an Ethernet cable to connect the modem’s LAN port to the router’s Internet/WAN port. Ensure a snug, straight connection to avoid intermittent drops.
Tip: If you only see one LED, reseat the cable and verify the correct ports are used. - 4
Power up and boot
Power on the modem first, then the router. Give both devices 1–2 minutes to boot fully. Confirm the online indicators are solid before continuing.
Tip: Avoid unplugging during boot to prevent boot loop issues. - 5
Access the router admin page
From a connected device, open a browser and navigate to the router’s admin page. Log in with defaults and then change credentials for security.
Tip: If you can’t find the login page, check the device label or manual for the correct URL. - 6
Configure WAN/DHCP
Set the Internet/WAN to obtain an IP automatically (DHCP) unless your ISP requires a specific method. Save and apply changes.
Tip: If advised by your ISP, enter PPPoE or other required settings. - 7
Set SSID and wireless security
Create a unique SSID, a strong password, and enable WPA2/WPA3 encryption. Disable WPS to reduce risk of unauthorized access.
Tip: Use separate 2.4 GHz and 5 GHz names if your router supports it. - 8
Test connectivity on wired and wireless devices
Connect a laptop via Ethernet and a phone via Wi‑Fi to confirm internet access. Run a quick speed test to verify performance.
Tip: If speeds are slow, try changing the Wi‑Fi channel and moving the router to a better location. - 9
Document settings and plan updates
Record your SSID, password, admin credentials, and firmware version. Schedule periodic firmware checks and future network upgrades.
Tip: Keep a digital copy in a secure note for easy restoration after resets.
People Also Ask
Do I always need a separate router if I have a modem?
Most ISPs provide a modem, but a separate router gives you more control over Wi‑Fi settings, security, and features. You can use a modem‑connected router setup to create a stronger home network.
Usually yes, using a separate router provides better control and performance for Wi‑Fi.
Can I set up a modem and router without a computer?
Yes. Use a web‑enabled smartphone or tablet to access the router’s admin page. Many vendors support mobile setup apps that guide you through the essential steps.
You can complete setup with a phone or tablet using the vendor’s app or web interface.
What is the difference between WAN and LAN ports?
WAN is used to connect the router to the internet (via the modem). LAN ports provide local connection points for devices on your home network.
WAN connects to the internet; LAN serves devices inside your network.
Why should I disable WPS even if it’s convenient?
WPS can be exploited more easily than WPA2/WPA3 authentication. Disabling it reduces the risk of unauthorized access.
WPS is convenient but less secure; turn it off for better protection.
How often should I update firmware?
Check for updates every few months or when the manufacturer releases a security notice. Updates improve stability and security.
Check occasionally and update when available.
What should I do if I can’t access the admin page?
Verify you’re on the correct local IP, try a different browser, and reset credentials if needed. If issues persist, factory reset may be required.
If you can’t reach the admin page, reset credentials or reboot the device.
Is a guest network recommended for visitors?
Yes. A guest network keeps your main devices isolated while providing internet access for guests.
Guest networks are a good practice for visitor access.
Watch Video
What to Remember
- Plan hardware placement before powering up.
- Use DHCP on the router for automatic IP assignments.
- Secure Wi‑Fi with WPA2/WPA3 and strong passwords.
- Test wired and wireless performance after setup.
- Document credentials and firmware versions for future maintenance.