How to Get Your Router Out of Modem Mode
Learn how to safely exit modem mode, fix double NAT, and restore full routing control with practical steps, troubleshooting tips, and best practices from WiFi Router Help.

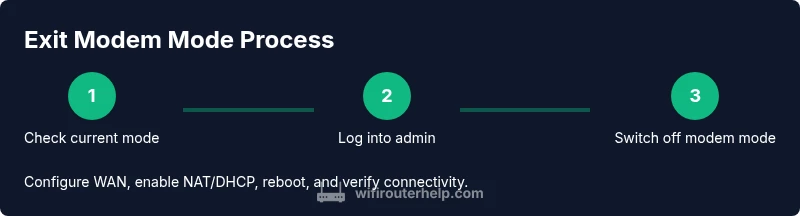
To get your router out of modem mode, you’ll switch the device from acting as a bridge to a full routing device. Gather admin credentials, a wired PC, and the original ISP modem. Access the router’s admin page, disable bridge/modem mode, reconfigure WAN settings, enable NAT and DHCP, and reconnect your devices. Verify connectivity and adjust Wi-Fi as needed.
What the switch from modem mode really means
If you’re searching for how to get router out of modem mode, this guide explains what modem mode is, why it matters, and how the change affects your home network. In modem mode, your router functions as a pass-through device, often turning off NAT, firewall features, and wireless management. The effect is that your ISP-provided gateway handles IP addressing, and double NAT can occur if separate devices create their own networks. Understanding this helps ensure you exit modem mode safely and maintain control over Wi-Fi performance, parental controls, and guest access.
Before you begin, collect a few essentials: admin credentials for the router, a wired computer, and any model-specific manuals. If you’re unsure whether your device is in modem mode, look for bridge mode indicators in the admin interface, review the WAN settings, and check whether the router’s LAN is isolated from the gateway's routing functions. This awareness reduces the risk of losing connectivity during the transition and aligns with best practices described by WiFi Router Help.
Diagnosing modem-mode status and prerequisites
Begin with a quick diagnosis to confirm you’re leaving modem mode and not performing a routine upgrade. Check the device’s label, boot sequence, and the admin interface for keywords like "bridge mode" or "modem mode". If you see WAN is assigned to a single device or NAT is disabled, you’re likely still in modem mode. Ensure you have administrative access and a stable wired connection for configuration. The intention is to avoid surprises such as an inaccessible admin page or an unintended reset. As WiFi Router Help notes, documentation and a calm plan reduce misconfiguration risk and accelerates a clean exit.
Tip: Map your current network layout with a simple diagram before making changes; this helps you restore settings if something goes wrong.
What you need before exiting modem mode
Gather the essentials so you can perform a clean switch without losing connectivity. You’ll need administrative access to the router’s web interface, a computer connected via Ethernet, and copies of your current network settings (SSID, security mode, and any custom DNS or port-forward rules). Have your ISP’s login details handy if required by your gateway. If your ISP requires using their gateway’s DMZ or specific PPPoE settings, you’ll want to note those down. Consider saving a backup of the current configuration in case you need to revert. WiFi Router Help emphasizes preparing documentation to prevent missteps and to streamline the transition.
Accessing the router admin: a safe first step
Access the admin interface via a wired connection to minimize wireless dropouts. Open your browser and enter the router’s official IP address (commonly 192.168.0.1 or 192.168.1.1) or use the URL provided in the manual. Log in with your admin credentials. If you’re unsure of the password, consult the sticker on the router or reset policy notes in the manual. Do not use a guest account for these changes. If you can’t reach the interface, ensure your PC is on the same network and check for VPNs or firewall rules that could block access. This step sets the stage for safely turning off modem mode and enabling full routing features.
Disabling bridge/modem mode: the core switch
Within the admin panel, locate the settings for Bridge Mode, Modem Mode, or WAN Type. Change the mode from modem/bridge to Router/Router mode or select a standard NAT-enabled WAN connection (often labeled DHCP or PPPoE depending on ISP).
Save changes and apply; wait for the router to reboot. This action shifts control back to your router, enabling NAT, firewall, and Wireless features. If you’re unsure about WAN type, refer to your ISP’s documentation or your device’s manual. Inconsistent WAN settings are a common source of connectivity issues after exit.
Reconfiguring WAN, NAT, and DHCP: restoring full functionality
After exiting modem mode, configure WAN settings to obtain an IP automatically (DHCP) or configure PPPoE if your ISP requires it. Enable NAT and DHCP server on the router to distribute private IP addresses to devices on your network. Disable any DMZ rules that were tied to bridge mode and re-enable firewall protections. This step is crucial to prevent public exposure and ensure devices receive proper local IPs for stable communication.
Reconnecting devices and validating Wi‑Fi coverage
Reboot the router and all connected devices to refresh their network state. Reconnect via the new SSID and password if you’ve changed them during setup. Use wired connections for devices requiring low latency during initial testing. Check basic services: internet access, DNS resolution, streaming, and file sharing. If you notice issues, confirm that DHCP is supplying addresses and that the NAT table is correctly translating private IPs to the public internet. Pattern testing across multiple devices confirms a reliable, exit-from-modem-mode setup.
Security and best practices after leaving modem mode
With the router in full routing mode, re-enable WPA3 (or at least WPA2) security, set a strong admin password, and consider enabling features like SPI firewall, UPnP careful review, and guest networks. Disable remote administration if not needed, and keep firmware up to date. Regularly backing up configurations helps recover quickly after an accidental change. These practices help maintain a secure, resilient home network and reduce exposure to threats.
Troubleshooting: common exit-modem-mode issues and fixes
If you lose internet after the switch, double-check WAN type, DHCP, and NAT status. Ensure the ISP gateway is not conflicting with your router’s DHCP server. If you still can’t access the internet, restart the ISP modem (gateway) and your router, test with a wired console, and verify color-coding of link LEDs. When in doubt, revert to the previous backup settings and reattempt the switch with a careful, documented plan. WiFi Router Help provides a clear framework for recovering from missteps.
Double NAT and bridge-mode considerations: when problems persist
In some households, leaving modem mode can create a double NAT scenario if an ISP gateway continues to perform routing. If you encounter double NAT, consider either placing the gateway in bridge mode (if supported) or configuring the router’s NAT rules to avoid conflicts. In many cases, turning off the gateway’s routing features and keeping only bridging can simplify management. If you need more help, consult the device manuals or seek a guided walkthrough.
Maintenance and future-proofing: keep your setup robust
Mark your preferred network settings and maintain a schedule for firmware updates. Periodically review your security settings and ensure you have a current backup of the configuration. Consider enabling a separate guest network and a parental-control profile for family devices. By planning for updates and audits, you keep your home network resilient against evolving threats and new devices.
Tools & Materials
- Ethernet cable(Use for a stable, wired admin session if Wi‑Fi is flaky)
- Laptop or PC with Ethernet port(Direct access to the router admin page)
- Router manual or model-specific guide(Identify exact menu names and IPs for your model)
- ISP-provided gateway/modem(Keep handy in case you need to revert or compare settings)
- Browser and fresh login credentials(Ensure you can log in to the router admin interface)
Steps
Estimated time: 25-45 minutes
- 1
Confirm current modem mode state
Physically inspect the gateway and check the admin interface for indicators like bridge mode or a WAN configuration that suggests pass-through. Confirm you’re not inadvertently attempting to reconfigure a device that already acts as a true router.
Tip: Take a quick photo of the current WAN settings before making changes. - 2
Log in to the router admin page
Connect your computer via Ethernet to the router, then open the admin URL (typical addresses are 192.168.0.1 or 192.168.1.1). Enter the admin username and password. If you’ve never changed these, use the default from the manual or sticker.
Tip: If you can't reach the page, disable VPNs or firewall rules that may block the local address. - 3
Find modem/bridge or WAN mode settings
Navigate to the Network or Internet settings and locate options labeled Bridge Mode, Modem Mode, or WAN Type. The exact naming varies by brand (e.g., ASUS, Netgear, TP-Link).
Tip: If you can’t find it, search the help guide within the admin UI or consult the model-specific manual. - 4
Disable bridge/modem mode
Change the mode from Bridge/Modem to Router or equivalent, which enables NAT and firewall on your own router.
Tip: Save changes and prepare for a router reboot; some devices require you to click a separate Apply button. - 5
Configure WAN and enable NAT/DHCP
Set WAN to DHCP (or PPPoE if your ISP requires it) and ensure NAT is enabled. Enable the DHCP server on your router to assign IPs to devices.
Tip: Document any PPPoE credentials if required by the ISP. - 6
Reboot and test connectivity
Power cycle the router and connected devices. Verify internet access and ensure devices receive private IPs from your router.
Tip: Test with both wired and wireless devices to confirm stability. - 7
Secure and optimize settings
Update admin password, enable WPA3/WPA2, disable remote admin if not needed, and verify firewall features are active.
Tip: Create a backup of the new configuration for easy recovery. - 8
Verify all services and features
Check guest network, parental controls, and port forwarding rules. Confirm DHCP lease times and DNS configuration work as intended.
Tip: Run speed tests on wired and wireless networks to gauge performance.
People Also Ask
What is modem mode and how does it affect my network?
Modem mode turns off the router features of your gateway and lets your own router handle routing tasks. This can avoid double NAT but requires proper configuration to maintain network security and performance.
Modem mode disables your gateway’s router features, so you use your own router for routing. Exiting modem mode gives you full control over NAT and Wi‑Fi.
Can I exit modem mode without resetting ISP settings?
In most cases you can exit modem mode without a full reset. You may need to reconfigure WAN type and NAT on your own router, but you should not lose essential ISP settings unless you perform a factory reset.
Usually yes—you can exit modem mode without a full reset. You’ll reconfigure the WAN/NAT on your router instead.
What if I can’t access the router admin page after switching?
Ensure the PC is connected via Ethernet, use the correct IP, and disable any VPNs or firewall rules that could block local access. If necessary, power cycle the devices and try a different browser. Re‑check the WAN settings if you’re unsure.
If you can’t reach the admin page, check the IP, cables, and any VPNs; a reboot often fixes it.
Will exiting modem mode change my public IP address?
Exiting modem mode and using your own router can change the public IP the ISP assigns, depending on how the gateway and ISP handle routing. Changing internal NAT settings won’t automatically alter the public IP, but some ISPs may reallocate it during reconfiguration.
Your public IP might change after switching, depending on your ISP’s configuration.
How long does it take to exit modem mode?
Most households complete the process in about 15 to 45 minutes, depending on the device and ISP. Allow extra time for rebooting and rechecking settings.
Plan on roughly half an hour, more if you’re dealing with a complex setup.
Do I need to reboot devices after switching?
Yes. Reboot the router and connected devices to ensure they receive updated DHCP leases and reconnect to the new network settings. This helps prevent lingering IP conflicts.
Yes—reboot devices to ensure the new settings take effect.
Watch Video
What to Remember
- Identify modem mode clearly before making changes.
- Disable bridge/modem mode and enable router mode with NAT and DHCP.
- Test connectivity on multiple devices and secure the network.
- Back up settings and document changes for future reference.