WiFi Router Setting Guide: Step-by-Step Configuration
Learn how to securely configure your wifi router, optimize performance, and troubleshoot common issues with a practical, homeowners-first approach from WiFi Router Help.

According to WiFi Router Help, you can dramatically improve home network reliability by starting with a secure admin login, updating firmware, and planning distinct 2.4GHz and 5GHz networks. This quick answer previews the steps below and highlights essential actions to take before you begin tweaking settings. Log in through your router’s gateway IP, verify your current device list, and prepare to save a backup of the configuration.
Why WiFi Router Setting Matters
The wi fi router setting you choose shapes every aspect of your home network. Proper configuration can improve coverage, reduce interference, strengthen security, and simplify device management. When you adjust settings with intention, you’re less likely to experience dead zones or slow connections during streaming and gaming. From a homeowner's perspective, it's not just about speed; it's about predictable performance and safe access for every family member and smart device.
According to WiFi Router Help, a deliberate approach to setup starts with securing access and updating firmware. Small changes, like separating guest access from your main network or selecting appropriate wireless channels, can yield outsized gains in reliability. This article walks you through practical steps that balance usability with solid security, so you can enjoy a stable home network without complex tweaks.
Key Basics: What the Settings Do
Before you touch dial knobs, understand the core elements of the wi fi router setting you’ll encounter. SSID is the network name you and guests see; the password protects it. Encryption standards such as WPA2 and WPA3 determine how data is encoded on the air. The two main bands, 2.4GHz and 5GHz, differ in range and speed, and many routers offer a combined network with distinct names.
Guest networks separate visitors from your personal devices and help protect your primary network from accidental exposure. DHCP assigns local IP addresses to devices automatically, while DNS maps names to addresses. Band steering tries to move devices to the faster band when possible. Understanding these basics helps you plan a setup that is both secure and easy to manage, even for non technical users.
Access Your Router’s Admin Page
Access is usually via a web browser or the manufacturer’s app. Find your router’s gateway address (often 192.168.1.1 or 192.168.0.1) on the device label or in your device settings. Open the address bar and enter it, then log in with the admin username and password. If you never changed them, consult the manual or the label for the default credentials, and plan to override them immediately. For initial setups, connect your computer or phone to the router with an Ethernet cable for reliability, then switch to wireless once configuration is complete. Save a favorite login URL in your browser to avoid future lookup drudgery.
Security First: Passwords, Firmware, and Guest Access
Security should be the foundation of every wi fi router setting. Change the default admin password to a long, unique passphrase. Enable WPA3 if available; if not, WPA2 with AES is acceptable. Turn off WPS, which can be exploited to gain access quickly. Update firmware whenever a new version is released to close vulnerabilities and improve stability. Create a guest network with a separate password and, if possible, limit guest access to internet only. Differentiate your devices by applying strong per device credentials and consider disabling remote management from outside your home network unless you need it. These steps dramatically reduce risk while preserving convenience for trusted users.
Optimize Wireless Settings: 2.4GHz vs 5GHz, Channel Selection
Most homes benefit from running both bands. The 2.4GHz band travels farther and penetrates walls better, but suffers more interference from baby monitors, microwaves, and neighbor networks. The 5GHz band offers higher theoretical speeds and less interference but shorter range. If your devices support it, use separate SSIDs for each band so you can direct bandwidth to traffic that needs it and preserve compatibility with older devices.
Set channels to reduce overlap. Auto mode is convenient, but manual selection can improve throughput in crowded environments. For 2.4GHz, channels 1, 6, and 11 are commonly non overlapping; for 5GHz, there are more options with less overlap. Consider adjusting channel width to 40MHz or 80MHz for better speeds on compatible devices, and revert to 20MHz if you see instability. After changes, recheck signal strength across your home using a phone app or computer, and adjust as needed.
Advanced Tweaks: QoS, DHCP, IP Addressing, and DNS
Quality of Service QoS prioritizes critical tasks such as video calls, gaming, or large file transfers. If your router supports it, enable QoS and set priority for real time applications or specific devices. DHCP is usually fine on by default, but you can customize the address pool and reserve specific IPs for important devices so you always know where to find them. Reserving DHCP assignments ensures printers, consoles, and home automation hubs stay reachable without manual reconfiguration. DNS settings can improve speed or parental controls; many routers default to the ISP’s DNS, but you can swap to another trusted provider. If you use cloud services or a VPN, consider whether those options should bypass or pass through the QoS rules. Remember to document changes so you can revert if issues arise.
Troubleshooting Common Issues
Slow performance or buffering often comes from channel interference, weak signal, or misconfigured QoS. Start by rebooting the router and your modem, then verify all cables are secure. Use your admin pages to check connected devices list and remove or quarantine rogue devices. If you cannot access the admin page, verify the gateway IP and network connection; a factory reset may be necessary as a last resort, but back up settings first. If devices fail to obtain an IP address, check DHCP status and address pool range. When sessions drop, test with a wired connection to isolate whether the problem is wireless or service provider related.
Real-World Setup Scenarios: Small Apartment vs Large Home
Small apartments benefit from a compact setup with a single strong router, properly placed near the center of the living space. In larger homes, you might need a mesh network or multiple access points to maintain coverage. Place routers at elevated heights away from obstructions and electronic interference. For homes with thick walls, consider adjusting antennas and enabling beamforming when available. Document your network map to help guests connect and to simplify future troubleshooting. If you rely on smart devices, ensure they can reach a local network segment and avoid overloading the main router with too many rules.
Maintenance Plan: Regular Checks and Backups
Treat your router like other critical network gear: perform a quarterly review of settings, firmware updates, passwords, and guest network status. Keep a written or digital backup of your current configuration and a recovery plan in case you need to restore after a reset. Periodically audit devices on the network and remove ones you no longer recognize. Finally, monitor network health and update your plan as your home grows or changes—new devices, new ISP, or different internet speeds.
Tools & Materials
- Computer or smartphone with a web browser(To access the router admin page and apply changes)
- Ethernet cable(Stable wired connection for initial setup)
- Router admin credentials(Username and password; change from defaults immediately)
- Pen and paper or password manager(For storing new credentials and network details)
Steps
Estimated time: 30-60 minutes
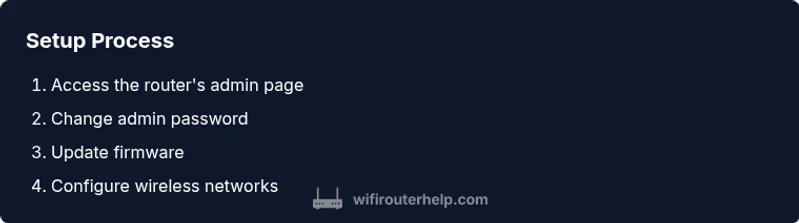
- 1
Gather prerequisites and map your network
Collect admin credentials, locate the gateway IP, and decide on a plan for SSIDs and passwords. This helps prevent mid‑config chaos and ensures you have all necessary details before making changes.
Tip: Have a pen and paper or a notes app ready to record current settings and new values. - 2
Connect to the router securely
Join the router via Ethernet if possible, or connect your device to the current Wi‑Fi. A wired connection reduces the risk of losing access during configuration.
Tip: Use a stable browser and close other high bandwidth apps during setup. - 3
Log in to the admin page
Open the gateway IP in a browser and enter the admin credentials. If you don’t know them, check the manual or the label on the router.
Tip: If you’re using a different device after a reset, clear old cache to avoid login issues. - 4
Change the admin password
Create a strong, unique password and store it securely. This prevents unauthorized changes to your network configuration.
Tip: Avoid common phrases; use a passphrase with mixed characters. - 5
Update firmware
Check for and install the latest firmware. Updates fix security flaws and improve stability and performance.
Tip: Only update from the official vendor page or the router UI to avoid counterfeit software. - 6
Configure the primary and guest networks
Set distinct SSIDs and strong passwords for main and guest networks. This isolates guests from your devices and data.
Tip: Label networks clearly, e.g., MyHome_2G, MyHome_5G, and GuestNet. - 7
Set bands and wireless channels
Decide on 2.4GHz and 5GHz usage, and select channels to minimize interference. Enable channel width per device compatibility.
Tip: Test a few channels and verify performance with real devices after each change. - 8
Enable security features and optional QoS
Turn on WPA3 if available, or WPA2 with AES. Consider QoS rules for critical apps like video calls and gaming.
Tip: Keep QoS simple at first; avoid overloading it with too many rules. - 9
Save, reboot, and verify connectivity
Apply changes, reboot the router if needed, and confirm all devices can connect. Check speed and reliability across rooms.
Tip: Document the final settings for future reference.
People Also Ask
What is the first thing I should do when setting up a new Wi‑Fi router?
Start by changing the admin password and updating firmware. This sets a secure foundation before adjusting other settings.
Begin with a secure admin password and the latest firmware to protect your network before making other changes.
Should I use 2.4GHz or 5GHz for my devices?
Use 2.4GHz for longer range and compatibility with older devices; use 5GHz for higher speeds on supported devices. Consider separate SSIDs.
2.4 gigahertz covers more area, 5 gigahertz is faster but shorter range. Separate networks helps optimize performance.
How often should I update router firmware?
Check for updates monthly or when notified by the manufacturer. Updates can fix security flaws and improve stability.
Check for updates regularly and install them when available to keep security strong.
How can I strengthen network security beyond a password?
Enable WPA3 if available, disable WPS, place a robust guest network, and consider remote management restrictions.
Use WPA3, disable WPS, and keep guest access separate from your main network.
What should I do if I can't access the admin page?
Verify the gateway IP, check the connection, and try a wired setup. If needed, perform a factory reset and restore from backup.
Check your connection and gateway address; a reset may be needed if access is lost.
Do I need internet to change local router settings?
No. Local router settings can be changed without an active internet connection, though firmware updates require connectivity.
No internet is needed for most local settings; you do need it for firmware updates.
Watch Video
What to Remember
- Secure the admin account before changing other settings.
- Separate guest and main networks for safety and clarity.
- Regularly update firmware to protect against threats.
- Document changes and back up configurations.
- Test connectivity across your home to verify improvements.