How to configure router wifi: A complete step-by-step guide
Learn to configure your WiFi router securely and reliably, covering admin access, SSID setup, encryption, DHCP, and ongoing maintenance. This educational guide from WiFi Router Help walks you through each step with practical tips, screenshots, and best practices for a robust home network.

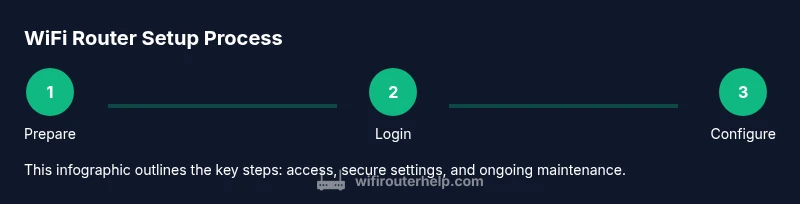
Through this guide, you will learn how to configure your WiFi router for a secure, reliable home network. The key steps include securing admin access, setting up a unique SSID and strong passphrase, choosing WPA3 or WPA2-PSK, configuring DHCP and NAT, updating firmware, and validating your connection on all devices. Start by connecting a computer to the router with a wired link. According to WiFi Router Help, following a structured setup minimizes common pitfalls and yields lasting performance.
Why configuring your router wifi matters
According to WiFi Router Help, properly configuring your home router is the foundation of a fast, secure network. A well-tuned setup reduces interference, avoids signal gaps, and protects your devices from common threats. This section explains the practical reasons people configure their routers: better stability, improved range management, clearer guest access controls, and easier future maintenance. When you understand the core pieces—admin access, wireless settings, and network services—you can tailor your setup to your home layout and device mix. The goal is not just a fast connection, but a reliable one that behaves consistently across all rooms and floors of your home. Think of this as a blueprint you can adjust as your family adds devices or your internet plan evolves.
Understand the basics: SSID, password, and bands
Before you touch any settings, know the core concepts: SSID is the network name you see when connecting; the password protects access; dual-band routers broadcast on 2.4 GHz and 5 GHz, which behave differently. The 2.4 GHz band travels farther but is slower and more congested, while 5 GHz offers higher speeds with shorter reach. When configuring, decide if you want separate networks for different devices (e.g., one for smart home devices and another for guests) or a single unified network. Use a descriptive SSID that doesn’t reveal your address or personal details, and keep the password long and unique. If your router supports guest networks, enable them with separate credentials to keep guest devices segregated from your primary network.
Security first: choosing encryption and strong credentials
Security should drive every router setup. Always enable the most current encryption standard supported by your device—WPA3-Personal is ideal if all your devices support it; otherwise WPA2-PSK with AES is a solid fallback. Create a passphrase that is at least 12-16 characters long and uses a mix of uppercase, lowercase, numbers, and symbols. Avoid common phrases and personal information. Disable WPS (Wi‑Fi Protected Setup) unless you have a specific need for it, as it can introduce security gaps. Regularly review connected devices and remove anything unfamiliar. These steps reduce unauthorized access and keep your network safer for every user.
Planning your network before login
Sketch a quick plan of your home layout and internet usage. Identify the main streaming devices, work-from-home computers, and smart home hubs that will connect to the router. Decide where the router should sit to maximize coverage: central, elevated, and away from thick walls or metal objects. Consider whether you want a guest network or parental controls, and note any special devices that require static IPs. A written plan helps prevent rushed decisions during setup and minimizes the need for backtracking when you test performance later.
Accessing the router admin page securely
Secure access begins with a wired connection for the initial setup, using the router’s default IP address (commonly 192.168.1.1 or 192.168.0.1). Open a modern browser and enter the address to reach the login page. If you don’t know the default credentials, consult the manual or the manufacturer’s site. Change the admin username and password immediately after logging in, and store these credentials securely. If you have trouble logging in or the page doesn’t load, reset the router to factory settings and repeat the process from the start. Always ensure you are on a trusted network when making changes.
Setting up the wireless network: SSID, password, and channels
Now configure the wireless settings: pick your SSID, set a strong passphrase, and choose the appropriate security mode (WPA3 or WPA2-PSK). For most homes, enabling both 2.4 GHz and 5 GHz bands is ideal; you can name them with distinct SSIDs to avoid confusion. Leave auto-channel selection enabled for simplicity, or manually select a channel if you notice interference from neighbors (typically channel 1, 6, or 11 on 2.4 GHz). Consider enabling 20/40 MHz channel width only if you experience issues with older devices. Save changes and test from multiple devices to ensure reliable coverage and fast connections.
DHCP, NAT, and LAN settings explained
Dynamic Host Configuration Protocol (DHCP) assigns IP addresses to devices automatically, while NAT translates private addresses to the public internet address. Ensure DHCP is enabled on the router and set an appropriate IP range that won’t conflict with any static IPs you may assign to printers or servers. A standard LAN subnet such as 192.168.1.0/24 works well for most homes. If you’re linking multiple routers, use a separate subnet or enable bridge mode on the secondary router to avoid double NAT issues. Document your settings so future maintenance is straightforward.
Firmware updates and ongoing maintenance
Firmware is the software that runs your router. Regularly check for and install firmware updates, which fix security flaws, improve stability, and add features. Set your router to automatically check for updates if available, and perform a manual check after a major update. Backup your current configuration before applying firmware updates to avoid losing customized settings. If the update fails, reset the router and reconfigure using your saved plan. Ongoing maintenance is essential for long-term performance.
Troubleshooting common post-configuration issues
If devices fail to connect after changes, verify the SSIDs and passwords on each device, ensure you’re connected to the intended network, and check the firmware version. Reboot the router and test again. If certain devices cannot authenticate, forget the network and reconnect with the correct password. For guest networks, ensure isolation is enabled so guest traffic doesn’t access your main devices. If you encounter persistent drops, review the wireless channel, reduce interference sources, or enable band steering if available.
Best practices for guests and parental controls
If you offer guest access, enable a separate network with limited permissions and a time-bound password. This keeps your primary network safer and reduces the chance of guest devices affecting your main devices. For families, enable parental controls to filter content, set time limits, and schedule access for younger devices. Regularly audit connected devices and adjust permissions as needed to balance convenience and security. Clear documentation helps you maintain consistent policies across devices and households.
Authority sources
- https://www.wi-fi.org
- https://www.fcc.gov/media/experience/keep-your-wi-fi-network-secure
- https://www.cisa.gov/publication/home-network-security
Tools & Materials
- Computer, smartphone, or tablet(With a modern web browser (Chrome/Edge/Safari))
- Ethernet cable(Use for a wired connection during first-time setup)
- Router manual or model documentation(Helps identify default IP and credentials)
- Stable power outlet(Keep the router powered during setup and updates)
- Notepad or digital document(Document settings and passwords securely)
Steps
Estimated time: 30-60 minutes
- 1
Prepare your setup and plan
Gather your devices, locate your router, and write down your planned SSIDs and passwords. This reduces last-minute decisions and helps you stay organized during the setup. Have the router in a central, elevated location for best coverage.
Tip: Write your intended SSID and a strong password before you begin. - 2
Connect to the router via Ethernet
Use an Ethernet cable to connect your computer directly to the router. This ensures a stable connection during login and initial configuration, avoiding wireless interruptions.
Tip: Prefer a direct wired link for the first-time login. - 3
Open the admin page with a trusted IP
In a web browser, enter the router’s default IP address (commonly 192.168.1.1 or 192.168.0.1) to reach the login page. If prompted, disable remote admin access for security.
Tip: If you don’t know the default IP, check the manual or the label on the router. - 4
Change the admin password
Log in and immediately change the default admin username and password. Use a long, unique passphrase. Save changes and store credentials securely.
Tip: Never reuse default credentials across devices. - 5
Set the SSID and wireless security
Configure the network name (SSID) and a strong password. Enable WPA3 or WPA2-PSK with AES. Consider separate SSIDs for 2.4 GHz and 5 GHz if needed.
Tip: Keep the same password across devices to avoid frequent prompts. - 6
Configure channel and band settings
Leave auto-channel selection, or manually choose interference-free channels (1/6/11 on 2.4 GHz). Decide if you want 2.4 GHz, 5 GHz, or both, and enable channel width appropriately.
Tip: If devices drop connections, try a fixed channel. - 7
Set DHCP, NAT, and LAN options
Enable DHCP with a reasonable IP range (e.g., 192.168.1.2–192.168.1.254). Ensure NAT is active to share a single public IP. Document any static LAN IPs you reserve.
Tip: Avoid port-forwarding unless you need a service exposed externally. - 8
Apply changes, test, and update firmware
Save all settings, reboot if required, and test connectivity on multiple devices. Check for firmware updates and apply them if available, backing up your config first.
Tip: Always back up your current configuration before a firmware update.
People Also Ask
Do I need to use Ethernet for the initial setup?
Using a wired connection for the first-time setup reduces the risk of wireless drops while configuring. You can typically proceed over Wi‑Fi if the router’s default SSID is accessible, but a wired connection is preferred for reliability.
A wired connection is best for the initial setup to avoid drops.
Should I enable WPS?
WPS is convenient but has known security weaknesses. It’s generally safer to disable WPS and configure manually using a strong password.
Disable WPS and configure securely with a strong password.
How often should I update firmware?
Check for updates at least every few months or when the manufacturer releases a security fix. Enable automatic checks if available, but verify updates manually after major changes to avoid compatibility problems.
Check for updates regularly and apply them when available.
What’s the difference between 2.4 GHz and 5 GHz?
2.4 GHz travels farther and penetrates walls better but is slower and more prone to interference. 5 GHz offers higher speeds with shorter range. Using both bands can optimize performance in larger homes.
2.4 GHz is slower but longer-range; 5 GHz is faster but shorter-range.
Why can’t I access the admin page after a reset?
If the reset didn’t complete, the router may still be in a locked state. Try a longer reset (holding the reset button for 10–15 seconds), then reconnect using the default credentials from the manual.
Try a longer factory reset and check the manual for the default login details.
Watch Video
What to Remember
- Change default admin credentials and keep them secure
- Enable WPA3 or WPA2-PSK with AES and strong passphrases
- Configure DHCP with careful IP range and document static IPs
- Regularly update firmware and re-test connectivity
- Create a guest network if you frequently host visitors