How to Manage Router WiFi: A Practical Guide
Learn to manage your router wifi with a practical, always-updated approach: secure login, firmware updates, strong WiFi settings, QoS, guest networks, and parental controls. Follow the step-by-step plan and keep your home network safe and fast.

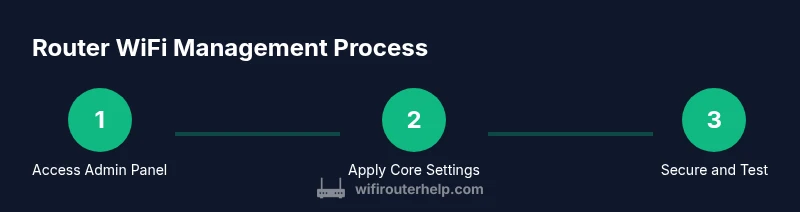
By following this guide, you will learn to manage router wifi responsibly: access the admin panel, update firmware, secure credentials, configure SSID/password, enable a guest network, and apply QoS for priority traffic. Before you begin, have your router model, the correct login URL, and a stable connection. Then follow the step-by-step sections below for a robust setup.
Getting started with managing your router wifi
Before you dive into settings, assemble a simple plan and gather essential information. Confirm the router model, the current admin login URL, and your network credentials. Having physical access to the device and a stable connection makes the process faster and safer.
According to WiFi Router Help, a methodical approach reduces misconfigurations and security gaps. Start by identifying your device's default IP address (commonly 192.168.1.1 or 192.168.0.1), the default login, and any previous customizations. If you’ve never changed the credentials, locate the user manual or manufacturer support page to learn the exact path to your admin panel. If you cannot locate credentials, prepare to reset the router only after you’ve tried standard recovery options.
Next, decide your goals: a stronger password, a guest network for visitors, and QoS rules for gaming or video calls. Map these goals to the main sections of the admin interface so you don’t get overwhelmed. Finally, plan a brief maintenance cadence—check for updates every few months and back up configurations after major changes.
wordCount":
Tools & Materials
- Computer or smartphone with a browser(Used to access the router admin interface)
- Ethernet cable(Optional for a stable wired connection during setup)
- Router model and admin login information(Have the exact model and default IP or URL)
- Current WiFi details (SSID and password)(Needed to configure or reset network credentials)
- Manuals or manufacturer support page(Helpful if credentials are lost or IP is unknown)
- Notes for backup (USB drive or cloud storage)(Store a backup of configurations after major changes)
Steps
Estimated time: 60-90 minutes
- 1
Identify login details and prepare equipment
Locate your router model and the default admin URL. Gather the current network credentials and ensure a stable connection. If you’ve never changed the credentials, consult the manual or manufacturer site to confirm the exact login path. Prepare to reset only if all recovery options fail.
Tip: If you’re unsure of credentials, avoid factory resets—look for a recovery option in the admin interface first. - 2
Access the router admin page securely
Connect a device to the router via Ethernet or Wi‑Fi. Open a browser and enter the router’s IP address or domain. Log in with the current admin credentials, then immediately set a strong, unique password if you haven’t already.
Tip: Verify you’re on the official login page by checking the URL and certificate (if HTTPS is available). - 3
Check for firmware updates
Navigate to the firmware section and check for new versions. If available, follow the prompts to install. If you can, download the update file from the manufacturer and perform a manual update for reliability.
Tip: Back up current settings before updating in case you need to revert. - 4
Back up current configuration
Export or save the router settings to a secure location. This makes it easy to restore your setup if an update or change causes issues.
Tip: Store backups offline when possible to protect against network outages. - 5
Configure wireless settings securely
Set a unique SSID for your network and a strong passphrase. Enable WPA3 if available, otherwise WPA2. If you have dual bands, publish separate SSIDs for 2.4 GHz and 5 GHz.
Tip: Avoid using your name or address in SSIDs to protect privacy. - 6
Set up DHCP/NAT and QoS
Ensure DHCP is enabled to assign IPs to devices, and configure QoS to prioritize critical traffic like video calls or gaming. Review port forwarding only if needed by specific devices. Keep a log of connected devices.
Tip: Reserve static IPs for important devices to prevent IP conflicts. - 7
Create guest networks and access policies
Enable a guest network with its own password to isolate guest devices from your main network. Apply parental controls or access schedules if needed. Review and adjust rules periodically.
Tip: Limit guest network bandwidth or time to preserve main network performance. - 8
Test, document, and finalize
Test all devices on both bands, confirm internet access, and check printer or server connectivity if applicable. Document changes for future maintenance and keep a fresh backup.
Tip: Schedule regular reviews every few months to keep settings optimal.
People Also Ask
How do I access my router's admin page?
Most routers use a web interface. Connect to the router and enter its IP address (commonly 192.168.1.1 or 192.168.0.1) in a browser, then sign in with admin credentials. If you can’t log in, check the sticker on the router or manufacturer support.
You access the admin page by visiting the router's IP in a browser and signing in with the admin credentials.
How often should I update router firmware?
Check for firmware updates regularly and apply them when available. Updates fix bugs, close security gaps, and may improve performance. Always back up settings before updating.
Check for updates when you can, and back up your settings before installing.
What’s the difference between 2.4 GHz and 5 GHz bands?
2.4 GHz offers longer range but slower speeds and is more prone to interference. 5 GHz provides faster speeds but shorter range and less wall penetration. If you have both, consider separate SSIDs to optimize usage.
2.4 GHz travels farther with lower speeds; 5 GHz is faster but shorter range.
Why can’t I connect after changing settings?
Common causes are incorrect WiFi password, unintended profile changes, or reboot timing. Re-enter the correct password, confirm the right SSID, and reboot the router if needed.
Double-check the SSID and password, then reboot the router if connections don’t return.
Should I enable WPS?
WPS can be convenient but introduces security risks. If possible, disable WPS and use manual setup with WPA3/WPA2. This reduces the chance of unauthorized access.
WPS is convenient but less secure; disable it if you can and set up with a strong password instead.
How do I set up a guest network?
In the router's admin panel, enable the guest network option, set its own password, and restrict access to your main network. This keeps guest devices isolated from your primary devices.
Turn on a guest network with its own password and access limits.
Watch Video
What to Remember
- Plan changes before touching router settings
- Back up configurations before firmware updates
- Use strong, unique WiFi passwords and current security standards
- Test connectivity after changes and document results