WiFi Router Settings: Step-by-Step Guide to Optimize Your Home Network
Master your wifi router settings with a practical, step-by-step approach. Learn safe access, essential tweaks, security upgrades, and fault‑proof backups for stable, fast home Wi-Fi.

Goal: You will access your router's admin page and safely adjust essential WiFi router settings to improve security and performance. Core requirements: a computer or phone with a web browser, the router’s admin credentials, and a stable local connection. You’ll learn the quickest first steps, then how to modify SSID, password, security level, and guest network while preserving network stability.
Why Getting Your WiFi Router Settings Right Matters
In a modern home, the performance and security of your internet begins at the router. The way you configure wifi router settings determines how fast devices can connect, how consistently signals reach every room, and how well your network defends against intruders. The choices you make here impact everything from streaming video to smart‑home automation. According to WiFi Router Help, getting your wifi router settings right provides tangible benefits: stronger coverage, fewer dropouts, and better privacy. You’ll learn how to set up a solid baseline, then tailor adjustments for your household needs. A careful approach—start with the basics, then move to advanced options—lets you improve reliability without introducing new problems. In this guide, we’ll walk through safe practices, practical tweaks, and tested routines you can reproduce on most home routers. By sticking to sensible defaults and documented steps, you’ll experience meaningful improvements with minimal risk.
Accessing the Admin Console Safely
Access to router settings should be performed from a trusted device on your home network. Begin by identifying the router’s IP address (commonly 192.168.1.1 or 192.168.0.1) using your device’s network settings. Enter that IP into a modern browser to reach the login page. Use a strong, unique admin password and enable HTTPS if available. For security, avoid exposing the admin interface to the internet or using easy-to-guess credentials. If you manage a mesh system, log in to the main node first and apply changes consistently across satellites. Finally, consider disabling remote admin access to prevent exposure to the wider internet.
Basic Settings to Tweak
Your first tweaks should balance usability with security. Change the network name (SSID) to something unique but non-identifying, and set a strong password using at least 12 characters that include letters, numbers, and symbols. Prefer WPA3‑Personal (or WPA2‑AES if WPA3 isn’t available) for encryption. Decide whether to run the 2.4 GHz and 5 GHz bands together or separately, and choose a reasonable channel (auto usually works, but in congested areas, manual selection can reduce interference). If your router supports beamforming or MU‑MIMO, enable them to improve performance for multiple devices. Keep in mind that some smart home devices may have limitations with certain security modes, so test compatibility after changes.
Advanced Configurations to Explore
Once basics are solid, explore advanced settings that directly influence performance. Implement Quality of Service (QoS) rules to prioritize latency‑sensitive traffic like gaming or video calls. Consider static IP reservations for critical devices to ensure reliable connections. Use port forwarding or a DMZ only if you’re hosting services; otherwise, leave these off. DNS configuration (such as using a reputable public DNS) can affect lookup times. If your router supports UPnP, decide whether to enable it—while convenient, it can introduce risks if left open. For guests, keep a separate guest network with isolated access to devices on your main network.
Securing Your Network Against Threats
Security should be a foundational pillar of wifi router settings. Always enable a firewall and disable WPS, which is known to be weak‑point vulnerable to attacks. If possible, enable automatic firmware updates so you receive security patches promptly. Use a strong admin password and consider changing it periodically. Create a dedicated guest network to protect primary devices from visitors’ devices. Turn off UPnP if you don’t need it, unless you’re running devices that explicitly require it. Finally, review connected devices regularly and remove any unfamiliar entries.
Optimizing for Different Use Cases
Households today have diverse needs: 4K streaming, online gaming, remote work, and a growing IoT footprint. Tailor router settings to your peak activities. For gaming, prioritize QoS rules for game consoles or PCs and select the best channel to minimize interference. For streaming‑heavy homes, ensure sufficient bandwidth by adjusting bandwidth limits and enabling multicast if supported. For smart homes, keep low‑priority IoT devices on a separate subnet or VLAN if your router supports it. Remember to test after changes by running speed tests in different rooms and with multiple devices to validate improvements.
Troubleshooting Common Router Settings Issues
If changes don’t take effect, verify you saved the configuration and rebooted the device. If you can’t log in, double‑check the IP address and credentials; use the reset procedure only as a last resort. When devices lose connectivity after a change, rejoin them with the new password or SSID. If a setting seems to cause instability, revert to a known good backup and reapply changes incrementally. Maintaining a simple backup strategy is essential for quick recovery during troubleshooting.
Backups and Recovery: Keeping Your Settings Safe
Prevent configuration loss by exporting or backing up your current router settings before making changes. Store the backup securely in a password‑protected note or a dedicated password manager. Document any changes you make with dates and notes so you can reproduce them later. Regularly test credential recovery procedures and ensure you know how to reset safely if something goes wrong. An organized recovery plan minimizes downtime and reduces frustration during future tweaks.
When to Consider a Hardware Upgrade
If your current router struggles to support your home network’s size or if you’ve upgraded to faster internet, a hardware upgrade can deliver meaningful benefits. Look for Wi‑Fi 6/6E, improved MU‑MIMO, broader coverage, and better QoS controls. A newer model often provides more memory for routing tables, more robust security features, and more flexible guest networking options. Assess your needs against the cost of upgrading and consider whether a mesh system would deliver the level of coverage you require for larger homes.
Quick Audit Checklist for Ongoing Performance
Establish a routine to audit router settings every few months. Check for firmware updates, review security basics (password strength, encryption type), verify guest networking isolation, and confirm QoS rules still align with your household usage. Re‑test speed and coverage in several rooms, adjusting channels or power settings as needed. Keeping a short log of changes helps you trace what worked and what didn’t, saving time on future maintenance.
Authoritative Sources and Further Reading
For deeper guidance on router security and best practices, refer to reputable sources such as the FCC, CISA, and NIST. These references provide context on securing home networks and staying current with evolving standards. They complement practical, hands‑on tips from WiFi Router Help and offer authoritative perspectives on protecting your home devices.
Tools & Materials
- Computer or smartphone with a web browser(Connected to your home network via Wi‑Fi or Ethernet)
- Router admin credentials(Username and password found on the device label or in the manual)
- Ethernet cable (optional)(Useful if the Wi‑Fi is unstable or you’re locked out of the wireless network)
- Firmware update access(Use official manufacturer sources or the router app to update)
- Password manager(Store strong admin and Wi‑Fi passwords securely)
Steps
Estimated time: 30-45 minutes
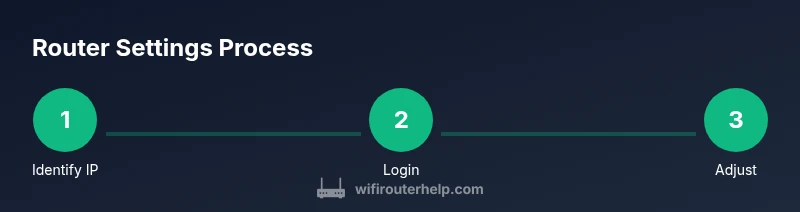
- 1
Identify Router IP and Admin Page
Locate your router’s IP address (usually 192.168.1.1 or 192.168.0.1) on the device label or in the manual, then enter it into a web browser to reach the login page. This is your gateway to adjustments in the admin console.
Tip: If the common defaults don’t work, check the network settings on a connected device or consult the manufacturer support page. - 2
Log In with Admin Credentials
Enter the admin username and password. If you’ve never changed them, try the defaults shown on the router label or in the manual. After logging in, consider enabling two‑factor options if available.
Tip: If credentials are unknown, use the reset procedure only after confirming no other access exists. - 3
Change Wi‑Fi SSID and Password
Navigate to Wireless settings to rename your network and set a strong password. Choose WPA3‑Personal if available, otherwise WPA2‑AES. Save changes before leaving the page.
Tip: Avoid using obvious names; choose a unique, non‑identifying SSID. - 4
Adjust Security and Encryption
Set security to WPA3, or WPA2‑AES if needed. Disable WPS and activate the firewall. If firmware updates are available, apply them to close known gaps.
Tip: WPA3 is preferred; some older devices may need WPA2 temporarily. - 5
Configure Guest Network
Enable a separate guest network with its own SSID and stronger isolation from your main network. This keeps visitors’ devices from accessing your printers, cameras, or file shares.
Tip: Limit guest bandwidth if you have many devices connected. - 6
Apply and Reboot
Click Save or Apply. Reboot the router if prompted or after a few minutes of applying changes. Ensure devices reconnect with the updated credentials.
Tip: If a device loses connectivity, reconnect it with the new SSID/password. - 7
Test Connectivity and Coverage
Run a quick speed test from multiple rooms and devices. If coverage is poor, try switching channels or enabling beamforming features where available.
Tip: Manual channel selection can reduce interference in crowded neighborhoods.
People Also Ask
How do I access my router settings?
Open a browser, enter the router's IP address (commonly 192.168.1.1 or 192.168.0.1), and log in with the admin credentials to view and modify settings.
Open your browser, enter the router's IP address, and sign in to adjust settings.
What should I know about default login credentials?
Default usernames and passwords are typically printed on the router label or in the manual. If you haven't changed them, update to a unique credential.
Default credentials should be changed to something unique.
How do I reset the router to factory settings?
Most routers have a small reset button. Hold it for 10–15 seconds until the lights flash, then reconfigure from scratch using the default login or a backup.
Use the reset button, then reconfigure from a fresh login.
Can I change the Wi‑Fi password without losing internet?
Yes. Changing the Wi‑Fi password will require devices to reconnect with the new password, but it does not interrupt internet service for already connected devices.
You’ll reconnect devices with the new password.
How do I set up a guest network?
In the Wireless or Guest Network section, enable a separate SSID and turn on isolation so guests cannot access your main devices.
Set up a separate guest network to protect your main devices.
Is WPA3 required for home networks?
WPA3 is recommended, but some older devices may not support it. If needed, use WPA2‑AES as a strong interim option.
WPA3 is ideal but WPA2‑AES is acceptable if required by devices.
What should I do if I forget my admin password?
Use the router’s reset procedure to regain access, then immediately set a new, strong admin password and back up the new configuration.
Reset the router to regain access and set a new password.
What to Remember
- Back up your current configuration before changes.
- Use strong passwords and WPA3 where possible.
- Isolate guests on a separate network.
- Keep firmware up to date for security and stability.
- Test coverage after changes and adjust channels if needed.