Netgear Nighthawk Router Login: Step-by-Step Access and Security
Learn how to access the Netgear Nighthawk router login, troubleshoot common issues, and secure your home network with a clear, step-by-step guide from WiFi Router Help.

To access and secure your Netgear Nighthawk router login, connect your device to the router’s network or via Ethernet, open a browser, and enter the gateway URL (commonly 192.168.1.1 or routerlogin.net). Sign in with the admin credentials, then change the default password and review security settings. Regular firmware updates protect against exploits, and WiFi Router Help recommends enabling strong passwords and keeping settings current.
Understanding the Netgear Nighthawk login interface
The Netgear Nighthawk login page is the gateway to configuring your home network. On most models, you’ll see a simple sign-in form with fields for a username and password, plus tabs for basic settings like wireless, guest networks, and security. The default admin username is commonly admin, and the default password may be a model-specific code or the word password; however, Netgear emphasizes that leaving defaults in place creates a significant security risk. For homeowners and tech enthusiasts, the first login should be treated as a security checkpoint: change the admin password, review who has access, and verify that your wireless name (SSID) is clear and unique. According to WiFi Router Help, this first step should take less than a few minutes but has long-term impact on your network’s safety and stability. As you explore, you’ll notice sections for Internet, Wireless, and Advanced settings, each offering granular controls to tailor your network to your home.
This page is also where you’ll manage login sessions, enable/disable remote management, and set login alerts if your model supports them. Understanding the layout helps you avoid common missteps, such as attempting to log in through a non-existent URL or using a browser extension that blocks login cookies. By knowing what to expect, you’ll reduce friction in future maintenance tasks and keep your router protected from unauthorized access.
Locating the gateway URL or IP address
To reach the Netgear Nighthawk login screen, you must identify the correct gateway address. Most routers use a private IP like 192.168.1.1 or 192.168.0.1, but some models may use routerlogin.net as an access point. If you’re unsure, check the device label on the bottom or back of the router, or consult the manual. You can also find the gateway using your computer or mobile device: on Windows, run ipconfig in Command Prompt and look for the Default Gateway; on macOS, open System Preferences > Network > Advanced > TCP/IP and read the Router field; on iOS/Android, view the connected Wi‑Fi network details to locate the gateway. Once discovered, type the address into a browser’s address bar to open the login page. Ensuring you’re connected to the router—whether via Wi‑Fi or a wired Ethernet connection—helps stabilize the session and reduces login errors.
Preparing to sign in: credentials and first-time setup
Sign-in requires valid admin credentials. If you’ve just unboxed the Nighthawk, the defaults are often admin for the username and password could be a model-specific string or the word password; however, defaults are widely publicized and insecure. Your immediate goal is to sign in, then immediately proceed to strengthen security. If you already changed the password in a prior session, use the updated credentials. After you sign in, you’ll typically be prompted to run a quick setup wizard or verify basic settings like the Wi‑Fi name (SSID) and password. This stage sets the tone for ongoing protection and performance of your home network. According to best practices from WiFi Router Help, changing the default password is essential before making deeper changes.
Password hygiene and enabling essential protections
A strong admin password is the foundation of router security. Use a long, unique passphrase with a mix of letters, numbers, and symbols, and avoid obvious strings. If your Nighthawk model offers two-factor authentication for the admin panel, enable it. Disable remote management unless you strictly need it, because exposing the admin interface to the internet increases risk. In addition to admin security, configure your wireless security to WPA2‑AES or WPA3 if available, and create a strong Wi‑Fi password. You should also rename the guest network with a distinct SSID so guests don’t accidentally access admin resources through the primary network. Regularly reviewing connected devices and changing credentials periodically keeps your network resilient. WiFi Router Help notes that proactive password hygiene reduces the chance of brute-force breaches and unauthorized access.
Firmware updates and backup of router settings
Firmware updates fix known vulnerabilities, add features, and improve stability. Check for updates within the router’s admin interface, and enable automatic updates if your model supports it. Before applying updates, back up your current configuration so you can restore your preferred settings if something goes wrong. The backup feature saves your wireless credentials, port-forwarding rules, and parental controls, which saves time during resets. After updating, verify that your Wi‑Fi network remains accessible, test both the 2.4 GHz and 5 GHz bands, and check for any new features that can enhance security or performance. Regular maintenance, including backups and updates, minimizes the risk of login problems and outages.
Access controls: guest networks and device management
Guest networks provide a separate access path for visitors and IoT devices. If your Netgear Nighthawk supports guest networks, enable them with their own password and limit access to the main network’s devices if necessary. This reduces the likelihood that insecure guest devices could compromise your primary network. You can also set up device management rules, limit bandwidth for specific devices, and apply parental controls if needed. Remember to keep the guest network names distinct and do not reuse admin credentials for guest access. Proper segmentation is a practical way to maintain security while offering convenience for family and friends.
Troubleshooting login issues: common causes and quick fixes
If you can’t reach the login page, ensure you’re connected to the correct network and try clearing browser cookies and cache. Some browsers block mixed content or require refreshing the page after a failed attempt. If you’re certain you’re using the right gateway address but still can’t sign in, consider rebooting the router and trying again. Check for IP conflicts if you’ve used multiple routers or access points in the same space. A stale session can also prevent a login; simply close the tab and reopen the login URL. If credentials are forgotten, you may need to reset the router to factory defaults, which will erase custom settings—only as a last resort.
Factory reset, resets, and safe practices after login
A factory reset restores the router to its original state and clears all configuration changes. If you perform a reset, you’ll need to reconfigure the WAN settings, wireless name, and admin credentials from scratch. Use the recessed reset button with a paperclip for about 10 seconds to perform a reset, then immediately set a strong admin password and a new Wi‑Fi password. After a reset, reapply your preferred security settings, back up the configuration, and verify that all devices reconnect correctly. Avoid multiple resets in quick succession, and keep a documented record of your new credentials for future maintenance.
By following these steps, you’ll maintain a secure, stable Netgear Nighthawk router login experience. The WiFi Router Help team emphasizes a disciplined approach to login discipline, firmware upkeep, and network segmentation to minimize risk and maximize performance.
Ongoing best practices for Netgear Nighthawk login safety
To stay ahead of evolving threats, adopt a routine for checking login security. Periodically review admin accounts, rotate passwords every few months, and enable automatic firmware updates if possible. Maintain a robust guest network strategy to isolate devices, and keep a current backup of your router configuration. Finally, document your changes so future maintenance is straightforward. A disciplined login strategy reduces risk and ensures reliable network performance for your household.
Tools & Materials
- Device with a web browser(Phone, tablet, or computer connected to your Netgear router network)
- Ethernet cable (optional but helpful)(Wired connection can stabilize login during setup)
- Gateway URL or IP address (reference label/manual)(Default gateways: 192.168.1.1 or routerlogin.net; check your device label)
- Admin credentials (or reset method)(Have the existing admin username and password, or plan to reset if forgotten)
Steps
Estimated time: 25-35 minutes
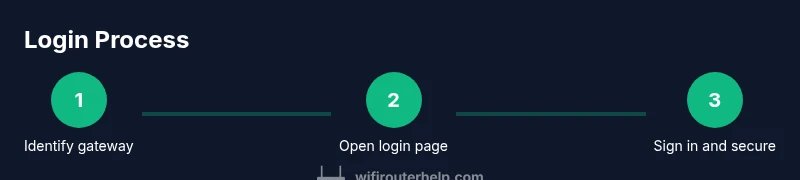
- 1
Identify the gateway address
Determine the router’s gateway IP address using your computer or mobile device. On Windows, run ipconfig and note the Default Gateway; on macOS, open Network settings and read the Router value. This address is where you’ll access the Netgear Nighthawk login page.
Tip: If you can’t find the address, check the router’s physical label for the gateway or model-specific instructions. - 2
Open the login page
Enter the gateway IP or routerlogin.net into your browser’s address bar. Wait for the sign-in page to load; ensure you’re using a trusted browser and that no VPN or proxy is altering the connection.
Tip: Avoid bookmarks that point to old or incorrect addresses. - 3
Sign in with admin credentials
Enter the admin username and password. If this is your first login, use the default credentials provided by Netgear and begin the setup wizard.
Tip: If you don’t know the credentials, stop and use the reset procedure rather than guessing and locking yourself out. - 4
Change the default password
Immediately replace the default admin password with a strong, unique passphrase. This reduces the risk of unauthorized access and is a foundational security step.
Tip: Use a passphrase of at least 14 characters with mixed character types. - 5
Update firmware
Check for and apply the latest firmware. Updates fix vulnerabilities and improve performance. After updating, confirm the login page and Wi‑Fi settings remain accessible.
Tip: Enable automatic updates if your model supports it. - 6
Configure wireless security
Set WPA2‑AES or WPA3 on both bands, and create strong Wi‑Fi passwords. Consider renaming the SSIDs to clearly distinguish networks (2.4 GHz vs 5 GHz) and enable network isolation if desired.
Tip: Disable WPS if available to reduce an easy attack vector. - 7
Create a backup of settings
Export or save your current router configuration so you can restore quickly if needed after changes or resets.
Tip: Store backups in a secure location and note where credentials are saved. - 8
Test and log out
Test that all devices reconnect to Wi‑Fi and that the admin login remains accessible. Always log out after finishing to prevent unauthorized session persistence.
Tip: If anything goes wrong, re-check password parameters and the gateway address.
People Also Ask
What is the default Netgear Nighthawk router login URL?
Most Netgear Nighthawk models use 192.168.1.1 or routerlogin.net. If neither works, check the router label or the manual for model-specific guidance.
Try 192.168.1.1 or routerlogin.net, and check the device label if you’re unsure.
I forgot my admin password. What should I do?
Use the reset procedure to restore factory defaults if you can’t recover the password. Then sign in with the default credentials and immediately set a new, strong password.
If you forget it, reset the router and create a strong new password.
Is it safe to login from public Wi‑Fi?
Avoid logging into your router admin page over public networks. Use a trusted private network or a VPN when needed, and ensure you’re on the correct gateway.
Don’t sign in on public Wi‑Fi; use a VPN or your home network.
Can I change the login URL or address?
Some Netgear models support changing certain login-related settings, but many rely on the standard gateway URL or routerlogin.net. Check your model’s documentation.
It depends on the model; many don’t allow changing the default address.
Should I enable remote management?
Only enable remote management if you need to manage the router from outside your home network. It increases exposure and should be disabled by default.
Only enable it if you have a clear, secure use case.
What’s the best practice after logging in?
Update firmware, change the admin password, verify Wi‑Fi security, and back up your configuration. Regular maintenance reduces login issues and improves security.
Update firmware, secure the login, and back up your settings.
Watch Video
What to Remember
- Know your gateway address and how to access it securely
- Change the default admin password immediately
- Enable strong Wi‑Fi security and keep firmware current
- Back up router settings after changes
- Isolate guest networks from admin resources for safety