Netgear Nighthawk Setup, Troubleshooting & Optimization
Comprehensive step-by-step guide to install, optimize, and troubleshoot Netgear Nighthawk routers for reliable home Wi-Fi, with security best practices and maintenance tips.

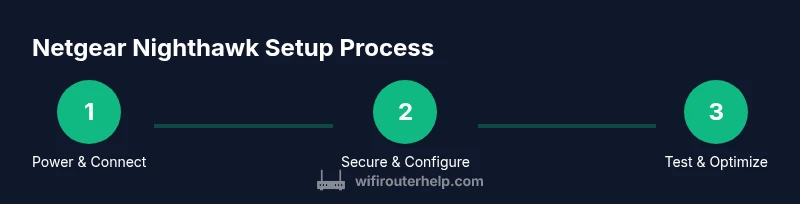
With this guide, you'll configure a Netgear Nighthawk router, secure your network, and optimize performance for fast, reliable Wi-Fi across your home. You'll need basic access to the router, a smartphone or computer, and your internet connection. The steps cover setup, security best practices, and common troubleshooting tips for peace of mind.
What Netgear Nighthawk Is and Why Home Networks Matter
Netgear Nighthawk is a family of high-performance routers designed to deliver reliable Wi‑Fi coverage across homes of varying sizes. These devices support dual-band or tri-band configurations and come with features such as beamforming, MU‑MIMO, and QoS that help manage multiple devices without noticeable slowdowns. Management is centralized through the Nighthawk app and the web interface, making setup and ongoing tweaks accessible even for less-experienced users. For many homeowners, the Nighthawk line represents a clear upgrade over basic routers, bringing better range, stronger stability, and easier device management. According to WiFi Router Help, selecting the right Nighthawk model depends on your home layout, device count, and entertainment needs rather than raw theoretical speed alone. This guidance helps ensure you avoid overspending on features you won’t use while still future-proofing your network.
Core Features You Should Know on Netgear Nighthawk Routers
Netgear Nighthawk routers offer a suite of features designed for modern households. You’ll typically find multiple wireless bands, beamforming to concentrate signals toward active devices, and user-friendly software that simplifies routine tasks. MU‑MIMO enables several devices to receive data simultaneously, while dynamic QoS prioritizes time-sensitive traffic like video conferences or gaming. Parental controls are often baked in, enabling schedules and content filtering without needing third-party software. The Nighthawk app provides a guided setup, real-time status, and easy access to guest networks. WiFi Router Help notes that model selection should align with your home layout, the number of connected devices, and whether you want features like wired backhaul or smart-home integration, rather than chasing the highest possible advertised speed.
Quick Start: Physical Setup for Netgear Nighthawk
Before you begin, gather a few essentials and make sure your modem is connected to the internet. To start, unplug power from both the modem and the router, then connect an Ethernet cable from the modem to the router’s WAN/Internet port. Plug in the modem first and wait for it to initialize, then power on the Nighthawk. Once the router boots, look for its default network name (SSID) and connect a computer or smartphone to begin the setup through the Nighthawk app or the web interface. When you’re connected, you’ll be guided through a basic configuration including admin credentials and your new network name.
Optimize Wireless Performance: Band Choice, Channels, QoS
Most Netgear Nighthawk models operate on 2.4 GHz and 5 GHz bands. Start with auto channel selection, but for interference-prone environments you may benefit from manually selecting a less crowded channel. Consider enabling band steering if your model supports it, which helps devices transition between bands for optimal speed. Use QoS to prioritize critical applications like video calls or gaming, but avoid over-tightening rules that can throttle other devices. For homes with many smart devices, enabling a dedicated IoT network can improve security and performance by isolating less-secure devices from your main network.
Security Best Practices for Netgear Nighthawk
Security should be a top priority from day one. Change the default admin username and password to strong, unique credentials. Enable WPA3 where available, or at least WPA2‑PSK with a strong passphrase. Disable WPS to reduce attack vectors, and keep firmware up to date to patch vulnerabilities. Create a separate guest network for visitors and IoT devices to prevent guests from accessing your primary devices. Regularly review connected devices and monitor for unfamiliar connections via the Nighthawk app.
Troubleshooting Common Issues with Netgear Nighthawk
If you encounter no internet after setup, verify the modem is online and the WAN connection is active. For weak Wi‑Fi signals, try moving the router higher and central, minimizing obstructions, and enabling QoS to prioritize bandwidth for essential tasks. If a device cannot connect, forget and reconnect to the network, verify the password, and ensure the device is within range. IP address conflicts or DNS issues can often be resolved by rebooting the router and modem in sequence and, if needed, restoring factory defaults and reconfiguring from scratch.
Firmware Updates and Maintenance for Longevity
Keep your Netgear Nighthawk router current by enabling automatic firmware updates when possible. Regular updates fix bugs, improve security, and sometimes unlock new features. If automatic updates aren’t available, check Netgear’s official support site for the latest firmware and follow the provided upgrade steps. After updating, rerun a quick network test to confirm everything is functioning correctly and that your devices still have expected speeds.
Advanced Tips: Mesh, Guest Networks, and Parental Controls
If you need broader coverage, consider a mesh-friendly approach with compatible extenders or additional Nighthawk devices in wired backhaul mode. A dedicated guest network helps keep visitors off your main network and protects your primary devices. Parental controls can schedule access, filter content, and monitor usage—useful for families with kids or shared living spaces. When expanding, plan IP addressing and DHCP scope to avoid conflicts and ensure devices seamlessly reconnect as you add more hardware.
Choosing the Right Model: Nighthawk Variants and Where to Buy
Netgear offers a range of Nighthawk variants with different band configurations, antennal designs, and feature sets. Start by evaluating your home size, device count, and whether you want features like tri-band performance, wired backhaul, or advanced security options. Read model reviews and confirm firmware update policies before purchase. For many shoppers, selecting a model within the Nighthawk line that matches your use case—streaming, gaming, or smart-home integration—provides the best balance of price and performance.
Tools & Materials
- Modem (ISP-provided or compatible standalone)(Ensure it’s connected to the internet and powered on before router setup.)
- Ethernet cable (Cat6 or better)(Used to connect the modem to the Netgear Nighthawk WAN/Internet port.)
- Smartphone, tablet, or computer(Needed to run the Nighthawk app or access the web interface.)
- Nighthawk router and power supply(Place near the center of your home for best coverage.)
- Paper or digital network credentials(Keep your SSID and password handy for quick reconnects.)
- Optional surge protector(Protects equipment from power surges during setup.)
Steps
Estimated time: 40-60 minutes
- 1
Power down and disconnect power
Power off the modem and router, then unplug both devices. This ensures a clean start and avoids conflicts during the initial boot. Wait 30 seconds to discharge residual power before reconnecting.
Tip: Label the cables so you can reassemble quickly after testing. - 2
Connect modem to router via WAN port
Use an Ethernet cable to connect the modem to the router's WAN/Internet port. This creates the primary data path for your home network. Ensure the connection is snug and check the link lights.
Tip: Use a high-quality Cat6 cable for more reliable throughput. - 3
Power up the modem, then the Nighthawk
Plug in the modem first and allow it to boot fully, then power on the Nighthawk router. Wait for the router to complete its startup indicator before proceeding.
Tip: If the lights seem stuck, unplug and replug the power to reset the device. - 4
Connect a configuring device to the router
Connect your smartphone, tablet, or computer to the router's default network using the printed SSID. This enables you to access the setup wizard via the Nighthawk app or a browser.
Tip: Disable any VPNs on the configuring device to avoid setup interference. - 5
Open the setup interface and set admin credentials
Launch the Nighthawk app or navigate to the setup URL provided by Netgear. Create a strong admin password and write it down securely. This step controls access to your router settings.
Tip: Use a unique password that combines letters, numbers, and symbols. - 6
Configure internet connection type
Select DHCP if your ISP assigns IPs automatically, or PPPoE if your service requires a username and password. Confirm WAN connectivity by checking the status in the app.
Tip: If you’re unsure, contact your ISP for the correct connection type. - 7
Set SSID and wireless password
Create a clear network name and a strong password. Avoid including personal information in the SSID and enable WPA2/WPA3 security on the main network.
Tip: Consider a two‑word SSID and a long, complex passphrase. - 8
Enable security features and update firmware
Turn on the strongest available security protocol and check for firmware updates. Updates often include critical security patches and performance improvements.
Tip: Enable automatic updates if your router supports it. - 9
Configure guest network and parental controls
Set up a guest network to isolate visitors and IoT devices. If needed, enable parental controls to manage access times and content. These steps help protect your primary network.
Tip: Keep guest credentials separate from the main network password. - 10
Test and optimize your network
Run speed tests and connect multiple devices to verify stable performance. Adjust QoS and channel settings as needed based on results. Document changes for future reference.
Tip: Recheck signal strength in common living areas and adjust placement if needed.
People Also Ask
What is Netgear Nighthawk best for?
The Nighthawk line is well-suited for households that stream 4K video, game online, and run many smart devices simultaneously. It balances performance with ease of use and robust software features.
Netgear Nighthawk is a great choice for homes that stream, game, and have many devices, thanks to strong software features and easy setup.
How do I access the router admin page?
Access is via the Nighthawk app or a web browser using the address provided in the manual. You’ll sign in with the admin credentials you set during setup to adjust settings.
Open the Nighthawk app or a browser and sign in with the admin credentials you created.
Can I use Netgear Nighthawk with my ISP?
Yes. Netgear Nighthawk routers are designed to connect to a modem from any major ISP. Ensure you choose the correct connection type (DHCP or PPPoE) during setup.
Absolutely. It connects to your modem and you’ll pick DHCP or PPPoE during setup depending on your ISP.
Should I enable a guest network?
Enabling a guest network keeps visitor devices separate from your main network, improving security and simplifying access control.
Yes, a guest network is a smart move to protect your main devices.
What if I forget the admin password?
If you forget it, perform a factory reset and reconfigure the router from scratch. Make a new, strong password during the setup.
If you forget it, reset the router and set a new, strong password during setup.
Does Nighthawk support WPA3?
Many Nighthawk models support WPA3 or WPA2‑PSK with a strong passphrase. Check your model’s firmware version to verify the available security options.
Most Nighthawk models offer WPA3 or WPA2 security; verify with your firmware version.
Watch Video
What to Remember
- Plan network layout before configuring for clarity and performance.
- Use strong passwords and enable automatic firmware updates.
- Separate guest and IoT devices from the main network for better security.
- Test connectivity after changes to verify real-world improvements.
- Keep documentation of settings for future maintenance.