How to Check Router Settings: A Practical Guide
Learn how to check router settings with a clear, model-agnostic approach. From admin login to firmware and security, this educational guide helps homeowners verify and optimize their home networks.

Learn how to check your router settings quickly: access your router’s admin page, verify your IP address, network name (SSID), security (encryption), and DHCP settings, and confirm firmware status. You’ll need a computer or mobile device on the same network, the router’s admin URL or IP, and the admin password. This guide covers typical models and common misconfigurations.
What checking router settings helps you accomplish
Keeping an eye on your router settings helps you maintain a stable, secure home network and prevents common connectivity issues. When you know exactly where to look, you can quickly diagnose slow WiFi, drops, or devices that won’t connect. This page explains what parts of the router settings to review, why they matter, and how to verify them without breaking your network. According to WiFi Router Help, a systematic approach reduces downtime and makes future changes smoother. The WiFi Router Help team found that most homeowners struggle not with hardware but with navigating the admin interface and understanding which values control their network. By learning a simple checklist, you can confirm that your SSID is broadcasting with proper encryption, your DHCP scope is adequate for your devices, and your firmware is up to date. You’ll also gain confidence to reconfigure settings safely if needed and to revert changes if something goes wrong. Whether you’re setting up a new router, troubleshooting an intermittent connection, or tightening security, this guide gives you practical steps you can follow. The emphasis is on clarity, not confusion, with model-agnostic guidance you can apply to most consumer routers. Finally, keep in mind that regular checks help prevent surprises when you rely on your home network for work, schooling, or streaming.
Accessing the router admin page
To check settings, you first must reach the router's administrative interface. Most routers expose a management page at a private IP address such as 192.168.0.1 or 192.168.1.1, or often a URL like http://router or http://myrouter.local. Start from a device connected to the network as this step depends on your current session. Open a web browser and enter the admin URL, then press Enter. If the page prompts for a username and password, use the credentials printed on the router label or the credentials you configured during setup. If you cannot access the page, confirm you typed the address correctly, disable VPNs or corporate proxies that could block local addresses, and ensure your device is on the same subnet. Some newer routers support a mobile app that offers the same settings in a guided interface; you can use that as an alternative. If you forget the password, most manufacturers provide a reset procedure that restores factory defaults but will erase all custom settings. Before resetting, try alternatives like password recovery features in the app or web page, and back up any configuration you can export. The goal at this stage is to establish a stable login path so you can review the remaining settings confidently. In this guide, we’ll reference the router's admin panel as the central source of truth for all changes.
Verifying core network settings (SSID, encryption, and password)
Once you’re within the admin page, locate the wireless or Wi‑Fi section. Here you’ll see the network name (SSID) broadcast status and the security protocol in use. For most home networks, WPA2-WPA3 Personal is standard; move away from older encryptions such as WEP. Confirm the encryption method and choose the strongest available option your devices support. Review the broadcast status to ensure your SSID is enabled; if you’ve hidden the SSID, consider turning it on for easier device connectivity. Check the password field: a strong password should be at least 12 characters and include a mix of letters, numbers, and symbols. If you’re working with a guest network, verify separate credentials and an isolated network to protect your main devices. If you see a separate 2.4 GHz and 5 GHz network, you may want to ensure both bands use the same security settings, or keep them distinct if you have devices that favor one band. Save any changes and test by connecting a device. If the new settings require reconnecting, you will see a brief downtime. Document the changes so you can revert if needed and track password updates for family devices. This step improves security and ensures reliable wireless performance across all rooms.
Checking WAN/Internet status and firmware updates
After confirming wireless settings, switch to the router’s status or internet section to verify the WAN connection. Look for a status indicator such as 'Connected' or a live uptime value. If the router is not seeing an internet connection, recheck the cable from the modem, the modem’s status lights, and any ISP outage notices. While you’re here, check DNS settings—most home networks use the ISP’s DNS by default, but you can switch to public options like 1.1.1.1 or 8.8.8.8 for improved responsiveness. Next, locate the firmware or software update area. Firmware updates fix bugs, improve security, and add features. If an update is available, read the release notes to confirm relevance, back up current settings, and proceed with the update. Do not interrupt the update process. After updating, the router may reboot automatically; wait for the device to stabilize and recheck your internet status. Keeping firmware current reduces vulnerability exposure and compatibility problems with new devices.
Inspecting LAN settings and DHCP scope
Navigate to the LAN or Network settings to review local network ranges and DHCP configuration. The DHCP server assigns IP addresses to devices on your network; ensure the DHCP range has enough addresses for all devices, including guests. A typical home setup uses a private IP range like 192.168.1.0/24 or 192.168.0.0/24 with a pool of 128 addresses. If you’ve added many new devices, you may need to widen the range or adjust the lease time to prevent address exhaustion. Check the router’s LAN subnet to ensure consistency with devices that rely on static IPs or port-forwarding rules. If you employ any static mappings, verify they still point to the correct devices and that there are no conflicts with dynamic addresses. After any change, save and reboot if required, then re-test connectivity from several devices. Document the exact values you used so future changes remain predictable.
Security hygiene: password changes, admin access, and guest networks
Security starts with strong authentication. Change the admin password if you haven’t done so recently, using a long, random combination of characters. Disable remote access if you don’t need it, and enable two-factor authentication if your router supports it. Create a dedicated guest network to isolate visitors from your main devices, and apply separate credentials for guests. Review the firewall and UPnP settings; disable UPnP if you don’t require it for gaming or streaming devices, as it can introduce risks. Keep an eye on connected devices and recent login attempts, which often appear in the admin dashboard. If you manage parental controls or access restrictions, test them to ensure they apply correctly to the right devices. After tightening security, re-run connectivity tests on a few devices to confirm nothing was unintentionally blocked. Finally, store a securely written or password-protected digital note of your current configuration so you can restore it if needed.
Troubleshooting common misconfigurations and rollback steps
If you make changes and suddenly lose connectivity, don’t panic. First, try rebooting the router and modem, which resolves many simple hiccups. If that doesn’t help, consider reverting the most recent change or restoring from a backup configuration if you created one before editing. When possible, make one change at a time and test afterward to isolate issues. If you’re unable to access the admin page after a change, use a wired device directly connected to the router to bypass wireless issues or misrouting. Many routers provide a quick reset option that leaves you with factory defaults; this should be a last resort because you’ll need to reconfigure everything from scratch. Before performing a factory reset, locate the backup/export option to preserve your previous settings. After stabilization, review the settings again with a calmer approach, applying only the necessary modifications. The goal is a reliable, easy-to-manage network without unintended side effects. If problems persist, consult the router’s manual or vendor support for model-specific guidance.
Documenting changes and future-proofing your setup
As you finish the review, document every setting you reviewed or changed. Create a simple log with date, device name, and a brief note about the change. This practice helps you troubleshoot faster in the future and makes it easier to revert if new issues arise after updates. Consider setting a reminder to review your router settings every 3–6 months or after major network changes, such as adding new devices or upgrading your modem. Keep a copy of the current configuration in a safe location, ideally encrypted, so you can restore quickly if problems occur. Finally, review compatibility when expanding your network with new hardware, such as mesh extenders or new access points, to ensure settings remain aligned across the entire system.
Tools & Materials
- Computer, smartphone, or tablet connected to your network(Needed to access the router admin page)
- Router admin URL or IP address(Often 192.168.0.1 or 192.168.1.1; check the router label)
- Admin username and password(Use credentials from the label or your previous config)
- Notebook or digital note for recording changes(Record settings you change and dates)
Steps
Estimated time: 20-40 minutes
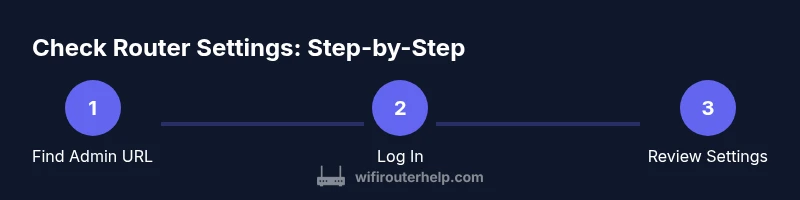
- 1
Find the router admin URL or IP
Identify the address you use to reach the router's admin interface. This is usually a private IP like 192.168.0.1 or 192.168.1.1, or a local hostname. Having this ready avoids guesswork and speeds up the login process.
Tip: Check the router label or user manual if you’re unsure; many devices also print the address on the bottom. - 2
Log in with admin credentials
Enter the admin username and password. If you haven’t changed them, use the factory defaults provided by the manufacturer. If login fails, verify you’re on the correct URL, disable VPNs, and consider a password reset only if you must.
Tip: If you forgot the password, use the vendor’s recovery option or back up from a previous export before a reset. - 3
Review wireless settings (SSID, security, password)
Navigate to the Wireless or Wi‑Fi page. Check that the SSID is enabled, encryption is at least WPA2/WPA3, and the password meets strength guidelines. If you have separate 2.4 GHz and 5 GHz networks, confirm each one’s security and password.
Tip: Avoid reusing passwords across devices and networks; a unique strong password for the main network is best. - 4
Review LAN and DHCP settings
Open the LAN or Local Network section. Confirm the DHCP range is adequate for all devices and that the router’s IP/subnet matches your device expectations. Document any static IPs and port-forwarding rules you rely on.
Tip: If you add many devices, consider expanding the DHCP pool or increasing lease time to prevent IP exhaustion. - 5
Check WAN/Internet status and DNS
Check the status indicator for internet connectivity. If needed, review DNS settings and consider switching to a public DNS like 1.1.1.1 for performance. Ensure the modem connection is stable and reboot if necessary.
Tip: Avoid changing multiple WAN-related settings at once; only adjust DNS or gateway if you’re sure the current path is healthy. - 6
Update firmware and apply changes
If an update is available, review release notes and back up current settings before applying. Do not interrupt the update once it starts. After update, confirm all essential settings retained and connectivity is restored.
Tip: Back up configuration after final changes so you can restore quickly if something goes wrong later. - 7
Test connectivity and document changes
Reconnect devices and run quick tests: speed checks, reliable streaming, and responsive smart-home devices. Record the exact changes and results in a log for future reference.
Tip: Use a mobile device on both 2.4 GHz and 5 GHz to ensure both bands work reliably.
People Also Ask
Do I always need to log in to check router settings?
Not all checks require login, but most meaningful edits—like changing SSID, passwords, or firmware—do require admin access. You can view basic status without logging in on many models, but for changes you must authenticate.
Most checks that involve changes require login; you can view status without signing in on some models.
What if I forget the router password?
Use the vendor’s password recovery option or reset the router to factory defaults if necessary. Remember that a reset erases custom settings, so back up first if possible.
If you forget the password, try the recovery option or reset as a last resort; back up settings if you can.
Can I check and change router settings from my phone?
Yes. Most routers provide a mobile app or a responsive web interface. Ensure you’re connected to the router’s network, then log in and perform the checks just as you would on a computer.
Absolutely. Use the router’s app or mobile web interface from a device on the network.
How often should I review router settings?
A good rule is to review settings every 3–6 months, or after adding new devices, updating your modem, or changing internet plans.
Review every few months or after major network changes.
Is DNS configuration part of router settings?
Yes. DNS settings at the router level affect all connected devices. You can switch to a faster or more privacy-focused DNS if desired, but ensure it’s compatible with your network.
DNS settings live in the router and affect all devices; you can adjust them if needed.
What if I change something and lose connectivity?
Reboot the router and modem, test one change at a time, and revert the last change if the problem started after it. If you backed up settings, restore from the backup.
Restart and revert the last change to recover connectivity, restore from backup if available.
What to Remember
- Identify and access the router admin page reliably
- Review wireless, LAN, WAN, and firmware settings in a structured way
- Prioritize security: strong encryption, unique passwords, guest networks
- Test changes and document outcomes for future reference