How a Router Connects to the Internet: A Complete Step-by-Step Guide
Learn how a router connects to the internet with a clear, expert-guided, step-by-step approach. From modem basics to Wi‑Fi setup and security, this guide helps homeowners get online confidently.

In this guide you will learn how a router connects to the internet by pairing your modem with a home router, selecting the correct WAN type, and configuring a secure Wi‑Fi network. You’ll verify connectivity and apply basic security settings. This practical, field-tested approach is ideal for homeowners and tech enthusiasts alike.
How a Router Connects to the Internet
If you’ve ever wondered how router connect to internet, the answer begins with your service from an Internet Service Provider (ISP), a modem that translates that service into a digital signal, and a router that creates a local network for your devices. The router acts as a gateway, performing Network Address Translation (NAT) and distributing IP addresses via DHCP. In most homes, the setup is straightforward: the ISP provides a modem or gateway, you connect a router to that device via an Ethernet cable, and you configure the router's settings to manage Wi‑Fi. According to WiFi Router Help, a clean, standard setup reduces outages and simplifies future troubleshooting. The goal is a stable, secure network that reliably carries traffic to and from every connected device. While the exact steps vary by brand, the core concepts remain the same: proper physical connections, correct WAN settings, and a strong wireless configuration.
Core Components and How They Talk to Each Other
A typical home network consists of three main players: the modem, the router, and your devices. The modem connects to the ISP’s network via a physical line (coax, fiber, DSL, etc.) and converts it into a digital signal. The router creates a local network, assigns local IP addresses, and routes traffic between devices and the internet. The WAN (or Internet) port on the router is the bridge to the modem; the LAN ports and Wi‑Fi radios distribute connectivity inside your home. Modern routers also include firewall features, basic QoS, and guest networks. Understanding this triad helps you diagnose issues quickly and makes future upgrades easier. WiFi Router Help emphasizes keeping firmware up to date as a cornerstone of reliability and security.
Preparing Before You Configure
Before you touch any settings, gather the essential equipment and information. Have your modem, router, an Ethernet cable, power adapters, and a laptop or smartphone ready. Know your ISP’s preferred connection type (DHCP, PPPoE, or static IP) and have any required credentials on hand. Write down the Wi‑Fi network name (SSID) and a strong password, or plan to generate new ones during configuration. If you’re connecting to a fiber or DSL service, you may need to bridge or place the modem in bridge mode; that step is handled later under WAN settings. This preparation saves time and reduces the chance of misconfigurations.
Understanding WAN Types and Initial Configuration
WAN settings determine how your router talks to the internet. Most home connections use DHCP (automatic IP assignment). Some ISPs require PPPoE credentials, while others use a static IP. Your router’s setup wizard will prompt you to choose between these options. If you’re unsure, contact your ISP or check your service documentation. For security, enable WPA3 or at least WPA2‑PSK. Disable WEP and other obsolete protocols. Keeping a unique SSID and strong password protects your network from intruders and helps you manage devices more effectively.
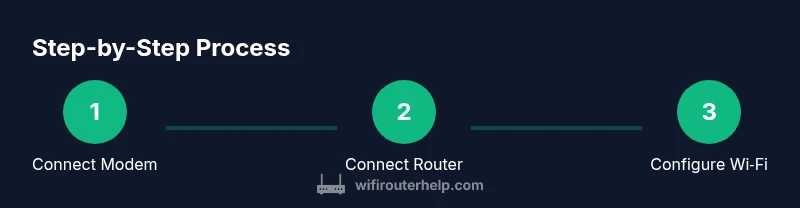
Step-by-Step Overview of the Setup Flow
A successful setup follows a logical flow: verify service and equipment, connect the hardware, enable WAN access, configure Wi‑Fi, update firmware, and test the network. This overview maps directly to the detailed steps that follow and provides context for why each action matters. You’ll also learn best practices for future maintenance, including regular firmware checks and secure password management.
Common ISP and Modem Setups
ISPs differ in how they provision your connection. Cable, fiber, DSL, and fiber with GPON have distinct considerations. In many cases, you'll place the modem in its default mode, then connect your router to the modem’s LAN port. If your ISP requires a bridge setup, you’ll need to bridge the modem so the router can manage the PPPoE session. For blended services (like a gateway device provided by the ISP), you may disable the wireless on the gateway and use your own router for wireless coverage. Understanding these setups helps you avoid double NAT and improves performance.
Verifying Your Connection and Securing the Network
Once configured, verify that devices can reach the internet, then confirm local network access between devices. Check the router’s status page for a green connection indicator and review the WAN/IP settings to ensure the assigned address matches your ISP’s plan. Secure your network by enabling a modern encryption standard, updating firmware, and managing access controls. Regular maintenance, like firmware updates and password changes, keeps your network resilient against vulnerabilities. The WiFi Router Help team recommends documenting your settings for future reference and troubleshooting.
Tools & Materials
- Modem (provided by ISP) or gateway(Must be compatible with the service and support routing)
- Router (home Wi‑Fi router) with WAN port(Supported by your internet plan and local devices)
- Ethernet cable (Cat5e or better)(One end to the modem, the other to the router WAN port)
- Power adapters for modem and router(Keep both devices powered during setup)
- Laptop, tablet, or smartphone with a web browser(Used to access the router’s admin interface)
- ISP account details (PPPoE username/password, if required)(Only needed for PPPoE connections; otherwise not required)
- Notebook or password manager(Record SSID and password for future reference)
- Basic grounding or surge protection (optional)(Protect equipment in adverse conditions)
Steps
Estimated time: 30-45 minutes
- 1
Gather equipment and check service type
Collect your modem, router, Ethernet cable, power supplies, and a smartphone or laptop. Confirm whether your ISP uses DHCP, PPPoE, or a static IP so you know which WAN setting to select later.
Tip: Take a quick photo of the back of devices to reference ports. - 2
Connect the modem to the internet line
Connect the modem to your service line (coax, fiber, or DSL) as specified by your ISP. Ensure the service is active before proceeding.
Tip: Wait 1–2 minutes after power is restored for the modem to initialize. - 3
Connect the router to the modem
Plug the router’s WAN/Internet port into one of the modem’s LAN ports with the Ethernet cable. This creates the bridge from your modem to the router.
Tip: Use a direct Ethernet connection; avoid switches during initial setup. - 4
Power on and wait for boot
Power on both devices and allow 2–3 minutes for boot and negotiation. The router’s status lights should indicate an active WAN connection.
Tip: If lights blink or stay red, recheck cables and try a different LAN port on the modem. - 5
Access the router admin page
From your connected device, open a browser and enter the router’s default IP address (commonly 192.168.0.1 or 192.168.1.1). Sign in with the default credentials.
Tip: If you can’t reach the page, ensure you’re connected to the router’s network and disable VPNs temporarily. - 6
Configure WAN settings and hostname
Choose DHCP for most home setups, or PPPoE/static IP if your ISP requires it. Enter any required PPPoE credentials precisely as provided by your ISP.
Tip: Double-check spelling and avoid copying errors; a single incorrect character can block access. - 7
Set up Wi‑Fi network details
Create a unique SSID and a strong password. Enable WPA3 if available, otherwise WPA2‑PSK. Consider separating guest access from main networks.
Tip: Avoid common names or personal information in the SSID. - 8
Update firmware and test connectivity
Check for and install any available firmware updates. Test internet access on multiple devices and confirm internal file sharing works as expected.
Tip: Firmware updates often improve security and compatibility with newer devices.
People Also Ask
Do I need a separate modem if my ISP provided a gateway device?
Many ISPs provide a gateway that combines a modem and router. If you want better performance or control, you can set the gateway to bridge mode and use your own router for networking. This avoids double NAT and can improve reliability.
Some ISPs give a combined device; you can bridge it and use your router for better control and performance.
What if my ISP requires PPPoE?
If PPPoE is required, you’ll need to enter the provided PPPoE username and password in the router’s WAN settings. Ensure you copy credentials exactly as given and save changes.
Enter your PPPoE credentials in the router’s WAN settings and save.
Why is my internet slow after setup?
Slowness can result from interference, crowded channels, or outdated firmware. Try changing the Wi‑Fi channel, enabling 5 GHz where available, and updating firmware. Rebooting devices can also help.
Check interference, update firmware, and consider moving the router to a better location.
How do I find my router’s IP address?
You can typically find the IP address on the router label or in the manual. Common defaults are 192.168.0.1 or 192.168.1.1. If in doubt, check your device’s network settings while connected to the router.
Look for the default IP on the device label or in the manual, usually 192.168.x.1.
Can I use a different DNS server?
Yes. You can configure a custom DNS server in the router’s WAN or LAN settings to improve speed or filtering. Popular options include public DNS services, but pick trusted providers and note any potential privacy implications.
You can switch to a trusted public DNS service in the router settings.
What is bridge mode and when should I use it?
Bridge mode disables the router’s routing features, turning it into a pure modem. Use it when you want a separate router handling all routing duties or when the ISP’s gateway conflicts with your own router.
Bridge mode turns your device into a simple modem, letting your own router handle routing.
Watch Video
What to Remember
- Verify physical connections before configuration.
- Record your SSID and password for easy access.
- Update firmware for security and stability.
- Use strong encryption and unique admin credentials.