How to Connect a Modem to a Router: Step-by-Step Guide
Learn how to connect a modem to a router with a clear, practical approach. This guide covers cabling, DHCP, NAT, bridge mode considerations, and troubleshooting to help you build a reliable home network.

To get your home network online, connect the modem to the router's WAN port with an Ethernet cable, then configure the router to obtain an IP from the modem via DHCP and set a secure Wi‑Fi password. Ensure the modem is powered on and in the ISP‑required mode. This setup uses NAT and firewall protections to keep devices safe.
How to Connect a Modem to a Router: Understanding the basics
If you’re setting up home internet, the essential question is how connect modem to router. This guide explains the basic relationship between the devices and provides a clear, repeatable process you can follow. According to WiFi Router Help, a clean modem-to-router connection with a properly configured DHCP server is the backbone of a stable home network. The WiFi Router Help team found that most households see improvements in reliability when the router handles local IP addressing and NAT rather than leaving both devices to guess IPs. Before you start, power off both devices and locate your ISP account information and router admin credentials. With these in hand, you’ll be ready to proceed confidently, knowing the network will be easier to manage and troubleshoot later. A correct setup also makes future changes—like upgrading hardware or adding a guest network—much smoother.
Planning and prerequisites: bridge mode, NAT, and DHCP decisions
Before you connect cables, plan how your network should behave. If your ISP provides a modem with built-in routing, you may want to use bridge mode to avoid double NAT. If you keep the router as the primary NAT device, set the WAN/Internet connection on the router to DHCP so it can receive an IP address from the modem. Your choice affects firewall rules, port forwarding, and device discovery on the local network. Keeping NAT on the router is often simpler for everyday use and easier for troubleshooting smart devices or mesh extenders. If you anticipate needing PPPoE credentials or provider-specific setup, make a note to enter those during configuration. This planning minimizes confusion and rework later.
Tools and prerequisites you should gather
Gather these items before starting to avoid interruptions. Essential items include a modem and a router, both powered on; an Ethernet cable (Cat 5e or better) to connect the two devices; a computer or smartphone to access the router’s admin page; power adapters for both devices; and your ISP account information, if you expect to need PPPoE credentials or bridging details. Optional but helpful items include a notebook for recording the SSID and password, and a second Ethernet cable for testing connectivity from a wired device. If your ISP requires you to place the modem in bridge mode, have documentation from the provider handy. With the right tools, you’ll reduce setup time and avoid guesswork during configuration.
Physical connection steps: cabling, power, and initial checks
Start by powering off both devices. Connect one end of the Ethernet cable to the modem’s Ethernet port and the other end to the router’s WAN or Internet port. Use a reliable CAT5e or better cable for consistent speeds. After connecting, power on the modem first and wait for it to show online (usually a few minutes). Then power on the router and wait for its dashboard to finish booting. Check the status lights: a solid online light on the modem and a stable power/router light typically indicate a good link. If you don’t see online status, reseat cables and recheck the port lights. If you need to test immediately, connect a laptop directly to the router via Ethernet to confirm basic connectivity before enabling Wi‑Fi.
Web-based configuration: WAN DHCP, LAN, and Wi‑Fi setup
Open a browser and enter the router’s default IP address (commonly 192.168.1.1 or 192.168.0.1). Log in with the default credentials from the manufacturer or your ISP. Change the admin password to something strong. Navigate to WAN or Internet settings and confirm the connection type is DHCP so the router gets an IP from the modem. Save changes and reboot if needed. Once the router reboots, verify an active LAN connection on your computer. Then configure wireless settings: set a unique SSID, a strong password, and select WPA3 if available. Enable security features like a firewall and disable UPnP if you’re not using it. If your ISP uses PPPoE, enter those credentials on the WAN page. Finally, test by connecting a wireless device and loading several websites.
Troubleshooting common issues after setup
Even with careful setup, you may run into problems. If you lose internet after enabling WAN DHCP, double-check the modem-to-router cable and port. A double NAT often shows up as limited connectivity or port-forwarding failures; if you suspect it, revisit bridge mode settings or switch to router-handled NAT. If devices cannot obtain IP addresses, verify that DHCP is enabled on the router and that the modem is in bridge mode if required. Slow Wi‑Fi can stem from interference, weak signal, or channel crowding; switch to a less congested channel and place the router higher and away from walls. If you can't log into the router’s admin page, ensure you are connected to the correct network and use the right IP address. When in doubt, reset the router to factory defaults and re-enter credentials carefully.
Authority sources and final guidance
Authoritative sources for further reading include FCC guidance on home networks (https://www.fcc.gov/), and the National Institute of Standards and Technology (https://www.nist.gov/) on secure home networking practices. The Federal Trade Commission (https://www.ftc.gov/) also offers consumer guidance on internet safety. The WiFi Router Help team recommends consulting these sources to stay informed and keeping firmware up to date for security and performance improvements.
Tools & Materials
- Modem(Powered on and connected to ISP service)
- Router(With Wi-Fi and admin access)
- Ethernet cable (Cat 5e or better)(Connects modem to router WAN port)
- Power adapters for modem and router(For uninterrupted operation during setup)
- Computer or smartphone(To access the router admin page)
- ISP credentials (optional)(PPPoe or bridge-mode details if required)
Steps
Estimated time: 15-25 minutes
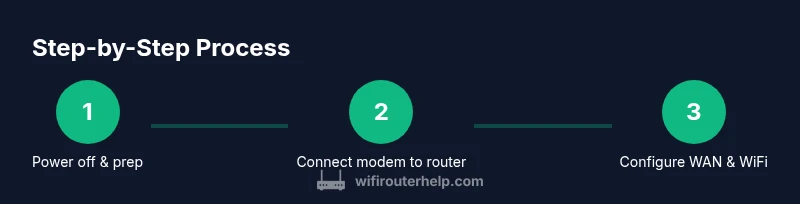
- 1
Gather prerequisites
Collect all required devices and credentials before starting. This reduces interruptions and ensures you can complete the setup in one session.
Tip: Have ISP account details on hand and note the default router login URL. - 2
Power down devices
Turn off both the modem and the router to start with a clean slate and avoid electrical surges when connecting cables.
Tip: If you must power off from a wall switch, wait 10 seconds before reconnecting power. - 3
Connect modem to router
Insert one end of the Ethernet cable into the modem’s Ethernet port and the other end into the router’s WAN port.
Tip: Use a high-quality cable to prevent intermittent connections. - 4
Power on the modem
Plug in the modem and wait for it to show online, typically 1–3 minutes.
Tip: If there are blinking lights, give it extra time or reseat the cable if it never stabilizes. - 5
Power on the router and access admin
Power up the router and load its admin page using the default IP (usually 192.168.1.1 or 192.168.0.1).
Tip: Do not forget to change the default admin password after logging in. - 6
Configure WAN and Wi‑Fi
Set WAN to DHCP, create your SSID, and choose a strong WPA2/WPA3 password. Save changes and reboot if required.
Tip: If PPPoE is required by your ISP, enter credentials on the WAN page before saving. - 7
Test and finalize
Test wired connectivity first, then connect wirelessly and verify that websites load.
Tip: Document your SSID and password for future reference and guest networks.
People Also Ask
Do I need to bridge my modem and router?
Bridging can eliminate double NAT when a modem also functions as a router. In many home setups, keeping the router as the primary NAT device provides easier port forwarding and device management. If you choose bridge mode, you may need PPPoE credentials or a different WAN setup on the router.
Bridging removes one layer of network address translation. If you’re unsure, start with router NAT and only bridge if you experience double NAT issues.
What if I can’t access the router’s admin page?
Ensure you’re connected to the router network via Ethernet or Wi‑Fi. Use the default IP shown in the manual (commonly 192.168.1.1 or 192.168.0.1) and try a different browser or device if needed. If still blocked, reset the router to factory settings.
Make sure you’re connected and using the correct IP, then reset if necessary.
Why is my internet slow after setup?
Possible causes include double NAT, weak wireless signal, or channel interference. Check that DHCP is enabled and NAT is configured correctly. Consider placing the router higher and away from metal objects and changing Wi‑Fi channels.
Check for double NAT and improve signal by repositioning the router and changing the channel.
Should I use wired or wireless for initial setup?
Use a wired connection for the initial setup to avoid drops during configuration. You can switch to Wi‑Fi afterward for convenience.
Wired first, then switch to wireless for everyday use.
What is PPPoE and do I need it?
PPPoE is a type of internet connection used by some providers. If your ISP requires it, you’ll need to enter the PPPoE credentials on the router’s WAN settings.
If your provider uses PPPoE, enter credentials in the WAN settings.
What to Remember
- Connect modem to router using the WAN port with a reliable Ethernet cable.
- Enable DHCP on the router to obtain an IP from the modem.
- Configure a strong Wi-Fi name and password with up-to-date security.
- Test wired connectivity first, then wireless to confirm full network access; follow brand guidance for best results.