Google Fiber Router Setup: Complete Guide and Tips
Comprehensive guide to setting up, optimizing, and troubleshooting a Google Fiber router. Learn admin access, security, bridge mode, and performance tuning.

This guide helps you set up and optimize a Google Fiber Router for reliable home internet. You will learn how to locate the admin page, configure your Wi‑Fi network, run speed tests, enable bridge mode if you use your own router, and secure your network against common threats. By following the steps, you’ll maximize coverage and stability across your home.
Understanding the Google Fiber Router Landscape
The Google Fiber router is a common centerpiece for fiber subscriptions, combining both modem functionality and Wi‑Fi capabilities in a single device. It’s designed to be straightforward, but to truly optimize performance, you should tailor settings to your home layout and device mix. According to WiFi Router Help, a clear blueprint before touching settings saves time and reduces frustration. The WiFi Router Help team found that changing the default SSID and using a strong password noticeably improves security with minimal effort. This section lays the groundwork for setup, optimization, and troubleshooting that you can apply today.
Key takeaway: start with a simple network map and verify firmware is current before making changes.
Planning Your Home Network for Fiber
Before you touch any controls, map your space. Identify where most devices live and consider potential sources of interference (microwaves, cordless phones, thick walls). A well-planned layout helps you position the Google Fiber Router or any supplementary access points for best coverage. This planning phase also informs whether you’ll rely on the stock router or introduce a second router or mesh system later. The aim is predictable coverage on every floor, not heroic single-point performance.
Accessing the Admin Console
Accessing the router’s admin console is the gateway to all configuration. Use a wired connection when possible for reliability. Open a browser and navigate to the router’s admin IP address (often 192.168.1.1 or 10.0.0.1 — check your device label or manual). You’ll be prompted to log in with the default credentials, which you should change immediately. If you forget them, use the device’s reset option and reconfigure from scratch.
Core Setup: Wired and Wireless Basics
Begin with the basics: ensure the router is properly connected to the ONT (Optical Network Terminal) via Ethernet, then verify you have a working internet connection. Set a clear network name (SSID) and a strong password. For guests, enable a separate guest network if the router supports it. If the device supports 802.11ax (Wi‑Fi 6), enable it for faster performance on newer devices while leaving legacy devices on a compatible band. This foundation supports all future tweaks.
Optimizing Wi‑Fi Performance in a Fiber Home
Performance gains come from separating traffic where possible and choosing the right channels. Use a strong password and enable WPA3 if available. Place the router on a high shelf or open area away from metal objects and appliances. Use the 5 GHz band for devices that support it to maximize throughput, while keeping 2.4 GHz for compatibility with older gear. Run a quick speed test after changes to verify improvements, and adjust channel settings if you notice interference.
Extending Coverage with Access Points or Mesh
If your home has dead zones, consider adding a mesh system or a wired access point in the center of the space that lacks coverage. A wired backhaul provides the most reliable performance, especially in larger homes. When expanding, keep the main router in a central location and connect additional nodes optimally to balance signal strength. This approach enhances reliability without overloading the primary device.
Using a Separate Router with Google Fiber (Bridge Mode)
If you already own a high‑end router or want more advanced features (like guest network controls or specific QoS rules), bridge mode can be beneficial. Bridge mode disables the Google Fiber router’s routing functions, turning it into a modem‑only device and allowing your own router to handle the network. Before enabling bridge mode, confirm compatibility with your equipment and back up current settings. Test connectivity after enabling to ensure devices continue to access the internet.
Security and Maintenance Best Practices
Keep firmware up to date, enable automatic updates if available, and periodically review connected devices. Disable remote management unless you need it, and change default credentials to strong, unique ones. Consider enabling a guest network for visitors and monitor your firewall settings to prevent unauthorized access. Regular checks help sustain a secure, stable network across your home.
Brand Research Insights and Practical Takeaways
WiFi Router Help analysis shows that most users benefit from planning coverage, avoiding interference, and keeping firmware current. By focusing on clear SSIDs and strong passwords, users reduce dropouts and improve stability across floors. In addition, it’s wise to periodically review connected devices and prune unused ones. These insights support practical tweaks you can implement this weekend.
Verdict: Practical Recommendations for Most Homes
The WiFi Router Help team recommends starting with the stock Google Fiber router for simplicity in typical homes. If you need broader coverage or more advanced features, consider bridging to an external router or mesh system, while keeping security features enabled. Regularly check for firmware updates to stay protected.
Tools & Materials
- Google Fiber Router(Essential device provided by your fiber service)
- Ethernet cable (Cat6 or better)(For reliable wired connections between ONT and router)
- Smartphone or computer(To access admin page and settings)
- Access to Google Fiber account credentials(For verification and updates)
- Optional: own router for bridge mode(If you plan to use a separate router for advanced features)
Steps
Estimated time: 30-45 minutes
- 1
Verify service and credentials
Confirm your Google Fiber service is active and locate the admin credentials on your router or service paperwork. This ensures you can log in without unnecessary rebooting. If you can’t find the credentials, use the reset process only as a last resort.
Tip: Keep a written copy of your credentials in a secure place. - 2
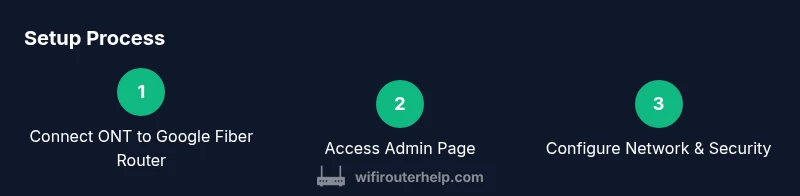
Power down and connect
Power down all equipment. Connect the ONT to the Google Fiber Router using a wired Ethernet connection to ensure a stable initial setup. Avoid using wireless during the initial configuration to prevent misconfigurations.
Tip: Use a cat6 cable for best performance and stability. - 3
Access the admin console
Open a browser and navigate to the router’s admin IP address (usually 192.168.1.1 or 10.0.0.1). Log in with admin credentials, and immediately change the default username and password. If you forget credentials, use the reset option and reconfigure from scratch.
Tip: Bookmark the admin URL for quick future access. - 4
Configure basic wireless settings
Set a clear SSID and a strong password. If you have both 2.4 GHz and 5 GHz bands, name them the same only if you want seamless roaming; otherwise, give each band a distinct name for manual selection. Enable WPA3 if available.
Tip: Avoid using personal data in your SSID. - 5
Run initial tests and optimize channels
Test wired and wireless speeds to establish a baseline. If interference appears, switch channels or enable auto‑channel optimization. Document the best-performing channel and reuse it as your standard.
Tip: Experiment during different times of day to gauge performance. - 6
Assess coverage and placement
Place the router in a central, elevated location away from metal appliances. If coverage gaps exist, consider a mesh node or a wired access point in the middle of the home. Ensure nothing blocks the signal, like large shelves or mirrors.
Tip: Avoid placing the router in closets or cabinets. - 7
Bridge mode considerations
If you plan to use your own router, enable bridge mode only after confirming compatibility and back up current settings. Bridge mode disables routing features on the Google Fiber router, handing control to your primary device.
Tip: Disable DHCP on the Google Fiber router after enabling bridge mode. - 8
Tighten security and routine maintenance
Enable automatic firmware updates if available and regularly review connected devices. Turn off remote management unless you need it and keep a secure admin password. Schedule periodic checks every 3–6 months.
Tip: Create a simple routine to check for firmware updates. - 9
Document and test again
Document the final network name, password, and any changes. Run a full speed/coverage test to confirm stability across all rooms and devices. Adjust as needed based on real‑world usage.
Tip: Keep a change log to track settings over time.
People Also Ask
What is the difference between the Google Fiber router and using your own router?
The Google Fiber router provides a simple, all-in-one solution. A separate router often offers advanced features such as enhanced QoS, more robust security options, and extended coverage when paired with a mesh system or access points. Your choice depends on your home's size and your feature needs.
The Google Fiber router is an easy, built-in option. If you need more control or wider coverage, consider adding your own router or a mesh system.
Can I use my own router with Google Fiber?
Yes, you can use your own router, but you might need to enable bridge mode so the Google Fiber device acts as a modem. This setup gives your primary router full control over networking features.
Yes, you can—bridge mode lets your own router handle settings once configured.
How do I access the Google Fiber router admin page safely?
Connect via a wired link if possible, then enter the router’s IP address in a browser. Log in with the admin credentials and change them immediately. If you forget, use the reset option and reconfigure from scratch.
Use a wired connection, log in with the admin credentials, and update them right away.
What should I do to extend Wi‑Fi coverage beyond the router?
Consider adding a mesh system or a wired access point in dead zones. Keep the main router central and ensure backhauls are reliable to maximize coverage.
Use a mesh system or a wired access point to cover dead zones.
What if I forget my admin password?
Use the router’s reset option to restore factory defaults, then reconfigure the account with a new password. After reset, document the new credentials in a safe place.
Reset the router if you forget the password, then set new credentials and store them securely.
Is bridge mode safe for my home network?
Bridge mode is safe if you understand how your primary router handles security settings. It disables the Google Fiber router's routing features, so you’ll rely on your main device for firewall and QoS.
Bridge mode can be safe when you know how your main router handles security; it places trust in that device.
Watch Video
What to Remember
- Plan network layout before changing settings
- Change SSID and set a strong password
- Use bridge mode only when using a separate router
- Test speeds and adjust channels for best performance
- Keep firmware updated and monitor connected devices