Cox Router Setup and Optimization Guide
Learn to set up, secure, and optimize your Cox router for reliable home Wi‑Fi. This step-by-step guide covers admin access, basic and advanced settings, firmware checks, and practical troubleshooting.

With this guide you will set up a Cox router for fast, reliable home Wi‑Fi, secure your network, and maximize coverage with smart placement. You’ll learn how to access the admin panel, configure basic and advanced wireless settings, update firmware, and troubleshoot common problems. The steps work for most Cox gateway devices and adapt to common home layouts.
Cox Router Essentials
A Cox router typically combines a modem and wireless access point to deliver internet to every device in your home. Understanding the role of the device helps you optimize placement, avoid dead zones, and secure your network. When configured correctly, a Cox router can support streaming, gaming, and smart-home devices with minimal buffering. In this guide, we emphasize practical, repeatable steps that work for most Cox gateway setups and apply to common home layouts. The term "cox router" will come up often as we discuss basics, placement, and security strategies that matter to homeowners and tech enthusiasts alike. By following these steps, you’ll reduce interference, improve stability, and simplify ongoing maintenance.
Planning Your Cox Router Deployment for Real Home Use
Before you touch the hardware, outline your goals: coverage for all floors, priority zones for work or gaming, and a security baseline that minimizes risk. The WiFi ecosystem in a typical home includes a mix of smartphones, laptops, tablets, smart speakers, and IoT devices. Your plan should account for signal strength in far rooms, upstairs/outdoor areas, and potential interference from microwaves or Bluetooth devices. According to WiFi Router Help, starting with a clear coverage map helps you position the Cox router and decide if you need a mesh system or a booster later. This planning step reduces trial-and-error and speeds up setup. In addition to performance, consider guest access and parental controls to manage who connects and when. A thoughtful deployment yields tangible benefits in speed, reliability, and safety for all connected devices.
Accessing the Cox Router Admin Page: Login and Basics
The admin interface is where you configure Wi‑Fi settings, security, and network management. Start by connecting a device to the Cox router—via Wi‑Fi or an Ethernet cable—and opening the default gateway URL (commonly something like 192.168.0.1 or 192.168.1.1). You will be prompted for a username and password; if you haven’t changed them yet, the defaults are typically found on a label on the device or in the manufacturer’s quick-start guide. For security, change the admin password immediately and enable two-factor authentication if available. The Cox app can also simplify this login process and provide quick access to common settings. If you’re switching from a third-party router, you may need to disable bridge mode or set the device to AP mode to avoid conflicts with the Cox router’s routing features.
Basic Wireless Settings: SSID, Password, and Encryption
Set a unique network name (SSID) that’s easy to recognize but not tied to your personal information. Create a strong passphrase using a mix of upper/lowercase letters, numbers, and symbols. Use WPA2‑PSK or WPA3 if your Cox router supports it, and disable WPS by default to close a common security hole. Consider separating 2.4 GHz and 5 GHz networks for better control: 2.4 GHz offers longer reach but slower speeds, while 5 GHz provides higher throughput with shorter range. If your router supports band steering, you can enable it to encourage devices to connect to the optimal band automatically. From a security perspective, regularly rotating passwords and reviewing connected devices helps keep intruders out.
Advanced Wireless Optimization: Channels, Band Steering, and Guest Networks
In crowded environments, picking the right channel reduces interference from neighbors. Manually selecting a channel on 2.4 GHz (usually 1, 6, or 11) for a stable baseline is a common best practice. For 5 GHz, there are more non-overlapping channels; enabling automatic channel selection can work, but manual tuning often yields better results in busy neighborhoods. If your Cox router supports guest networks, enable one with a separate password to isolate guest devices from your main network. This containment improves security while preserving convenience for visitors. You can also enable a firewall and review port-forwarding rules if you run servers or gaming consoles that require open ports, but avoid exposing devices unnecessarily.
Bridging, Modem Mode, and Your Home Network Topology
Some households opt to use their own router behind the Cox gateway, which can complicate routing if not configured correctly. If you plan to run a separate router, consider using bridge or modem‑in‑bridge mode to keep NAT manageable and prevent double‑NAT issues. Conversely, if you want everything on one device, keep the Cox router as the primary gateway and disable any secondary router’s NAT. This decision impacts device reach, streaming performance, and gaming latency. The key is to align your topology with the number of devices, your speed tier, and whether you need features like QoS or VPN support built into the router. If you’re unsure, start with the Cox router as the main unit and add a mesh system later, which often simplifies management while preserving performance.
Firmware Updates and Routine Maintenance
Firmware updates bring security patches, bug fixes, and feature enhancements. Check for updates in the admin interface or the Cox app and apply them when available. Enabling automatic updates is convenient, but you should still periodically verify the version and review release notes to understand changes that affect performance or security. Keeping a backup of your configuration can save time if you ever need to reset settings or replicate your setup on a new device. A proactive maintenance habit reduces downtime and helps you stay ahead of vulnerabilities.
Common Cox Router Issues and Troubleshooting Steps
Connectivity drops, slow Wi‑Fi, and devices failing to obtain an IP address are among the most common Cox router problems. Start with simple checks: verify power and coax connections, ensure the router isn’t overheating, and reboot the device. If you experience slow speeds, check device placement, reduce interference from cordless phones and microwaves, and ensure you’re on the correct band. For login issues, confirm you’re using the current admin credentials and clear browser caches or try a different browser/app. If problems persist, a factory reset may be necessary, but only as a last resort after backing up your settings. WiFi Router Help emphasizes a structured approach to diagnosing issues to prevent blind fixes.
Maintenance Routine and Quick-Start Checklist
A periodic maintenance routine keeps your Cox router performing well. Start with a 4-point checklist: 1) Verify firmware and apply updates; 2) Review connected devices and remove unfamiliar ones; 3) Confirm SSIDs and passwords, updating if necessary; 4) Perform a test speed check in multiple rooms to confirm coverage. Create a backup file of your configuration and store it in a safe place. Having a routine reduces chaos during network changes and helps you detect problems early.
Tools & Materials
- Coaxial cable from wall outlet(Ensures the Cox router has a signal to transition into your home network.)
- Cox router unit(The device provided by your ISP; power it on and keep it in an open space.)
- LAN Ethernet cable (optional)(Helpful for wired configuration or bridging with another router.)
- Laptop or smartphone(Used to access the admin interface via browser or Cox app.)
- Web browser or Cox app(Access admin panel; enable changes securely.)
- Pen and paper (optional)(For noting passwords and network names during setup.)
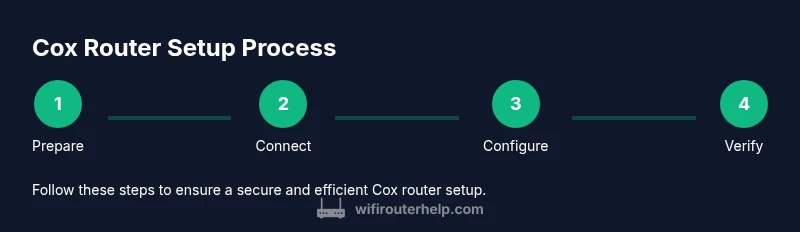
Steps
Estimated time: 45-60 minutes
- 1
Prepare your Cox router and workspace
Clear a space around the device to prevent heat buildup and interference. Gather your coax cable, power adapter, and a device to configure the router. This first step reduces surprises during setup and ensures you can follow the whole process without interruption.
Tip: Leave at least 1–2 feet of clearance on all sides for heat dissipation. - 2
Connect the coax and power
Attach the coaxial cable firmly to the wall outlet and the Cox router’s coax port. Plug the router into power and ensure the LEDs indicate normal boot. A stable physical connection prevents boot errors and helps you reach the admin page quickly.
Tip: Check for a solid connection—loose coax may cause intermittent outages. - 3
Power on and boot
Allow the device 2–5 minutes to boot fully. Do not unplug mid‑boot; a complete startup ensures all services come online. You’ll know it’s ready when the status lights indicate healthy activity.
Tip: If boot takes unusually long, try a soft reset by unplugging for 10 seconds and plugging back in. - 4
Access the admin page or app
Open a browser to the router’s login URL (often 192.168.x.1) or launch the Cox app. Use the default credentials if you haven’t changed them yet. If you can’t access the page, ensure your device is on the same network and try a different browser.
Tip: Bookmark the admin URL for quick future access. - 5
Change the admin password
Update to a strong, unique password and consider enabling two‑factor authentication if available. This step blocks unauthorized changes to the network and reinforces security.
Tip: Avoid easily guessable passwords or personal information. - 6
Configure Wi‑Fi name and security
Set a memorable SSID and a strong passphrase. Enable WPA2‑PSK or WPA3, disable WPS, and separate 2.4 GHz from 5 GHz if your device supports it. This combination improves both security and performance.
Tip: Do not reuse any default SSID or password. - 7
Update firmware and backup settings
Check for firmware updates and install them. Create a backup of your current configuration in case you need to restore settings after a reset or changes.
Tip: Keep a copy of your important network details offline. - 8
Optimize placement and test performance
Move the router to a central, open location away from walls and metal objects. Test speeds in key rooms and adjust placement or channel settings as needed to reduce dead zones.
Tip: A single placement tweak can significantly improve coverage. - 9
Document and finalize the setup
Record your network name, password, firmware version, and backup status. This makes future changes faster and helps you diagnose issues later.
Tip: Create a simple configuration sheet for quick reference.
People Also Ask
Where can I find my Cox router login details?
Login details are usually printed on a label on the router or provided in the Cox setup guide. If you’ve changed them and forgotten, use the official password reset process through the Cox app or contact customer support. Remember to backup any credentials securely.
Look on the router label for the default username and password, or use the Cox app to reset credentials.
How do I reset my Cox router to factory settings?
To reset, locate the reset button, usually recessed on the back. Hold it for 10–15 seconds with a paperclip until the lights flash. This returns the device to factory defaults. Note that you will need to reconfigure your network afterward.
Press and hold the reset button with a paperclip for 10–15 seconds until it reboots to factory settings.
Can I use my own router with Cox service?
Yes, you can use your own router, but you may need to put the Cox gateway in bridge or modem‑only mode to avoid double NAT. This often improves performance for gaming and streaming but can affect VoIP and some Cox features.
Yes, you can use your own router, but you might need to configure bridge or modem‑only mode to avoid double NAT.
What’s the difference between 2.4 GHz and 5 GHz on Cox routers?
2.4 GHz travels farther and penetrates walls better but is slower and more prone to interference. 5 GHz offers higher speeds with a shorter range. Balancing both bands improves overall performance.
2.4 GHz covers more area but slower; 5 GHz is faster but shorter range. Use both strategically.
How do I update firmware on a Cox router?
Check the admin page or Cox app for firmware updates and install them when available. Enabling automatic updates keeps your device secure with the latest features.
Look for firmware updates in the admin panel or Cox app and install when prompted.
What should I do if my devices won’t connect to the Wi‑Fi?
First, restart the router and the devices. Confirm the correct SSID is selected and the password is accurate. If needed, forget the network on the device and reconnect from scratch.
Restart the router and devices, then rejoin with the right password. If issues persist, forget and reconnect to the network.
How can I troubleshoot slow speeds on a Cox router?
Run speed tests in multiple rooms, check for interference, ensure the device is on the correct band, and verify firmware is up to date. Consider reducing connected devices or enabling QoS for priority traffic.
Test speeds in different rooms, check for interference, and update firmware. Adjust QoS if needed.
Should I enable a guest network on my Cox router?
Enabling a guest network improves security by isolating visitors’ devices from your main network. Use a separate password and monitor guest access as needed.
Yes, a guest network adds security by isolating guests from your main devices.
Watch Video
What to Remember
- Secure admin access with a strong password
- Separate 2.4 GHz and 5 GHz networks for better performance
- Enable WPA2/ WPA3 and disable WPS for stronger security
- Place the router centrally for uniform coverage
- Keep firmware updated and maintain backups