Router Cox: The Ultimate Guide to Cox Router Setup and Performance
A practical, step-by-step guide to setting up and optimizing a Cox router (router Cox) for reliable home Wi‑Fi. Learn installation, security, and troubleshooting with WiFi Router Help.

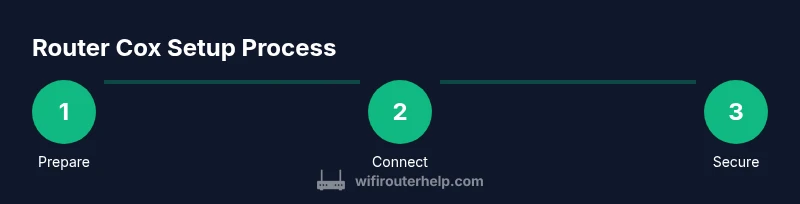
With a router Cox setup, you'll establish a secure home network by connecting the modem, selecting a strong admin password, and enabling WPA3 where possible. The WiFi Router Help team found that proper placement and channel choices significantly boost coverage. This guide walks you through a Cox router setup and optimization.
What does router Cox mean for home networks?
Router Cox isn't a single product; it’s a practical shorthand many homeowners use when discussing Cox Communications' internet gateway. In practice, the term covers a few common scenarios: using a Cox-provided gateway (a combined modem and router), bridging a separate modem with a third-party router, or configuring a standalone router behind the Cox device. The distinction matters because it changes how you enable features like bridge mode, NAT, or firewall rules, and it affects performance and support.
If you hire a professional or follow self-install guides, you may see advice tailored to Cox-supplied equipment versus third-party gear. For many households, starting with the Cox gateway set to bridge mode and then placing a separate router can yield cleaner performance and more control. The WiFi Router Help approach prioritizes clarity: identify your current setup, confirm your service plan, and choose the route that preserves essential features while maximizing security and coverage. Throughout this article, we’ll refer to "router Cox" as a practical umbrella term for all Cox-related router configurations.
Verifying service compatibility with Cox devices
Before you start, confirm your Cox plan supports using a third-party router or a bridge configuration. Check your account, the equipment list provided by Cox, and any notes about bridge mode or role of the gateway in your plan. If you’re in doubt, contact Cox support or review the support portal for your region. The goal is to know whether you should configure a full gateway, bridge mode, or a standalone router behind the Cox device. Understanding your plan helps you avoid double NAT issues, ensure proper firewall protection, and maintain parental controls where needed.
Quick-start: connecting your Cox modem and router
Begin by powering down devices and assembling your hardware: modem, router, and a computer or smartphone for setup. Connect the coaxial cable to the Cox modem and plug it in. Use an Ethernet cable to connect your computer directly to the modem for initial login. Open a browser and enter the gateway address shown on the device or in the manual. Follow the setup wizard to configure your network name (SSID) and password, choosing WPA3 if available. This step creates a stable baseline before you introduce a separate router or enable bridge mode if your plan allows it.
Positioning for best signal and interference management
Placement matters more than you might think. Keep the router elevated, central in the home, and away from thick walls, metal appliances, and large mirrors. Avoid closets and basements where signals tend to degrade. If you have multiple floors, consider a high point on a central stairwell or near the center of your living area. For homes with dense materials, you may need a mesh system or a Wi‑Fi extender to maintain even coverage. Small changes, like placing the router a few feet higher or switching away from cordless phones, can improve signal quality dramatically.
Accessing and configuring the router admin interface
Most Cox devices expose a web-based admin interface at a default gateway address (often found on the device label). Use a wired connection for initial login to avoid wireless dropouts. Change the default admin password immediately and configure a strong network password. Enable WPA3 where available, and disable WPS if the option exists. Review advanced settings like NAT, firewall, and port forwarding only if you understand the implications. Save changes and reboot if required to apply new configurations.
Security best practices for Cox routers
Security should be a core part of your setup. Use a unique, long passphrase for your Wi‑Fi network and enable WPA3‑Personal whenever possible. Regularly check for firmware updates and enable automatic updates if the feature is offered. Disable remote management unless you specifically need it away from home, and limit admin access to trusted devices. Consider enabling a guest network to isolate visitors from your main devices, and use parental controls where appropriate to manage content and screen time.
Performance optimization: channels, bands, and QoS
To maximize performance, understand the basics of 2.4 GHz vs. 5 GHz bands. 5 GHz offers higher speeds but shorter range; 2.4 GHz penetrates walls better but is more prone to interference. If your router supports auto channel selection, enable it; otherwise manually select clean channels with minimal interference from neighbors. Quality of Service (QoS) rules can prioritize time-sensitive traffic like video calls or gaming. For Cox setups, ensure the gateway is not blocking essential ports and that your own router’s QoS rules don’t conflict with the gateway’s settings.
If you’re using bridge mode, some QoS features may be disabled on the Cox device, so configure QoS on your third-party router for consistent performance.
Troubleshooting common issues with Cox routers
Common issues include dropped connections, slow speeds, or poor in-home coverage. Start with a simple reboot of the modem and router, then verify cables and power supplies. Check for firmware updates and confirm bridge mode settings if you’re using a separate router. If devices can’t obtain a valid IP address, release and renew DHCP settings on devices or reboot the gateway. For persistent problems, use a wired connection to test speeds and check for interference sources like microwaves or overlapping networks.
Upgrading and maintenance: when to replace and how to keep firmware fresh
Over time, hardware degrades and firmware becomes outdated. If you notice frequent drops, weak coverage, or slow performance despite optimization, consider upgrading to a newer router or a mesh system. Regular firmware updates matter for security and performance; enable automatic updates if possible. Keep a simple inventory of your network devices and their firmware versions, so you know when to upgrade components in your home network.
Tools & Materials
- Computer or mobile device with browser(Used to access the router admin page and run setup wizards.)
- Ethernet cable (Cat5e or better)(Preferred for stable, wired setup during initial configuration.)
- Cox account credentials(Needed to activate service and access account-based features.)
- Coaxial cable and a working Cox modem/router(Have the hardware ready before starting.)
- Optional: spare router for mesh or bridge mode(Useful if you plan to extend coverage beyond a single router.)
Steps
Estimated time: 45-60 minutes
- 1
Power down the modem
Shut off the Cox modem and any connected devices to prevent conflicts during setup.
Tip: Unplug all devices for 30 seconds before restarting. - 2
Connect the modem to power and the coax
Attach the coaxial cable to the modem and plug it into a power outlet. Wait for the indicators to stabilize.
Tip: Ensure coax connectors are securely fastened to avoid signal loss. - 3
Connect your computer to the modem with Ethernet
Use an Ethernet cable to connect your computer to the modem to access the admin interface.
Tip: Use a wired connection for the most stable setup experience. - 4
Access the router admin page
Open a browser and enter the gateway address shown on the device label or in the manual; log in with the default or provided credentials.
Tip: Check the device label for default login details before you start. - 5
Run the setup wizard and choose your network name
Follow prompts to set SSID and password; prefer WPA3 if available. Name your network clearly.
Tip: Avoid using personal info in the SSID to protect privacy. - 6
Set a strong admin password and enable encryption
Change the admin password and enable WPA3; disable WPS if possible.
Tip: Choose a long, random admin password and a separate strong Wi‑Fi passphrase. - 7
Update firmware
Check for firmware updates and install; expect a short downtime during the process.
Tip: Keep a backup of current settings before updating. - 8
Position the router for best coverage
Place the router centrally and elevated; avoid blocking by walls and metal appliances.
Tip: Experiment with height and location to maximize signal in problem areas. - 9
Test connectivity and save settings
Test with multiple devices and verify stable internet; save and document settings for future reference.
Tip: Note down your SSID and password in a secure place.
People Also Ask
Do I need to use the Cox router or can I use my own?
You can use your own router, but you may need to enable bridge mode on the Cox gateway or place your own router behind it. Check your plan details and Cox support for compatibility. This helps avoid double NAT and provides more advanced features on your own device.
You can use your own router, but you may need to enable bridge mode on the Cox gateway. Check your plan and Cox support for compatibility.
How do I log into the router admin page for a Cox setup?
Connect a device via Ethernet, then enter the gateway IP address shown on the device label into a web browser. Use the default credentials if you haven’t changed them, and then update to a strong admin password.
Connect via Ethernet and enter the gateway IP from the device label in your browser. Update the admin password after login.
What is bridge mode and when should I enable it?
Bridge mode disables the router functionality on the Cox gateway, allowing a separate router to handle routing and Wi‑Fi. Enable it if you want to use a more capable third-party router or a mesh system for larger homes.
Bridge mode turns the Cox device into a modem only, so your own router handles routing and Wi‑Fi.
How can I improve Wi‑Fi coverage in a multi-story home?
Place the router centrally, elevated, and away from dense obstacles. If coverage remains patchy, consider a mesh system or range extenders designed for larger homes.
Center and elevate the router, and if needed, add a mesh system for better coverage on all floors.
Should I enable remote management on Cox routers?
Disable remote management by default to reduce exposure to external access. Enable it only if you have a compelling reason and strong authentication in place.
Turn off remote management unless you truly need it, and keep security strong.
What should I do if my internet drops frequently?
First, reboot the modem and router. Check cables, confirm firmware is up to date, and review bridge vs. router settings. If issues persist, contact Cox support or consider a hardware upgrade.
Try rebooting, check cables, and ensure firmware is current. If it persists, contact Cox or upgrade hardware.
Watch Video
What to Remember
- Plan your setup by confirming Cox compatibility and bridge options.
- Prioritize central placement and updated firmware for best coverage.
- Use WPA3 and strong passwords to secure your network.
- Bridge mode can simplify topology and improve performance in some homes.