How to Access Virgin Router in Modem Mode: Step-by-Step Guide
Learn how to access a Virgin router when it’s in modem/bridge mode, with practical steps to regain control, safely exit bridge mode, and optimize your home network using your own router.

Accessing the Virgin router when the device is in modem/bridge mode usually means you cannot reach its admin page from devices on the LAN. To modify settings, you typically exit bridge mode or manage through your own router. This guide outlines safe steps, prerequisites, and options to regain control without compromising your network.
Why you might want to access the Virgin router while in modem/bridge mode
Understanding why you’d want admin access while the Virgin hub is in modem mode helps set expectations. In simple terms, modem/bridge mode disables the hub’s routing features to let a third-party router manage traffic, Wi-Fi, and firewall rules. While this configuration can improve performance for power users or homes with mesh systems, it often means the hub's built-in admin interface is limited or inaccessible from devices connected behind the bridge. According to WiFi Router Help, most troubleshooting and configuration tasks should be performed on your own router, while the Virgin device remains a passive bridge. If you need to adjust basic settings on the hub itself (for example, to disable Wi‑Fi or change the bridge status), you may be required to exit modem mode temporarily or use the official Virgin Media app as a management proxy. The key takeaway is clarity: bridge mode is designed to hand the reins to your own equipment, but there are safe paths to regain control when necessary.
What exactly is modem mode and what changes for your network?
Modem mode, often called bridge mode, turns the Virgin hub into a pure modem, removing its NAT, DHCP, and Wi‑Fi features. Your home network then relies on a separate router to assign IP addresses, segment networks, and enforce security rules. This setup can improve performance in congested homes and enables advanced features like VLANs, QoS, and guest networks that some third-party routers handle more robustly. However, because the hub is no longer managing those services, its own login page may not be reachable in the usual way, and some troubleshooting steps require switching back to standard router mode. WiFi Router Help emphasizes that bridging decisions should align with your home network goals, whether you optimize for speed, coverage, or control.
Before you start: prerequisites and safety considerations
Before attempting any changes, gather the essentials: a computer or mobile device with a web browser, an Ethernet cable for stable connections, and your Virgin hub’s model information (Hub 3/Hub 4/Hub 5). Note the default login credentials from the hub sticker or documentation, as you may need them to exit bridge mode or access the hub briefly for verification. Make sure you have a backup plan for network access in case you need to revert. If you’re unsure about the current state of bridge mode, check the status indicators on the hub (often a bridge or online light) and confirm whether your own router is actively handling DHCP and NAT. Safety tip: avoid making multiple simultaneous configuration changes; a single, coordinated plan reduces the risk of losing connectivity.
Accessing the Virgin Hub admin page when in bridge mode: reality check
In many implementations, once the hub is in bridge mode, the admin interface becomes less accessible from downstream devices because NAT and DHCP functions are disabled. This is not a failure—it's by design. If you must view or adjust hub settings while bridging, you typically need to connect a device directly to the hub via Ethernet and use the hub’s local management address that the device exposes (if supported). Some users report that the official Virgin Media app can display limited bridge-related options or help confirm the current mode, but full admin access may require temporarily exiting bridge mode. The WiFi Router Help team notes that the most reliable way to manage the hub while bridging is to coordinate changes with the connected router, then revalidate connectivity after adjustments.
Methods to regain admin access: exit bridge mode, use passthrough, or manage via the connected router
There are three practical paths when you need admin access or to adjust bridge status:
- Exit bridge mode: Temporarily revert to router mode to regain full hub access, make your changes, then re-enable bridge mode.
- Use passthrough or DMZ with your own router: Some hubs offer a passthrough or DMZ option that forwards all traffic to your own router while keeping bridge-like behavior for certain devices; this may still limit some hub settings.
- Manage via the connected router: Perform the changes you need on your primary router (port forwarding, QoS, parental controls) since it will be the network’s control point while in bridge mode.
Pro tip: document any changes and verify connectivity step by step to avoid leaving your network disjointed. The goal is to stabilize the network after enabling bridge mode, not to lock yourself out of essential features.
Step-by-step scenarios with common Virgin Hub models in modem mode
Virgin has produced several model generations, with Hub 3, Hub 4, and Hub 5 sharing the same core bridge-mode behavior. Here’s a framework you can adapt:
- Confirm the hub is in bridge mode via the Virgin Media app or the hub’s status lights.
- Connect a computer directly to the hub using Ethernet to check if a local admin URL appears.
- If the admin page is inaccessible, prepare to revert to router mode to make changes.
- Once changes are completed on your own router, re-enable bridge mode and retest connectivity.
The process emphasizes a controlled approach: make one change at a time, test, and then proceed. If your goal is to enable features like a guest network or parental controls, those tweaks are typically better handled by your primary router in bridge mode.
Troubleshooting common issues when bridging
Bridge mode can introduce the following issues: inability to access hub admin, intermittent connectivity between devices, or double-NAT if the secondary router isn’t configured properly. Common fixes include restarting both devices (power-cycle), ensuring the connected router is actively handling DHCP, and verifying that the WAN port on your router is assigned an IP from the correct subnet. If you need to revert, use the hub’s reset button or the official app to exit bridge mode. Finally, always ensure firmware on your router and hub is up to date to minimize compatibility issues.
Long-term strategies: bridge vs mesh, or upgrading hardware
Bridge mode is a powerful option when you want to deploy a high-performance third-party router or a mesh system. However, it isn’t always the best long-term solution for every home. If your goal is seamless roaming, fewer dead zones, and easier management, consider a mesh Wi‑Fi system paired with a robust main router. If you stay in bridge mode, invest in a router with strong QoS and security features, and keep your firmware current. WiFi Router Help’s guidance favors a balanced approach: bridge only if you need a dedicated router control, otherwise a modern mesh system can offer superior coverage with simpler maintenance.
Security and maintenance tips after bridging to protect your home network
After enabling bridge mode, keep security front and center. Ensure your primary router uses a strong, unique admin password, enable WPA3 if available, and configure a guest network for visitors. Regularly update firmware on both your router and the Virgin hub if you must keep bridge mode active. Disable any unused services on the hub and monitor connected devices for unusual activity. A proactive maintenance plan reduces the risk of exposures and keeps your home network running smoothly.
Tools & Materials
- Ethernet cable(Cat5e or better; use a wired connection for reliability when accessing admin pages)
- Computer or mobile device with a web browser(Connected to the Virgin hub or your own router for management tasks)
- Virgin Media hub model info(Model number and login credentials from the device sticker or account portal)
- Your primary router or mesh system(Used to manage the network when the Virgin hub is in modem/bridge mode)
- Backup plan (notes of current settings)(Optional; helps you restore settings if something goes wrong)
Steps
Estimated time: 45-75 minutes
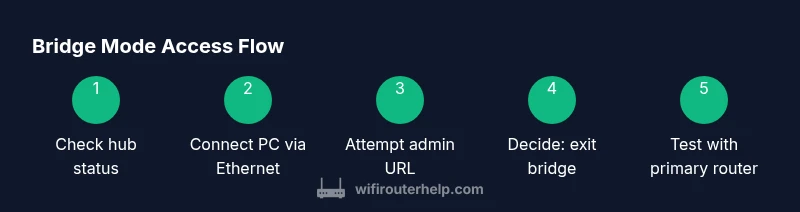
- 1
Verify current mode and prepare
Check the Virgin hub status lights and the bridge/bridge-like indicators in the app. Gather the admin credentials and ensure you have a stable wired connection to the hub or to your own router for testing. This step reduces surprises and ensures you’re ready to proceed.
Tip: Document the current configuration before making changes. - 2
Connect a device directly to the hub
Use an Ethernet cable to connect a laptop or PC to one of the hub’s LAN ports. This direct link helps you access any local admin interface if temporarily available and reduces the risk of connectivity issues during changes.
Tip: Always prefer a wired link when adjusting network devices in bridge mode. - 3
Attempt to access the hub admin page
Open a browser and try the hub’s local management URL (as indicated on the device). If the admin page loads, you can view bridge status and consider exiting bridge mode if needed. If it does not load, proceed to the next steps.
Tip: If you can’t access it, don’t force settings; move to the exit-bridge option. - 4
Exit bridge/modem mode (if changes require it)
If you need to adjust hub-level settings, revert the hub to router mode using the app or the reset procedure described in the manual. Make your changes, then re-enable bridge mode and re-test.
Tip: Only perform this if you’re comfortable with network reconfiguration. - 5
Configure your own router for control
Log in to your primary router and apply desired settings (Wi‑Fi name, password, guest network, QoS, port forwarding). Ensure DHCP and NAT are handled by this router while the hub is in bridge mode.
Tip: Keep a consistent admin password across devices for security. - 6
Test connectivity and device behavior
Disconnect and reconnect devices to verify they obtain IP addresses from your primary router and that internet access remains stable. Check wired and wireless devices for consistent performance.
Tip: Run a quick speed test on multiple devices to confirm no bottleneck after changes. - 7
Document the changes
Record what was changed, including bridge status, router settings, and firmware versions. This record helps with future troubleshooting and reversion if needed.
Tip: Store notes in a known location or a network setup doc. - 8
Plan for future maintenance
Schedule periodic checks for firmware updates and security settings on both devices. Prepare a simple rollback path if you encounter issues after updates.
Tip: Enable automatic security updates if possible on your router. - 9
Confirm stability and close the loop
Run multiple tests over several hours to ensure stability and consistent performance. If issues crop up, revisit bridge status and revalidate the configuration.
Tip: Keep a regular maintenance window to ensure ongoing reliability.
People Also Ask
Can I access the Virgin Hub admin page while the device is in modem/bridge mode?
In many setups, the hub’s admin interface is not accessible when in bridge mode. To view or change hub-specific settings, you may need to exit bridge mode or use the Virgin Media app to verify status. Plan changes on your primary router instead whenever possible.
Typically not accessible. Exit bridge mode to view full admin options, or verify status with the Virgin app and manage most changes on your own router.
How do I exit bridge mode safely?
To exit bridge mode, use the Virgin Media app or a connected computer to access the hub’s settings and toggle off bridge mode. Reboot the hub if required, then test internet on your primary router before re-enabling bridge mode if desired.
Use the app to disable bridge mode, reboot, and test your network before re-enabling bridge mode if needed.
What should I do if I forget the hub admin password?
If you forget the login credentials, consult the sticker on the hub or the official Virgin Media support page for reset instructions. A factory reset should be a last resort as it reverts settings and could disable bridge mode unless reconfigured.
Check the hub sticker or Virgin support for reset steps. Use a factory reset only if you have a recovery plan for your network.
Will bridging the Virgin hub affect Wi‑Fi on the hub itself?
Yes, in modem/bridge mode, the hub’s Wi‑Fi is often disabled or limited because another router handles wireless. If you need Wi‑Fi coverage from the hub, you should disable bridge mode or rely on your own router for wireless coverage.
Bridge mode usually turns off the hub’s Wi‑Fi, so rely on your own router for wireless.
Is there a risk in changing bridge settings?
Any network reconfiguration carries risk of temporary downtime. Plan changes during a low-use period, back up settings, and test each step before moving on to the next.
There is some risk of downtime; back up settings and test steps one by one.
Should I consider a mesh system instead of continually bridging?
If you struggle with coverage, a mesh system with a capable primary router can outperform a bridged setup, offering easier management and seamless roaming. Evaluate your home layout and performance needs before choosing.
A mesh system can provide better coverage and easier management than a bridged setup in many homes.
Watch Video
What to Remember
- Bridge mode hands control to your own router; hub admin access can be limited.
- Revert to router mode temporarily if you must adjust hub settings.
- Document changes and test connectivity after each adjustment.
- For best long-term performance, consider a modern mesh system with a capable primary router.