What to Do When Your Router Is Blinking
Urgent, step-by-step troubleshooting for a blinking router. Learn safe power cycles, firmware checks, cable tests, and when to seek help to restore stable home Wi‑Fi fast.

A blinking router usually signals a firmware update, a connectivity fault, or a hardware issue. Start with a safe power cycle (unplug, wait 15 seconds, plug back in) and verify the LED pattern. If the blink continues after a reset, check cables and try a factory reset only after backing up settings; otherwise contact WiFi Router Help for guidance.
Why blinking happens on modern routers
According to WiFi Router Help, a blinking LED on a consumer router is often a sign of background activity or a fault that needs attention. In most cases, blinking patterns are not random; they map to specific situations—firmware updates, startup sequences, a WAN or LAN connection hiccup, or overheating when the device struggles to maintain a stable link. Recognizing the exact pattern speeds and color combinations helps you triage quickly and avoid unnecessary resets. Before you dive into fixes, note the blink type: is it a single blink, a slow steady blink, or a rapid, continuous flash? Each pattern can point you toward a different root cause, which is why having a clear checklist matters. This article keeps the focus on the two most common causes in home networks: a firmware process that needs to finish and a simple yet stubborn connectivity fault that affected the router’s ability to talk to the modem and devices.
Quick safety and initial checks
Safety comes first. Start with the basics before you touch firmware or reset settings. Unplug the router from power and inspect the power adapter to ensure it matches the model’s official spec. If you’re using a surge protector, try a direct outlet to rule out a faulty strip. While the device is unplugged, check all visible cables for kinks or loose connectors at both ends—WAN, LAN, and the power cable. After you reattach everything, plug the unit back in and observe the LED behavior for a full minute. If the blink persists, you’ve ruled out a loose plug and you’re ready to move to deeper checks. In this section, we’ll outline the checks that reliably save time and reduce risk.
Firmware updates vs hardware faults
Many blinking patterns are tied to firmware processes attempting to complete. If a router is applying an update, the blink may be slower and intermittent. However, a sudden, rapid blink that doesn’t settle often signals a hardware or boot error. Accessing the router’s admin interface (usually via a local IP like 192.168.1.1) can reveal whether an update is pending or stuck. If you see a notification asking you to reboot after an update, perform the reboot as prompted. If the UI shows a stalled update or a failed boot sequence, you’ll need a different course of action, such as a firmware recovery or factory reset. Throughout, avoid unverified firmware from untrusted sources, as this can worsen instability.
Cable, power supply, and placement checks
A flashing LED can be caused by physical issues rather than software. Verify the power adapter is the original or an approved replacement and that it delivers stable voltage. Inspect the Ethernet cables for frays, kinks, or loose shielding and reseat every connection. If you’re using a detachable modem, ensure the coaxial or fiber cable is locked in and the modem is syncing correctly. Consider the router’s placement: heat buildup or proximity to other electronics can trigger thermal throttling, which can manifest as irregular blinking. Move the router to an open, cool area and ensure airflow around vents. After these checks, power cycle again and watch for a pattern change.
Diagnostic flow: building your own checklist
A systematic approach helps you isolate issues without guesswork. Start by confirming the blink type (single, slow, rapid). Map it to the most likely cause: power/connection problem, firmware update, or hardware fault. Create a short table in your notes: symptom → suspected cause → tested fix. For each test, document the outcome so you don’t repeat steps. This structured flow saves time, especially when multiple devices share the network. Remember to keep your firmware login credentials handy and back up important settings before any resets. If you’re testing multiple times and nothing changes, it’s time to escalate to a higher level of support. WiFi Router Help offers a clear framework to guide you through the process.
Step-by-step fixes for the most common blinking pattern
Here is a practical sequence you can apply when the LED blink appears to be a minor connectivity hiccup rather than a full hardware fault. 1) Perform a safe power cycle: unplug, wait 15 seconds, plug back in. 2) Check all cables, reseat WAN and LAN connections, and ensure the modem is powered. 3) Try a basic reboot of the modem; if you see a micro-boot on the router, let it complete. 4) Access the router’s admin page and inspect the status: if a firmware update is pending, allow it to complete or trigger a manual update from the official UI. 5) If the LED remains inconsistent, perform a factory reset only after you’ve backed up essential settings. 6) Reconfigure briefly with minimal changes to verify stability before restoring full customization. 7) If it still blinks, contact your ISP or the manufacturer’s support. 8) Keep a maintenance log to document recurring patterns and potential environmental causes.
Preventive habits to avoid future blinking
Proactive maintenance reduces the odds of recurring blinking. Schedule a periodic firmware check (monthly or quarterly) and enable automatic updates if supported. Use a singular, wireless channel set to avoid interference in dense environments, and rotate passwords to keep devices secure. Place the router away from heat sources, and ensure ventilation remains unobstructed. Keep a small spare Ethernet cable on hand for quick swaps, and regularly inspect cables for wear. Finally, document your network topology and backup settings so you can recover quickly after a reset. These habits make blinking patterns less disruptive and speed up recovery when issues arise.
When to seek professional help
If you’ve exhausted the basic steps and the LED continues to blink in any pattern that doesn’t match a standard update, it’s time to seek professional help. A technician can test the device’s power rails, diagnose internal hardware faults, and verify compatibility with your modem and other equipment. If your router is under warranty, contact the manufacturer for a replacement or repair option. For many households, a service call may be the most efficient path to restore stable Wi‑Fi, especially in complex setups like home offices with several access points. Remember, ongoing instability can also indicate a broader network issue beyond the router itself.
Blink patterns in smart homes and mesh networks
In homes with multiple access points or a mesh system, blinking LEDs can indicate different problems than a single-router setup. A blinking node might suggest a backhaul issue, interference from nearby networks, or a firmware mismatch between nodes. Start by testing one node at a time, updating firmware across the network, and verifying synchronization between devices. For mesh setups, ensure that each node is placed within range of its parent and that backhaul settings are correct. If a node is blinking blue or amber, consult the mesh system’s app-based diagnostics for signal strength and channel usage. Addressing these patterns often prevents cascading disconnects across the entire network.
Steps
Estimated time: 60-90 minutes
- 1
Power cycle
Unplug the router and modem, wait 15–30 seconds, then plug back in. Allow 60 seconds for the device to boot and reestablish links. Check whether the LED pattern changes.
Tip: Use a wired test device to confirm basic connectivity during this step. - 2
Check cables
Inspect all cables for wear and reseat every connection (modem to router, router to devices). Replace any frayed Ethernet cables and ensure port LEDs respond as expected.
Tip: Avoid using damaged cables to prevent intermittent faults. - 3
Admin panel status
Log into the router’s web interface or app and look for firmware notes, updates, or error messages. If an update is pending, let it run; if it’s stuck, prepare for a recovery option.
Tip: Have your admin credentials handy before making changes. - 4
Firmware update
If a firmware update is available or in progress, allow it to complete without power interruptions. Do not interrupt an active update.
Tip: Only update through official sources. - 5
Factory reset
If issues persist, back up your settings and perform a factory reset. Reconfigure essentials first and test connectivity before restoring advanced settings.
Tip: A reset wipes custom settings; have a recovery plan. - 6
Reconfigure network
Set up your network again with basic parameters. Verify WAN connectivity and test with multiple devices.
Tip: Document your setup in case you need to reproduce it. - 7
Testing and monitoring
Monitor the LED pattern and network performance for 24–48 hours. Check for stable Wi‑Fi, no drops, and consistent speeds.
Tip: Keep a simple log of outages and remedies. - 8
Escalation
If blinking continues after all steps, contact support with the steps you’ve taken and any fault codes or LED patterns observed.
Tip: Include model number and firmware version when talking to support.
Diagnosis: Router LED blinking pattern persists after power cycle
Possible Causes
- highFirmware update in progress or failed update
- mediumLoose or damaged cables or ports
- mediumPower supply or outlet instability
- lowHardware fault or overheated router
Fixes
- easyPower cycle the router and modem, then observe LED behavior
- easyInspect and reseat WAN/LAN cables; replace damaged cables
- easyAccess the admin panel to check firmware status and apply updates if needed
- mediumPerform a factory reset only after backing up settings
- easyTest with a known-good power supply or directly from outlet without surge protector
- mediumIf unresolved, contact manufacturer support or ISP for further diagnostics
People Also Ask
Why is my router blinking after I updated the firmware?
A post-update blink can indicate the device is finalizing changes or that the update encountered a minor issue. If the UI shows success, monitor stability; if not, reattempt the update from the official page or perform a clean reboot.
After an update, blinking can mean the update is finishing or there's a hiccup. Check the official update status in the router UI and restart if needed.
Should I unplug the router during a storm or power outage?
Unplug during severe weather to prevent surges from damaging the device. When power is restored, perform a power cycle to reinitialize connections.
Unplug during a storm to protect the router, then plug back in and restart when safe.
Is a factory reset safe if I don’t remember the settings?
Factory reset wipes custom settings. Back up only essential details, like the Wi‑Fi name and password, before resetting. You can reconfigure these quickly afterward.
A factory reset erases settings—back up what you can, then reconfigure your network.
What if the blinking pattern changes after a repair step?
A pattern change can indicate a new state. Recheck the admin panel for updated statuses and, if needed, repeat the step-by-step flow from the start with careful observation.
If the blink changes, revisit the UI to see current status and adjust steps accordingly.
Can a blinking router affect smart home devices?
Yes. A flaky router can disrupt hubs, cameras, and sensors. Stabilize the router first, then re‑pair or re‑connect smart devices as needed.
A blinking router can upset your smart home. Stabilize it first, then reconnect devices.
Is firmware update always required when blinking?
Not always, but many times a pending or failed firmware update causes blinking. Check the router UI, and apply updates if recommended by the manufacturer.
Often blinking means a firmware update is needed or unfinished. Check and apply updates from the official page.
Watch Video
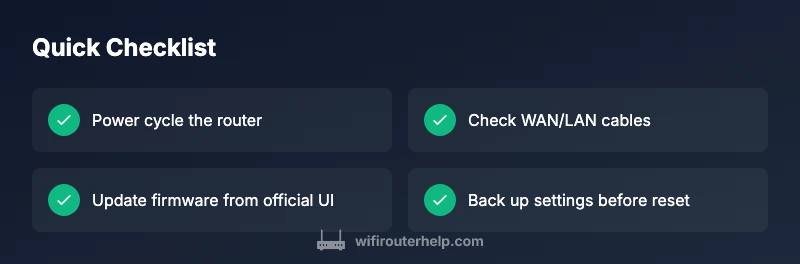
What to Remember
- Power cycle first—it's often enough to resolve blinking.
- Distinguish firmware updates from hardware faults by checking the admin UI.
- Back up settings before resets to avoid loss of configuration.
- Escalate if patterns persist after all safe steps.