Tplink Wifi Extender Setup and Optimization
Learn how to install and optimize a tplink wifi extender to expand coverage and reduce dead zones. This step-by-step guide covers placement, setup, testing, and basic troubleshooting for a stronger home network.

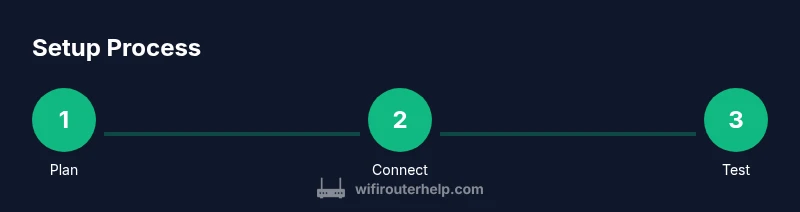
By following this guide, you will install and optimize a tplink wifi extender to broaden coverage, minimize dead zones, and improve streaming and gaming. You’ll need a TP-Link extender and a compatible router, plus access to the extender’s app or WPS. The steps cover placement, setup, testing, and basic security.
tplink wifi extender: boosting coverage for a modern home
According to WiFi Router Help, a tplink wifi extender can fill in dead zones, especially in multi-story homes and larger floor plans. It works by receiving the existing WiFi signal from your router and rebroadcasting it to areas with weak signal. The goal is a stronger, more reliable network without running new cables. In practice, you’ll notice improved streaming, smoother video calls, and steadier online gaming once placement and basics are dialed in. This section explains why a tplink wifi extender matters and what you can realistically accomplish when you set it up correctly. The guidance here is designed for homeowners and tech enthusiasts who want reliable, step-by-step instructions rather than guesswork.
Core capabilities and limitations of TP-Link extenders
TP-Link extenders are designed to extend a wireless network, not replace your router. They typically support dual-band operation and a straightforward setup process. Benefits include easier coverage in remote rooms and stairwells; limitations include potential speed reductions due to wireless backhaul and the need to balance placement and channel selection. Understanding these trade-offs helps you set realistic expectations for a tplink wifi extender in your home network.
How to choose the right model for your home
When selecting a tplink wifi extender, assess your home layout, the number of rooms to cover, and whether you want a simple plug-in device or something with an Ethernet port for a wired backhaul. Look for units that support the common frequency bands, offer a straightforward web or mobile app setup, and provide clear security options. If you have several dead zones across multiple floors, prioritize models with stronger antennas and better backhaul options. Remember, a budget extender can improve coverage, but a mesh system may be a better long-term fit for very large homes.
Placement strategies for best coverage
Placement is the single most important factor in extender performance. Aim for a spot roughly halfway between your router and the dead zone, ideally on a shelf about chest-high and away from obstructions like thick walls, metal appliances, and microwaves. Avoid placing the extender behind TVs, inside cabinets, or in bathrooms where humidity can impact electronics. If you have a multi-story home, test signal strength on each level and adjust height and orientation of the device to maximize coverage where you need it most. A little experimentation goes a long way in achieving consistent performance.
Basic setup: wired vs wireless backhaul
Decide whether to use wireless backhaul or a wired backhaul if your extender supports Ethernet. The wireless option is quick: plug in, connect to the extender using WPS or the extender’s web/app, and choose to extend the existing network. A wired backhaul, when possible, can provide more stable speeds and reduce interference, especially in busy households. If you can, route an Ethernet cable from the router to the extender to unlock the best possible performance for streaming boxes or gaming consoles. This setup approach reduces the hit to throughput often seen with wireless backhaul.
On-device configuration: using WPS, or web/app setup
Start with WPS if both devices support it; press the WPS button on the router, then on the extender, and wait for the connection lights to stabilize. If you prefer manual setup, connect to the extender’s temporary network and open the web UI or mobile app. Follow prompts to select your home network, enter your password, and decide whether to reuse the same SSID or create a separate one for the extended network. For most households, using the same SSID simplifies roaming as you move around the home. Make sure you enable the strongest security (WPA2 or WPA3) during this step.
Testing and verifying performance
After setup, test in rooms that previously struggled with signal. Run speed tests and compare results to your baseline before installing the extender. Check both download and upload speeds, and verify stable connections as you move through the space. If performance isn’t up to expectations, try repositioning the extender, adjusting its antennas (if present), or selecting a different channel on your router. Small changes can yield noticeable improvements in real-world use like video calls and gaming.
Security and maintenance tips
Keep firmware up to date and enable modern security settings. Change default admin passwords on the extender and disable remote management unless you specifically need it. If you have a guest network configured, ensure it uses separate credentials from your main network. Regularly review connected devices and run periodic speed tests to catch any issues early. These practices help ensure your extended network remains secure while you enjoy improved coverage.
Troubleshooting common issues
If you encounter a failure to connect, weak signal, or unstable roaming, start with a full reboot of both devices and re-check firmware versions. Verify you are using the latest TP-Link software and that the extender is configured to extend the correct network. If MAC filtering is enabled on the router, temporarily disable it to test connectivity, then re-enable after the extender connects. When in doubt, reset the extender to factory defaults and repeat setup from scratch to rule out misconfigurations.
Next steps: when to upgrade or consider mesh
A tplink wifi extender is a practical bridge for improving coverage, but mesh networking can provide an even more seamless experience across many rooms. If you continue to experience multiple dead zones or frequent signal drops, consider a TP-Link mesh system or a higher-end extender with better backhaul options. Plan a staged upgrade starting with the most problematic area and extend gradually as needed to achieve full home coverage.
Tools & Materials
- tplink wifi extender(Model unspecified; ensure compatibility with your router)
- router(802.11n/ac/ax supported; ensure access to admin interface)
- smartphone/tablet/PC(for setup via app or web UI)
- Ethernet cable(use if your extender supports wired backhaul)
Steps
Estimated time: 25-45 minutes
- 1
Gather equipment and prep
Collect the tplink wifi extender, your router, and a device for setup. Confirm you know the router's admin password and the current network name (SSID). This ensures you can complete both wireless and wired setup options without interruptions.
Tip: Have the network name and password ready to simplify the initial login. - 2
Choose the optimal placement
Identify areas with weak coverage and plan a location roughly halfway between the router and the dead zone. Elevate the device if possible and avoid thick walls or metal appliances that could block signals.
Tip: Use a mobile device to measure signal in candidate spots before finalizing placement. - 3
Power on and reset if needed
Plug in the extender and wait for the status LED to indicate ready. If you suspect a prior misconfiguration, perform a factory reset before starting.
Tip: A reset helps ensure a clean slate for setup and reduces login issues. - 4
Connect to the extender's setup interface
Connect to the extender using WPS or its temporary network, then open the web interface or app to begin configuration. Wait for the setup screens to load and follow prompts to connect to your home Wi‑Fi.
Tip: If WPS fails, switch to the manual setup path via the extender’s UI. - 5
Configure network name and security
Decide whether to reuse the same SSID or create a separate one for the extended network. Enable WPA2 or WPA3 security and set a strong password.
Tip: Using the same SSID can simplify roaming; if issues occur, try a separate SSID temporarily. - 6
Choose backhaul method
If you can run Ethernet, use it for a wired backhaul to maximize stability. If not, use wireless backhaul and select the best channel for both 2.4 GHz and 5 GHz bands.
Tip: Wired backhaul often delivers better streaming and gaming performance. - 7
Test connectivity on the far side
Move a test device around the home to test signal and speeds. Record the results in key rooms to compare with your baseline.
Tip: Use multiple devices to get representative results across real-world usage. - 8
Optimize placement and channels
If speeds or coverage aren’t ideal, reposition the extender or adjust the router’s channel settings. Sometimes a small angle change can make a big difference.
Tip: Consult the extender/app signal indicator to guide placement changes. - 9
Secure and maintain
Update firmware regularly, change admin credentials, and review connected devices. Enable auto-updates if possible.
Tip: Keep a simple log of settings in case you need to reproduce the setup later.
People Also Ask
What is a tplink wifi extender and how does it work?
A TP-Link wifi extender repeats your existing wifi signal to broaden coverage. It creates a second access point in the extended area and typically shares the same network name. Proper setup helps reduce dead zones and improve reliability.
A TP-Link extender repeats your home Wi‑Fi to fill in gaps, giving you better coverage.
Do I need the TP-Link app to set up the extender?
No, you can set up using WPS or the extender’s web interface. The app adds convenience and extra features but is optional.
You can set up with the app or via the web interface.
Can a TP-Link extender increase my internet speed?
Extenders extend coverage and may not increase raw internet speed. They can improve usable throughput where signals were weak, but throughput can be reduced due to wireless backhaul.
Extenders help you reach far corners, but they can slightly reduce speed due to backhaul.
Where should I place the extender for best results?
Place it midway between the router and the dead zone, elevated and away from walls and metal objects. Avoid putting it behind appliances that block signals.
Put it halfway between router and dead zone, high up and away from obstructions.
How can I tell if the extender is connected properly?
Check the extender’s LED indicators or the app to confirm a strong link to the main router. Ensure you can access the internet on a device connected through the extender.
Check the lights or app to confirm a solid connection.
What if the extender won't connect after setup?
Reboot both devices, verify firmware versions, and ensure you are not blocking the extender with MAC filtering. If needed, reset the extender and retry the setup from scratch.
Restart both devices, check firmware, and try again from scratch if needed.
Watch Video
What to Remember
- Place strategically for best coverage
- Choose wired backhaul when possible
- Test and adjust placement to optimize signal
- Keep firmware up to date for security