TP-Link AC1200 Extender Setup Guide
Learn how to set up and optimize a TP-Link AC1200 extender to extend coverage, boost speeds, and secure your home Wi‑Fi with practical, step-by-step guidance.

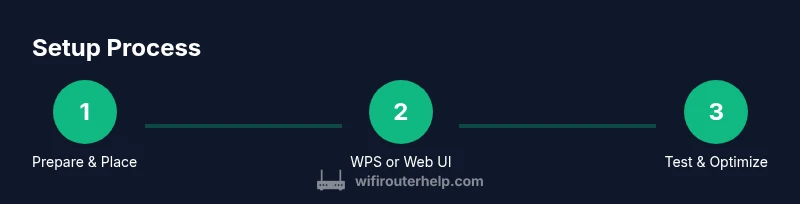
This guide shows how to set up and optimize a TP-Link AC1200 extender to extend Wi-Fi coverage in your home, troubleshoot common issues, and keep your network secure. You'll learn best-practice placement, whether to use WPS or the web interface, and how to verify performance with real-world tests. You only need your router, the extender, and a device to configure settings.
Understanding how the tp link ac1200 extender works
The tp link ac1200 extender is designed to pick up your existing Wi‑Fi signal from the router and rebroadcast it, effectively creating a larger network footprint. It uses dual-band radios to deliver improved coverage across your home while maintaining reasonable throughput. For homeowners and tech enthusiasts, knowing the basics helps you choose the right placement and configuration. Remember: the extender does not replace your router; it extends its reach. According to WiFi Router Help, understanding the device’s placement and settings is the key to reliable performance in 2026.
Throughout this article you’ll see practical, jargon-free guidance specific to the tp link ac1200 extender, including how to set it up using either WPS or a browser-based interface, and how to verify that your extended network meets your household needs. The information is written with homeowners in mind, so you can confidently tackle common home networking scenarios without confusion.
Planning extender placement for maximum coverage
Placement is the single most impactful factor for the tp link ac1200 extender’s performance. Start by identifying dead spots in your home—areas where streaming or gaming stutters or disconnects occur. Aim to place the extender halfway between your router and the area that needs coverage, ideally where the extender still receives a strong signal from the router. Avoid placing it behind large obstacles like thick walls, metal appliances, or inside cabinets, which can dramatically reduce signal strength. A simple rule of thumb is to test signal strength by walking the space with a mobile device while monitoring the network bars; adjust as needed until you reach stable performance. WiFi Router Help’s guidance emphasizes practical testing over guesswork to determine optimal placement, a strategy that has served many households well in 2026.
Setup methods: WPS vs. web interface
You have two reliable setup paths with the tp link ac1200 extender. WPS is fast: press the WPS button on your router, then on the extender, and wait for a solid connection indicator. If your router lacks WPS or you prefer more control, use the web-based setup: connect to the extender's temporary network, open the admin page, and follow the guided setup to join your existing SSID or create a new one. The web approach offers deeper options like selecting a specific channel, configuring a guest network, and enabling security features. In both cases, ensure you are configuring the extender to use the same WPA2/WPA3 security as your primary router to maximize protection across the extended network.
Configuration tips for stable performance
After initial setup, fine-tune the tp link ac1200 extender for reliability. Use the admin interface to verify firmware is current and enable automatic updates if possible. Set a strong, unique password for the extender’s admin page and avoid leaving WPS enabled if you don’t need it for daily use. Enable a guest network for visitors to keep your main network secure, and consider enabling QoS if you have a mix of streaming, gaming, and work-from-home traffic. Finally, run a basic throughput test from multiple rooms to ensure the extended network meets your speed expectations.
Troubleshooting common issues with the tp link ac1200 extender
If performance drops after setup, confirm that the extender is still receiving a solid signal from the main router. Reposition if necessary and re-run the setup steps. Double-check that both devices are on the same security protocol and that the extender’s firmware is up to date. If devices fail to connect, reset the extender to factory settings and start fresh with the configuration wizard. For persistent issues, check for interference from neighboring networks or appliances and adjust the extender’s channel or placement accordingly.
Security and maintenance best practices
Keep your TP-Link AC1200 extender secure by regularly updating firmware, using strong unique passwords for both the extender and your main network, and disabling unnecessary features like WPS on the router side if not needed. Periodically review connected devices and revoke access for anything unfamiliar. Document the SSID and password in a safe place, and consider using a separate guest network for visitors to minimize risk to your primary network. Regular maintenance reduces the likelihood of silent slowdowns and security vulnerabilities.
Tools & Materials
- TP-Link AC1200 extender(Essential hardware to extend Wi-Fi coverage)
- Router with active Wi-Fi network(Your existing network to be extended)
- Smartphone or computer(Device to configure the extender)
- Wi-Fi network name (SSID) and password(Needed to join and configure the extended network)
- Ethernet cable (optional)(Helpful for a wired backhaul during setup)
Steps
Estimated time: 30-60 minutes
- 1
Prepare your network and locate the extender
Identify a candidate location halfway between the router and the area needing coverage. Ensure power, and that you have access to the router’s SSID and password. If possible, confirm the router and extender firmware versions are current before starting.
Tip: Use a quick site survey: walk from the router outward and note where signal strength remains strong enough to support setup. - 2
Plug in the extender and power it up
Plug the tp link ac1200 extender into a nearby outlet and wait for the power LED to indicate readiness. If you can, place the extender so the LED faces the room you want to cover for easier alignment during setup.
Tip: Avoid power strips or surge protectors that can dampen signal. - 3
Connect to the extender using WPS (optional)
If your router supports WPS and you prefer a quick setup, press the WPS button on the router, then press the WPS button on the extender. Wait for the LED to show a stable connection before proceeding.
Tip: Use WPS only if you trust your home network security and want convenience over control. - 4
Configure via web UI or mobile app
If not using WPS, connect a device to the extender's temporary network, open the admin page, and follow the guided setup to join your existing Wi-Fi. Choose to clone the main SSID or create a new one, and set security to WPA2/WPA3 as supported.
Tip: Prefer manual setup for more control over channels and security features. - 5
Test signal and adjust placement
Move the extender to a better position if you notice dead zones persist. Re-test in multiple rooms to confirm coverage improvements and stable throughput. Update firmware if prompted during tests.
Tip: Aim for consistent signal around the home, not just near the extender itself. - 6
Lock down security and perform maintenance
Set a strong admin password, disable WPS if not needed, and enable automatic firmware updates. Document your network credentials and monitor connected devices for unfamiliar activity.
Tip: Schedule periodic checks to keep your TP-Link AC1200 extender secure and performing well.
People Also Ask
What is the difference between a TP-Link AC1200 extender and a mesh system?
A TP-Link AC1200 extender boosts an existing router’s signal, typically targeting specific dead zones. A mesh system uses multiple units that coordinate as a single network. Extenders are often cheaper and easier for small spaces, while mesh systems provide seamless roaming in larger homes.
Extenders boost coverage from your existing router, while mesh systems create a coordinated network for seamless roaming.
How do I know where to place the extender?
Place the extender halfway between the router and the areas with weak signal, ensuring it still has a good signal from the router. Avoid walls and appliances that block signals. Test by walking the space with a device and checking signal bars.
Put it halfway to the dead zones and test with your phone or laptop to confirm solid signal.
Can I use WPS to set up the extender with my TP-Link AC1200?
Yes, WPS offers a quick setup path if your router supports it. Press the WPS button on the router, then on the extender, and wait for the connection indicator to confirm. If you prefer more control, use the web UI instead.
WPS is fast but use the web UI if you want more control over settings.
How often should I update the extender firmware?
Check for firmware updates periodically and install them when available. Updates improve security and sometimes performance. Enable automatic updates if supported by the device and your network policy.
Check for updates regularly and install them when available.
Why is my extender slower than my router?
Because the extender repeats your signal, some throughput is expected to drop. Ensure optimal placement, reduce interference, and use a dedicated 5 GHz band where possible. Firmware updates and sensible channel selection can help improve speeds.
Throughput may drop a bit due to signal repetition; optimize placement and channels for best results.
Should I clone the main SSID on the extender?
Cloning the main SSID can simplify device connections but may cause roaming challenges in some homes. If you experience frequent disconnections, consider using a separate SSID for the extender to better manage handoffs.
Using a separate SSID can improve stability if roaming is problematic.
Watch Video
What to Remember
- Place the extender midway between router and dead zones.
- Choose setup method (WPS or web UI) based on your security needs and control preferences.
- Test in multiple rooms and adjust placement for stable throughput.
- Keep firmware updated and disable unused features for security.