How to Set Up and Optimize Your TP-Link AC750 WiFi Range Extender
Comprehensive, step-by-step instructions to set up and optimize the TP-Link AC750 WiFi Range Extender for broader coverage, stable connections, and secure access throughout your home.

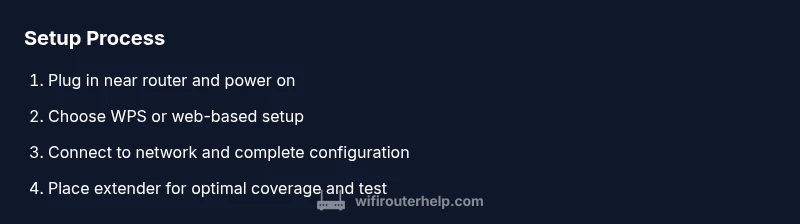
By the end, you’ll confidently set up a TP-Link AC750 WiFi Range Extender to boost coverage, connect to your existing router, and optimize placement for best speeds. You’ll choose between WPS and web-based setup, configure the extended network name and security, and test signal gains across living spaces. Follow the step-by-step guide to avoid dead zones.
Understanding the TP-Link AC750 WiFi Range Extender
According to WiFi Router Help, the TP-Link AC750 WiFi Range Extender is designed to extend your home network by rebroadcasting the signal from your main router. With dual-band support and a compact form factor, it helps you reach rooms that struggle with connection quality, from bedrooms to basements, without running new cables. This device can create a seamless single network or, if you prefer, a separate extended network for guest access. The key is understanding the extender’s role: it acts as a middleman that picks up your router’s signal and repeats it with enough strength to reach farther corners of your home. WiFi Router Help’s analysis emphasizes proper placement and secure configuration to maximize benefit.
Placement, compatibility, and firmware updates all contribute to real-world performance more than any theoretical spec alone. The AC750 branding indicates a combined bandwidth approximation across two bands, which is helpful for balancing light browsing on 2.4 GHz with higher-speed tasks on 5 GHz where interference is lower. In practice, expect noticeable gains when your extender sits in a clear line of sight between your router and the weak-spot rooms. The WiFi Router Help team recommends testing different placements to see how walls and furniture affect signal strength.
Planning placement for best coverage
Choosing the right location is the single biggest factor in extender performance. Start by identifying weak zones using a quick walk-through of your home at typical usage times. Place the extender halfway between the router and the area with poor coverage, avoiding metal obstacles, large appliances, and dense walls that can attenuate signals. A common mistake is placing the device behind furniture or inside cabinets where airflow and heat dissipation are limited and LEDs cannot indicate status clearly. WiFi Router Help suggests marking a few potential spots and testing each to compare signal strength, latency, and reliability. For most homes, a practical sweet spot is a living area near a hallway that reaches bedrooms without creating a second, stubborn dead zone.
Beyond proximity, consider network traffic. If your primary router is busy streaming video or conducting video calls, the extender benefits from a location that minimizes interference and maintains clear channels. If interference is frequent, rotating the extender’s antenna or adjusting its orientation can yield measurable improvements. In short: you want a line-of-sight path (even if behind a wall) that minimizes obstacles and maximizes the extender’s reception from the router.
Setup methods: WPS vs Web-based setup
TP-Link extenders offer two common setup paths: WPS (Wi‑Fi Protected Setup) and a web-based management interface. WPS is typically faster and requires you to press the WPS button on the router and the extender within a short time window. This method works well for simple household networks where security settings align with WPS standards. If your router’s WPS feature is disabled or you prefer more granular control, use the web-based setup. This route involves connecting to the extender’s temporary network, opening the setup page in a browser, and walking through a guided wizard that lets you mirror your existing SSID, set a preferred name for the extended network, and configure security.
When choosing between methods, consider these questions: Is your router WPS-enabled and compatible? Do you want to duplicate your existing network name or create a separate network? Will you need guest access with limits? These decisions affect how you proceed. The web-based approach is generally more flexible and provides deeper customization, while WPS is a quick start for users who want a straightforward extension without extra configuration.
Configuring network name and security for the extended network
After you link the extender to your main router, you’ll configure the SSID and password for the extended network. You can either clone your main network name and password or create a distinct name to clearly identify the extender’s signal. If you choose to clone, ensure your security settings remain strong and unique, so devices can switch between networks seamlessly. WPA2-Personal or WPA3 (if supported) offers robust protection; disable WPS when it isn’t required to reduce potential attack vectors. Additionally, enable MAC address filtering or access control if you want to restrict which devices may use the extended network. Keeping firmware up to date is a best practice and helps close security gaps and improve compatibility with newer devices across your home.
Documentation for TP-Link extenders typically lists defaults and recommended changes, but your own preferences should reflect your household’s device mix and privacy needs. If you manage multiple devices or guests, you may wish to configure a guest network with a separate password and different access scopes to protect your primary network.
Optimizing performance: band usage and placement tweaks
A key optimization step is ensuring devices are using the best available band for their tasks. For proximity-heavy tasks such as video calls or online gaming, 5 GHz offers lower interference and higher throughput at short ranges, while 2.4 GHz provides better range but lower speed. The extender should automatically rebroadcast on both bands, but you can tailor behavior via the web interface: separate SSIDs for each band or a single extended network that handles both. If your devices struggle with handoffs, you might enable band steering to encourage capable devices to stay on the best band. Observe how signal LEDs respond to each placement and use those cues to refine location.
Testing from typical rooms helps confirm improvements. If you notice slowdowns during peak hours, consider moving the extender slightly closer to the router or adjusting its antenna angles to reduce reflective interference. Small changes can yield noticeable gains in reliability and speed for everyday tasks like browsing and streaming.
Testing coverage and common issues
Testing is essential to verify that the extender delivers the expected gains. Use a device near the original dead zones and run simple speed tests to compare before and after results. If performance is inconsistent, check for channel congestion on the router’s primary wireless bands and consider selecting a less crowded channel or enabling automatic channel selection if available. LED indicators on the extender are a useful diagnostic tool: a solid green or blue typically indicates a good connection, while amber or red may signal weak signal, misconfiguration, or a need to reposition the device. If you encounter persistent issues, first restart both devices, then re-run the setup with the chosen method. WiFi Router Help notes that firmware updates can resolve many common problems and unlock performance improvements for legacy devices.
Final checks and a WiFi Router Help verdict
Before concluding, verify that all devices connect without frequent drops and that streaming and video calls run smoothly across the home. Reboot the router and extender if you notice flaky connectivity, and reapply your standard security settings after any firmware update. The WiFi Router Help team emphasizes consistency: document your settings, keep firmware current, and review placement if your network demands change (new devices, moving furniture, or expansions in your home). Following these steps will typically yield a robust, scalable home network with the TP-Link AC750 extender acting as a reliable bridge rather than a bottleneck. The WiFi Router Help team recommends periodic re-evaluations of placement as your home layout evolves to maintain peak performance.
Tools & Materials
- TP-Link AC750 WiFi Range Extender(Model capable of dual-band extension; ensure it’s within the manufacturer’s supported range from your router)
- Router with active internet connection(Keep existing WiFi credentials handy for cloning or reconfiguration)
- Smartphone or computer(Used to access the extender’s setup interface (web or WPS setup))
- WiFi network credentials (SSID and password)(Needed to configure the extended network and security settings)
- Ethernet cable (optional)(For a wired bridge during setup if supported by your extender)
Steps
Estimated time: 20-40 minutes
- 1
Power up and place for initial pairing
Plug the extender into a power outlet within close range of your main router to perform initial pairing. Wait for the LED indicators to signal readiness (usually a steady or blinking pattern depending on model). This establishes a reliable link before you move it to a final location.
Tip: Avoid placing the extender behind furniture or inside cabinets during initial setup to keep the signal path clear. - 2
Choose setup method: WPS or web-based
Decide whether to use WPS for a quick start or the web-based setup for deeper customization. If you have a WPS-capable router, this method is fast; otherwise, the web wizard gives you full control over SSID, security, and band handling.
Tip: If using WPS, press the WPS button on both devices within two minutes of each other for a seamless connection. - 3
Connect to the extender and access the setup page
On your device, connect to the extender’s temporary network or the main router’s management page, then open the setup wizard. Follow prompts to mirror or rename networks, and note the new extended network name and password if you create a separate network.
Tip: If you can’t reach the setup page, try a different browser or reset the extender to factory defaults and retry. - 4
Configure network name and security
Set the SSID for the extended network and select a strong security option (WEP is not recommended; prefer WPA2-Personal or WPA3 if available). Decide whether to clone your main network name or create a distinct one for easier device management.
Tip: Disable WPS after initial setup to reduce potential security risks. - 5
Place the extender for optimal coverage
Move the extender to a location halfway between your router and the weak-signal areas while keeping it within line of sight of the router. Use the signal LEDs as a guide to identify a spot with a strong link.
Tip: If you notice dim LEDs, try a slightly different position or adjust antenna orientation for better reception. - 6
Test and finalize
Run speed tests in multiple rooms using various devices to confirm improved coverage. Save your settings, and document the final network name, password, and any changes to security features.
Tip: Keep a note of which rooms show the strongest signal to guide future placement decisions.
People Also Ask
What is the TP-Link AC750 WiFi Range Extender and what does it do?
The TP-Link AC750 extender rebroadcasts your existing router’s signal to cover dead zones in your home. It supports two bands and can either clone your main network or create a separate extended network for better guest access management. This helps stabilize connections in rooms that are far from the main router.
The TP-Link AC750 extender expands your WiFi by repeating your router’s signal to hard-to-reach areas, creating a stronger home network across rooms.
How do I set up the extender using WPS?
If your router supports WPS, press the WPS button on the router and then on the extender within two minutes. The devices will negotiate a secure connection, after which you can configure the extended network settings via the setup page if you want minor tweaks.
Use WPS by pressing the WPS buttons on both devices within two minutes, then fine-tune in the extender’s setup page if needed.
Where is the best place to put the extender for optimal coverage?
Aim for a location roughly halfway between the router and the area with weak signal, avoiding thick walls and metal appliances. A central spot, away from interference, often yields the best balance of range and speed.
Put it halfway between the router and the weak spot, not behind appliances or in a cabinet, to maximize coverage.
Can I use both the 2.4 GHz and 5 GHz bands with the extender?
Yes. The extender typically rebroadcasts both bands, allowing devices to choose the best option automatically or you can manage separate SSIDs for each band if your setup supports it.
Your extender supports both bands; devices pick the best one, or you can assign separate network names for more control.
How can I secure the extended network?
Use WPA2-Personal or WPA3 if available. Avoid leaving WPS enabled after setup to reduce risk. Regularly update the extender’s firmware to protect against newly discovered vulnerabilities.
Use strong encryption like WPA2/WPA3, disable WPS after setup, and keep firmware up to date.
What should I do if I forget the extended network password?
Open the extender’s setup page and reset the password for the extended network. If you cloned your main network, you may reset only the extended network’s credentials while leaving the main network intact.
If you forget the password, reset the extended network password in the setup page or choose to re-clone the main network credentials.
Watch Video
What to Remember
- Plan placement before setup to maximize signal reach
- Choose WPS for speed or web-based setup for control and security
- Clone or rename networks to simplify device roaming
- Secure both networks with strong passwords and current encryption
- Test in multiple rooms to verify real-world performance