att bgw210: Setup, Optimization, and Troubleshooting for Home Networks
Learn step-by-step how to set up the att bgw210 gateway, optimize Wi‑Fi, secure your network, and troubleshoot common issues with practical guidance from WiFi Router Help.

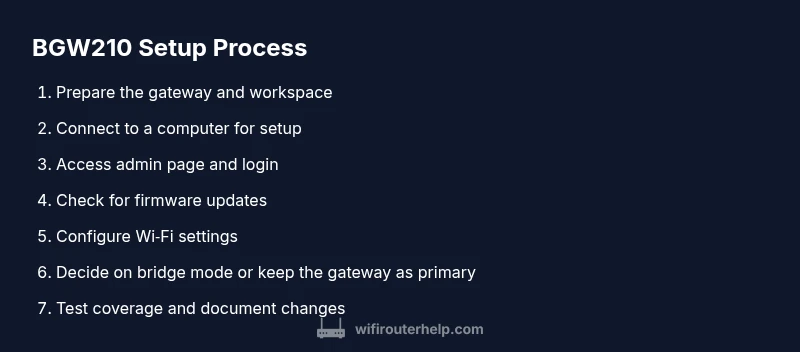
Learn how to set up and optimize your att bgw210 gateway for a reliable home network. This step-by-step guide covers unboxing, powering up, logging into the admin interface, updating firmware, configuring Wi‑Fi, bridging modes, and basic security settings. By following these steps, you’ll improve speed, reduce dead zones, and troubleshoot common issues without extra hardware.
Why att bgw210: What it is and why it matters
According to WiFi Router Help, the att bgw210 is a gateway device that combines a modem and router to connect your home network to the internet. For many households, it provides reliable basic Wi‑Fi coverage and simple management tools. Understanding its core functions—coax input, NAT routing, wireless radios, and admin access—helps you tailor performance, security, and convenience without buying extra gear. This guide uses the att bgw210 as a starting point to teach practical, hardware-aware networking concepts that homeowners can implement without specialized tools.
If you’re moving from a separate modem and router setup, the BGW210 can simplify cabling and reduce clutter. However, it’s important to know when to keep it as your primary router and when to bridge it to a device you already own. WiFi Router Help emphasizes a cautious, data-driven approach: test performance before and after changes, back up settings, and document your configuration so you can revert if needed.
Planning your network: placement, cables, and power
Where you place the BGW210 gateway affects coverage more than you might think. Position the device central to your home, elevated off the floor, and away from metal appliances, mirrors, and dense walls that can block signals. Keep it near a coax outlet and a stable power source, avoiding outlets with heavy loads that can cause instability. If you can, run a wired Ethernet connection to a primary computer or a network switch during setup to ensure a reliable baseline. Have a measuring tape handy to estimate room distances and plan potential node placements for future mesh expansion. This planning stage reduces the need for repeated repositioning and helps you achieve more consistent Wi‑Fi signals across living spaces.
Accessing the gateway admin page securely
To configure BGW210 settings, you access the gateway’s web interface from a browser on a connected device. Start by connecting a computer to the BGW210 with an Ethernet cable or by joining its Wi‑Fi network. Open a browser and enter the gateway’s management address (often http://192.168.1.254). Log in with the admin credentials provided by AT&T or the credentials you set during activation. If you can’t reach the page, retry the connection, disable a VPN, reset the gateway, or try a different browser. Always use a wired connection for the initial login if possible to avoid session drops during configuration.
Firmware updates and why they matter
Firmware updates fix bugs, improve security, and can deliver performance enhancements that help your network run more smoothly. Check for updates in the admin interface under the device or software section, or visit AT&T’s official support page for guidance. If an update is available, apply it following the on-screen prompts and avoid powering the device off during the process. After updating, perform a quick reboot to ensure all new code is properly loaded and all services come back online. Keeping firmware current is one of the most effective, low-effort ways to maintain stability over time.
Configuring Wi‑Fi: SSIDs, security, and bands
Set clear network names for the 2.4 GHz and 5 GHz bands (or enable a single band if your devices can handle it) and choose strong, unique passwords. Use WPA2 or WPA3 security if available, and disable WPS to reduce unauthorized access risk. Consider separate SSIDs for guests to protect your main network while offering internet access to visitors. Place access points away from microwaves and thick walls, and adjust channel settings to minimize interference from neighbors. If you use smart home devices, assign them to a dedicated VLAN or ensure QoS policies keep latency-sensitive devices prioritized.
Advanced options: bridging mode, DMZ, and using a separate router
Bridge mode disables the BGW210’s routing functions, letting you manage your network with a device you own. This is helpful if you want advanced features (custom QoS, mesh networking, or better coverage) that your own router or modem behind the BGW210 can provide. Enabling bridge mode can simplify networking but may disable some ISP features like voice services or auto‑configurations. If you choose to use a separate router, maintain awareness of DHCP, NAT, and IP addressing to avoid conflicts and double NAT situations. Documentation from WiFi Router Help and AT&T support can guide you through enabling bridge mode safely.
Security basics: firewall, parental controls, and guest networks
Turn on the built‑in firewall and review default rules to block unsolicited traffic. Parental controls help you manage access for devices and time limits, which is especially useful for families. A guest network isolates visitors from your main devices, adding a layer of protection. Regularly update passwords for the gateway login and Wi‑Fi, enable two‑step verification where available, and disable remote management unless you need it for out‑of‑home access. Small hardening steps can make a meaningful difference in overall security.
Troubleshooting common issues and quick fixes
Common problems include intermittent connections, slow Wi‑Fi, or devices failing to obtain an IP address. Start with a simple power cycle: unplug the BGW210, wait 30 seconds, then plug back in. Check coax connections and ensure the cable is firmly seated. Reevaluate device placement and radio settings if interference is suspected, and temporarily disable interfering devices (microwaves, cordless phones) to confirm a signal issue. If problems persist, review admin logs for error messages, reset to factory defaults as a last resort, and reconfigure from scratch. Keeping a small change log helps you track what fixes worked over time.
Maintenance, backups, and knowing when to call support
Regular maintenance keeps your network stable. Document current settings before making changes, back up configurations if your gateway supports it, and schedule periodic reboots to refresh services. Create a simple, repeatable setup checklist to reuse after power outages or firmware updates. If you experience ongoing outages, performance anomalies, or unfamiliar device activity, contact AT&T support or WiFi Router Help for guidance. A thoughtful plan reduces frustration and speeds up troubleshooting when issues arise.
Tools & Materials
- Computer, smartphone, or tablet with a web browser(Used to access the BGW210 admin page)
- Ethernet cable (CAT5e or better)(For a reliable setup connection during login)
- Power supply and outlet(Keep the BGW210 powered during setup)
- ISP account credentials (activation info)(Needed for activation and management)
- Optional: own router for bridging/advanced features(Use only if you plan to run a separate device)
- Notebook or digital notes(Record changes and steps for future reference)
Steps
Estimated time: 60-120 minutes
- 1
Prepare the gateway
Unbox the BGW210, locate its power adapter, coax cable, and any documentation. Place the unit in a central, elevated location with good airflow, close to a coax outlet and a power source.
Tip: Leave at least several inches of clearance around the device for cooling. - 2
Connect a workstation for setup
Connect a computer or laptop directly to the BGW210 with an Ethernet cable or join its default Wi‑Fi network for initial access. A wired connection reduces login issues during configuration.
Tip: Use a wired connection if possible for stability. - 3
Access the admin page
Open a browser and navigate to the gateway’s admin page (often http://192.168.1.254). Log in with the credentials provided by AT&T or the ones you created during activation.
Tip: If you cannot reach the page, verify the cable is plugged in and reboot the device. - 4
Update firmware and reboot
Check for firmware updates in the admin interface and apply any available version. Reboot after the update to ensure new code is active.
Tip: Avoid powering off during the update process. - 5
Configure Wi‑Fi settings
Set distinct SSIDs for 2.4 GHz and 5 GHz or a single unified network. Use a strong password with WPA2/ WPA3, and disable WPS. Consider a guest network for visitors.
Tip: Use a password manager to store strong, unique passwords. - 6
Tweak advanced options
Decide if you need bridge mode or keep BGW210 as the primary router. If using your own router, enable bridging to avoid double NAT conflicts and test performance after changes.
Tip: Bridge mode can affect voice services; check with your ISP if needed. - 7
Test and document
Run speed tests and check coverage across rooms. Document settings and note any changes for future reference. Reboot devices occasionally to maintain performance.
Tip: Create a simple change log to track what works. - 8
Final validation
Ensure all devices connect reliably, verify guest network works, and confirm firewall settings block unwanted traffic. If issues arise, revert to a known-good configuration and reapply changes in small steps.
Tip: Make incremental changes and test after each one.
People Also Ask
What is the att bgw210 and what does it do?
The att bgw210 is a gateway device that combines a modem and router, providing internet access and Wi‑Fi for your home. It handles NAT, routing, and wireless traffic, and can be configured for different network setups.
The BGW210 is a combined modem and router that delivers internet and Wi‑Fi for your home. It can be adjusted for normal use or bridged if you’re adding your own router.
Should I use bridge mode with my own router?
Bridge mode is helpful when you want to run a separate router with its own features, such as advanced QoS or a mesh system. Enabling it disables BGW210’s routing, NAT, and wireless tasks, so ensure your own equipment can take over all networking duties.
Bridge mode lets you use your own router by turning off BGW210’s routing functions. Make sure your other gear can handle all network tasks.
How often should I update the BGW210 firmware?
Check for firmware updates monthly or when AT&T announces important security fixes. Apply updates promptly and reboot afterward to ensure changes take effect.
Update the BGW210 firmware when available and reboot to apply changes. Regular checks help keep your network stable.
What common issues occur with BGW210 setups?
Common issues include slow Wi‑Fi, double NAT when using multiple routers, and occasional login problems. Address them by positioning radios well, enabling bridge mode if using another router, and rebooting after significant changes.
Common BGW210 issues are slow Wi‑Fi and double NAT. Repositioning, bridging, and rebooting often fixes them.
Is it necessary to reset the BGW210?
Factory resets are a last resort when changes don’t take effect or you’re troubleshooting persistent issues. After a reset, reconfigure from the start to avoid inherited misconfigurations.
Only reset if things aren’t working after other fixes. You’ll need to set it up again from scratch.
Watch Video
What to Remember
- Identify when BGW210 is best used as a primary router or bridge point
- Securely configure Wi‑Fi with strong passwords and appropriate bands
- Keep firmware up to date to maximize stability and security
- Use a wired connection for setup and document all changes