bgw320 Setup and Troubleshooting Guide
Learn to set up, optimize, and troubleshoot the bgw320 gateway. This step-by-step guide covers placement, firmware updates, Wi‑Fi optimization, bridge mode, and common issues for a stable home network.

In this guide you will learn how to set up, optimize, and troubleshoot the bgw320 gateway for reliable home Wi‑Fi. You’ll need the BGW320 device, a computer or tablet, an Ethernet cable for initial setup, and your ISP account details. The steps cover connecting the device, updating firmware, configuring Wi‑Fi, enabling bridge mode when appropriate, and applying security enhancements for a stable network.
What is the bgw320 and why it matters
The bgw320 is a gateway device that combines a modem and router into a single unit, commonly provided by ISPs for fiber services. Understanding its role helps you optimize coverage, reduce dead zones, and secure your home network. This model supports dual‑band Wi‑Fi and built‑in firewall features to protect devices on your network. For homeowners and tech enthusiasts, mastering the bgw320 means fewer buffering issues, smoother streaming, and more reliable video calls. In practice, placement, firmware updates, and proper configuration make a noticeable difference in speed, latency, and overall stability. WiFi Router Help stresses that even small changes—like moving the gateway a few feet from a large metal appliance or adjusting the 5 GHz channel—can yield a measurable improvement. Throughout this guide, we’ll refer to the bgw320 by its full model name to keep terminology precise and help you troubleshoot more efficiently. By following a structured setup, you’ll reduce confusion and gain predictable performance.
Planning your bgw320 deployment
Before plugging in cables, map your space and set goals for coverage. Identify a central location away from thick walls, metal appliances, and microwaves that can interfere with radio signals. Place the gateway at a height that minimizes obstruction, not tucked behind a cabinet. If your home has multiple floors, consider a secondary access point or a mesh extender to ensure strong signals in stairwells and bedrooms. A quick heat map-like review using a smartphone app or a simple speed test in each major living area helps you decide whether the BGW320 should live in the living room, the central hallway, or near a home office. The aim is uniform coverage with minimal dead zones, which translates into smoother video calls, faster downloads, and fewer dropouts. The WiFi Router Help team recommends testing after any rearrangement to confirm improvements and adjusting placement if needed.
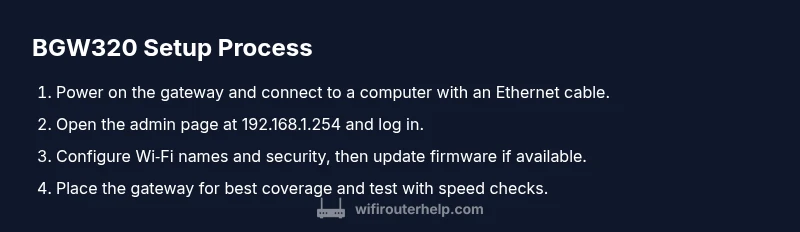
Initial setup: connect, access the admin page, and update firmware
Start with power and a stable connection. Connect your computer or tablet to the BGW320 using an Ethernet cable to ensure a reliable initial link. Open your web browser and enter the gateway’s admin address, typically something like http://192.168.1.254. Log in with the credentials provided by your ISP or the account you use for service management. If you don’t know them, contact your provider before proceeding to avoid being locked out. Use the setup wizard if presented, or switch to manual configuration to tailor settings. Check for firmware updates and install them if available, since newer firmware often includes security fixes and performance improvements. After a reboot, re‑log in and run a quick health check of the connection to confirm Internet and LAN devices are functioning as expected. This initial pass sets a solid foundation for the rest of the optimization.
Optimizing wireless performance with bgw320
A core reason homeowners choose the bgw320 is its built‑in Wi‑Fi radios. To maximize performance, enable both 2.4 GHz and 5 GHz bands with distinct network names or a combined single network with smart steering if your model supports it. Use WPA2‑WPA3 security with a strong password and disable things you don’t need, such as remote management, unless you require remote access. For interference reduction, set the 2.4 GHz channel to a non‑overlapping option (1, 6, or 11) and allow the 5 GHz band to auto‑select or manually pick a clear channel. Position the router away from dense walls, metal appliances, and large electronics such as microwave ovens. If your device supports band steering, enable it to move devices between bands seamlessly. Finally, test speeds on a few devices in different rooms and adjust placements or channels as needed. Document your results so you can measure improvements over time. As always, WiFi Router Help recommends keeping a clean network with realistic expectations about range.
Advanced configurations: bridge mode, VLANs, firewall rules
Bridge mode is useful if you want to use your own router behind the BGW320. When bridge mode is active, the gateway stops acting as a router, and NAT/PAT are handled by your primary router. This can improve performance for advanced users or those with mesh systems, but it may disable some ISP services or IPTV features, so verify compatibility with your plan. VLAN tagging is sometimes required by providers for voice, IPTV, or quality‑of‑service needs; consult your ISP documentation before changing VLAN settings. Firewall rules on the BGW320 can add an extra layer of protection by blocking unwanted inbound traffic. Create safe port forwards only for needed services, and consider enabling a DMZ host for troubleshooting when you already have a dedicated security perimeter. Save any changes and reboot the device to apply them. If you’re unsure about these settings, start with the default configuration and experiment gradually while monitoring stability.
Troubleshooting common bgw320 issues
No Internet after setup? Double‑check cables, power cycling, and the status indicators. Reboot the BGW320, then verify the WAN status in the admin page. If the LED shows an error, consult the user manual or provider support for the exact meaning. Slow Wi‑Fi can be caused by distance, interference, or misconfigured channels; adjust placement and try different 2.4 GHz/5 GHz channels. If devices don’t appear on the network, ensure DHCP is enabled and check the LAN settings. For persistent problems, perform a soft reset (retains settings) or a factory reset (restores defaults) as a last resort. After resetting, re‑run the initial setup steps. Keep logs of changes to track what fixed the issue and when.
Maintenance and security best practices
Keep firmware up to date by checking for updates monthly or when a notification appears. Use a strong, unique admin password and enable a guest network to isolate devices like IoT from your main network. Disable remote management unless you need it for travel or work; this reduces exposure to the Internet. Regularly review connected devices and remove unknown clients. Rename your networks with clear, non‑personal names to reduce social engineering risk. Consider enabling firewall features, monitoring features, and parental controls if available. By following these practices, you’ll reduce exposure to threats and keep your bgw320 running at peak reliability.
Authority sources
- FCC, Consumer Information and guidelines: https://www.fcc.gov
- CISA, Cybersecurity Best Practices for Home Networks: https://www.cisa.gov
- NIST, Security and Privacy Frameworks: https://www.nist.gov
Tools & Materials
- bgw320 gateway device(ISP-provided modem/router gateway)
- Ethernet cable (Cat5e or better)(For a reliable initial connection)
- computer or tablet(Used to access the admin interface)
- web browser (Chrome/Edge/Safari)(Ensure cookies and JavaScript are enabled)
- ISP account details(Needed for login and activation)
- backup power source (UPS)(Recommended for reliability during outages)
Steps
Estimated time: 60-90 minutes
- 1
Prepare and connect BGW320
Unbox the device, connect the power, and join your computer to the BGW320 with an Ethernet cable to ensure a stable link for initial setup.
Tip: Use a short, quality Ethernet cable to minimize signal loss. - 2
Access admin page and verify firmware
Power on, open http://192.168.1.254 in your browser, and sign in with the credentials from your provider. Check for firmware updates and install them if available, then reboot.
Tip: Bookmark the admin URL for easy access later. - 3
Configure Wi‑Fi basics
Set clear SSIDs for 2.4 GHz and 5 GHz, enable WPA2/WPA3 security, and create strong passwords. Disable remote management unless you need remote access.
Tip: Use different passwords for Wi‑Fi and admin login. - 4
Position for best coverage
Place the BGW320 in a central, elevated location away from microwaves and metal appliances. Run quick signal checks in key rooms and adjust placement as needed.
Tip: Avoid stacking electronics directly on top of the gateway. - 5
Enable bridge mode or advanced features if needed
If you plan to use your own router or a mesh system, enable bridge mode and verify ISP support for features you rely on.
Tip: Bridge mode disables NAT; ensure your network has proper protection. - 6
Test, save, and monitor performance
Run speed tests from multiple devices, save settings, and monitor performance over time to catch drift or interference.
Tip: Keep a simple log of changes and their effects.
People Also Ask
What is the BGW320 and what does it do?
The BGW320 is a gateway device that combines a modem and router, delivering Internet access and Wi‑Fi in one unit. It also includes a built‑in firewall to help protect connected devices.
The BGW320 is a combined modem and router with built‑in firewall for home networks.
How do I access the bgw320 admin page?
Connect a computer to the gateway via Ethernet or Wi‑Fi, then open 192.168.1.254 in your browser. Sign in with the credentials provided by your ISP and navigate to settings.
Open 192.168.1.254 in your browser and log in with your ISP credentials.
Can I put bgw320 in bridge mode?
Yes, bridge mode allows your own router to handle NAT and Wi‑Fi. This disables the BGW320’s routing features, so verify compatibility with your service and devices before enabling.
Bridge mode turns off BGW320’s router features so your own router handles the Wi‑Fi.
How do I update firmware on bgw320?
Firmware updates typically occur automatically, but you can check manually in the admin interface and install updates when available. A reboot may be required after updating.
Check for firmware updates in the admin page and install as needed.
What steps if I see a network issue?
Restart the gateway, check cables, review status LEDs, and verify DHCP settings. If problems persist, revert to factory defaults as a last resort and reconfigure.
Restart the BGW320 and check cables; reset only if needed.
What can I do to improve Wi‑Fi speed with BGW320?
Optimize placement, separate 2.4 GHz and 5 GHz networks, use strong security, and adjust channels to reduce interference. Consider a mesh system if coverage is still limited.
Improve speed by placing the gateway well and using separate bands with clear channels.
Watch Video
What to Remember
- Plan placement for optimal coverage
- Keep firmware up to date for security and stability
- Use separate Wi‑Fi networks and a guest network
- Bridge mode requires your own router considerations
- Regular maintenance protects performance