Will Any Router Work with Starlink? A Practical Setup Guide
Discover whether any router works with Starlink, how to enable passthrough/bridge mode, and step-by-step setup for a reliable home network.

Yes — most routers can work with Starlink if you enable IP passthrough or bridge mode and connect via the WAN port. You’ll then configure DHCP/NAT on your own device and manage features like QoS, VPN, and firewall yourself. Some models may require additional tweaks; always verify compatibility with your specific router and Starlink plan.
Will Any Router Work with Starlink? Understanding the Compatibility Landscape\n\nAccording to WiFi Router Help, the simple reality is that many routers will function with Starlink when you pass the internet signal through to the downstream device correctly. The key is to avoid relying solely on Starlink’s gateway for all network features. By using IP passthrough or bridge mode, you pass the publicly routable IP and let your own router handle DHCP, NAT, firewall rules, and advanced features like VPNs and parental controls. This approach gives you greater control over your local network while still relying on Starlink for the internet connection. Different routers handle passthrough differently, so you may need to consult your user manual or vendor support for model-specific steps. WiFi Router Help’s testing across common consumer routers shows that with proper configuration, most modern devices can participate in a home network powered by Starlink. If you rely on Starlink’s Wi-Fi alone, you’ll miss options such as seamless mesh networks or enterprise-grade security configurations offered by standalone routers.\n
How Starlink Assigns IP Addresses to Downstream Routers\n\nStarlink typically provides a dynamic WAN IP to downstream devices when the gateway is in gateway mode. In order to let a third-party router manage your network, you’ll want to enable a passthrough or bridge-like setup so that your router receives the public IP address directly. When this happens, the Starlink router remains the gateway to the internet, but your own router takes responsibility for NAT, firewall, and local routing. This prevents double NAT issues and preserves your chosen security policies. It’s important to note that some ISP-like features or certain parental controls may require tweaks on the downstream router, not on Starlink. If you’re hosting services (VPN, gaming, port forwarding), ensure your router exposes the correct ports and that the Starlink device isn’t blocking them.
What to Look For in a Downstream Router\n\nChoosing the right router matters more than you might think. Look for a model with: a reliable WAN port (RJ-45 Ethernet), strong firewall capabilities, configurable NAT, and DHCP server stability. A router that supports IPv6, QoS, and VPN passthrough can future-proof your network. If you plan to expand into a mesh system, ensure the primary router supports mesh technology and that you choose compatible satellites. For gaming or streaming, prioritize low-latency features and sufficient CPU/RAM for your household load. Your choice should align with your home size, number of devices, and the type of traffic you expect.\n
Bridge Mode vs IP Passthrough: Choosing the Right Path\n\nBridge mode and IP passthrough both hand a public IP to your downstream router, but subtle differences exist. Bridge mode disables most of the gateway’s routing features, effectively turning the Starlink device into a simple modem. IP passthrough, on the other hand, forwards the IP while keeping some gateway functions available. The best option depends on your router’s capabilities and your network goals. If you need advanced firewall rules or VPN support, IP passthrough is often the easier choice. If your router struggles with NAT issues, bridge mode can be a cleaner path, but be aware of potential loss of certain gateway features.\n
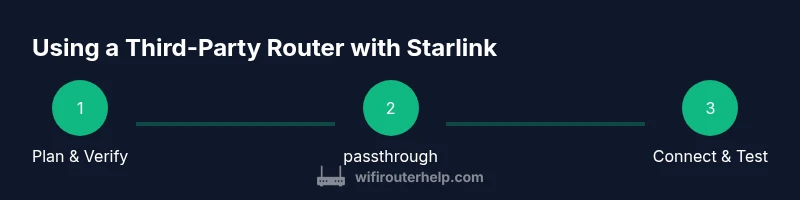
Step-By-Step Setup Overview for a Third-Party Router\n\nWhile the full setup is covered in the dedicated STEP-BY-STEP section, here is the high-level flow: plan your network, access Starlink’s admin interface to locate passthrough/bridge options, connect your router via the WAN port, configure the router for DHCP and NAT, disable Starlink’s Wi‑Fi, and finally test the connection and security settings. This approach keeps Starlink’s connection stable while giving you robust control over your local network.\n
Common Pitfalls and Troubleshooting\n\nCommon issues include double NAT when both devices perform NAT, IP address conflicts if DHCP scopes aren’t aligned, and Wi‑Fi interference when you enable multiple access points in close proximity. Double-check that the passthrough configuration matches your router’s WAN settings, ensure the Starlink gateway is updated to a compatible firmware version, and verify that firewall rules aren’t inadvertently blocking essential traffic. If you encounter connectivity problems, temporarily bypass features like VPN or QoS to isolate the fault. WiFi Router Help provides practical steps to diagnose each scenario.\n
Security, Updates, and Best Practices\n\nSecurity should be a primary concern when using a third-party router with Starlink. Keep firmware up to date, enable a strong admin password, and enable automatic security updates where available. Use a unique SSID, enable WPA3 if supported, and turn off WPS to avoid weak points. Regularly review attached devices and monitor for unusual activity. A well-maintained router with current firmware offers better protection against threats while you enjoy Starlink’s high-speed connectivity.\n
Mesh, Gaming, and Future-Proofing Your Home Network\n\nFor larger homes or network-heavy households, consider a mesh system that pairs with your primary router. Verify that the mesh nodes are compatible with your router and can seamlessly roam across rooms. For gamers, prioritize a router with a fast CPU, ample RAM, and features like low-latency modes and game-centric QoS. If you plan on expanding your network in the future, choose a router with scalable features and robust security options to keep pace with evolving devices and services. WiFi Router Help recommends planning scalability from the start to reduce rework later.\n
Authority Sources\n\n- FCC: https://www.fcc.gov/about-bureau/bureau-technology-telecommunications-and-broadband/fcc-broadband-service https://www.fcc.gov/\n- Wired: https://www.wired.com/\n- PCMag: https://www.pcmag.com/\n
Tools & Materials
- Third-party router(Choose a model with a reliable CPU, adequate RAM, and modern features (QoS, VPN, IPv6, firewall).)
- Ethernet cable (Cat6 or better)(Used to connect Starlink gateway to your router for stable performance.)
- Starlink kit (existing)(You’ll still need the Starlink dish and power supply; only the network configuration changes.)
- Power supply for router(Ensure adequate wattage for sustained performance.)
- Optional: network switch(If you have multiple wired devices, a switch can simplify cabling.)
- Admin access to Starlink and router manuals(Useful for model-specific passthrough/bridge steps.)
Steps
Estimated time: 30-60 minutes
- 1
Plan your network
Assess the size of your home, number of devices, and whether you need features like VPNs, guest networks, or parental controls. Decide if you will use passthrough or bridge mode on Starlink and what role your own router will play in your local network.
Tip: Sketch a small map of coverage and device placement to minimize dead zones. - 2
Access Starlink settings
Log into the Starlink admin interface and locate the passthrough or bridge option. This is typically found under network settings and may be labeled as IP Passthrough or Bridge Mode. Read any on-screen prompts to understand the consequences.
Tip: Note the current IP address of the Starlink gateway before changing settings. - 3
Prepare your downstream router
Power on your router, connect a computer to the router, and verify WAN/LAN behavior. Update firmware if an update is available, and configure a basic network (SSID, WPA3 if available).
Tip: Disable UPnP unless you actively need it for a specific application. - 4
Connect the devices
Connect the Starlink Ethernet port to your router’s WAN port using a high-quality Ethernet cable. Ensure the Starlink device remains powered during this process.
Tip: Use a dedicated Ethernet cable to avoid interference with power lines. - 5
Configure WAN and NAT on your router
Set the router’s WAN interface to DHCP (or the correct IP method per your device) and enable NAT. If you chose passthrough/bridge, verify your router receives a public IP.
Tip: If you see a private IP on the WAN interface, recheck passthrough settings. - 6
Disable Starlink Wi‑Fi (optional)
If you plan to rely entirely on your own router, turn off Starlink’s Wi‑Fi to avoid interference and double access points.
Tip: Keep a backup plan in case you need Starlink Wi‑Fi for troubleshooting. - 7
Test and secure the network
Test internet access on multiple devices, run a speed test, check firewall rules, and ensure firmware is up to date. Enable security features and monitor for unusual activity.
Tip: Document your settings in case you need to reconfigure in the future.
People Also Ask
Will any router work with Starlink?
Most modern routers will work when Starlink is set to passthrough or bridge mode and the downstream device handles NAT. Some budget models may require extra tweaks. Always check your router’s documentation and Starlink’s guidance.
Most routers work if you set Starlink to passthrough and configure NAT on your router. Some budget models may need extra tweaks.
Do I need to enable IP passthrough or bridge mode on Starlink?
Enabling IP passthrough or bridge mode allows your own router to receive the public IP address and manage NAT. This is essential to use a third-party router effectively.
Enable passthrough or bridge mode to hand the IP to your own router.
Can I use a mesh system with Starlink?
Yes. Use a compatible mesh system with your primary router configured in passthrough/bridge. Ensure the mesh backhaul settings are properly configured for optimal roaming.
Absolutely, you can use a mesh system with the right backend router settings.
Should I disable Starlink Wi‑Fi?
If you want to rely on your own router for all network features, disable Starlink Wi‑Fi to prevent interference and avoid double access points.
Only disable it if you’re sure you want full control from your own router.
Will using a third-party router affect speed or latency?
Performance depends on the router hardware and configuration. A capable router with proper QoS and optimizations can maintain high speeds, while cheaper devices may introduce latency if not optimized.
A good router with proper settings can preserve speed; cheaper models may introduce latency if not configured well.
What about IPv6 with Starlink and third-party routers?
Starlink supports IPv6; ensure your router is IPv6-capable and properly configured to handle IPv6 traffic alongside IPv4.
Make sure your router supports IPv6 and enable it in settings.
Where can I find model-specific passthrough steps?
Consult your router’s manual or vendor support site for precise passthrough/bridge instructions, since interfaces vary by model.
Check your router’s official docs for model-specific steps.
Is there a risk in updating Starlink firmware?
Firmware updates can occasionally change passthrough behavior. Keep a backup plan and verify connectivity after updates.
Updates can shift settings; verify after updates.
Watch Video
What to Remember
- Verify passthrough/bridge capabilities on Starlink for third-party routers.
- Configure your router for DHCP/NAT and security features to maximize performance.
- Disable Starlink Wi‑Fi if using a dedicated router for reliability and control.
- Regularly update firmware and monitor network activity for security.