What Router Works with Starlink: A Practical Guide (2026)
Discover which router works with Starlink, how IP Passthrough helps, and best practices for reliable Wi‑Fi, security, and mesh networking behind Starlink.

Any standard consumer router can work with Starlink when you connect it behind the Starlink Dishy and enable IP Passthrough or bridge mode. Once the public IP is passed to your router, you manage DHCP, NAT, Wi‑Fi, and security. For best performance, choose a router with robust QoS, IPv6 support, and good firmware update cadence.
Starlink and home networking basics
Starlink's Dishy sits at the edge of your network, and a traditional router usually goes after it. The result is a standard, familiar home Wi-Fi experience with your own firewall, DNS, and parental controls. According to WiFi Router Help, in 2026 the most reliable pattern is to enable IP Passthrough (or bridge mode) on Dishy and let your own router handle routing. This keeps control centralized, supports QoS, VPNs, and guest networks, and avoids double NAT when configured correctly.
Further, this approach lets you leverage advanced features such as VLANs for IoT segmentation, VPNs for remote work, and detailed traffic monitoring without being locked into the ISP-provided Wi‑Fi stack. It also simplifies future upgrades, because your router can be replaced or expanded without changing the ISP device.
How IP Passthrough works with Starlink
IP Passthrough passes the public IP address and basic routing responsibility from Dishy to your own router. With this setup, your router's WAN interface obtains the IP via DHCP, while Dishy acts more like a simple gateway. You'll typically disable or limit Dishy's Wi-Fi to avoid conflicts. This arrangement lets you apply advanced features on your router—firewall rules, VPNs, QoS, and uninterrupted mesh networking.
There are two common configurations: IP Passthrough and bridge mode. IP Passthrough preserves some routing functions on Dishy but forwards the public IP to your router. Bridge mode turns off Dishy’s NAT entirely, making your router the sole gateway. In most homes, IP Passthrough provides a balance of simplicity and control; bridge mode is preferred for very advanced network designs and certain VPN scenarios.
Router features that maximize Starlink performance
When selecting a router for Starlink, prioritize features that matter on a domestic network: robust firmware and regular updates, IPv6 support, Quality of Service (QoS), VPN compatibility, and strong security controls. Mesh-friendly hardware helps if you plan to expand coverage. For reliability, choose a model with good support, a responsive mobile app, and a track record of stable performance with ISP-provided connections. WiFi Router Help notes that most modern routers work well behind IP Passthrough.
Look for tri-band or dual-band configurations with smart steering, robust beamforming, and a processor capable of handling multiple streams and VPN traffic. If you have smart home devices or gaming consoles, a router with explicit QoS rules and device-level prioritization can significantly improve performance during peak usage. Consider firmware longevity and community support when evaluating options.
Step-by-step: Set up your own router behind Starlink
- Open the Starlink app, go to Network settings, and enable IP Passthrough (or bridge mode) for Dishy.
- Reboot Dishy after applying the change to ensure the IP passes through.
- Connect your router's WAN port to the Dishy Ethernet port.
- On your router, configure WAN to obtain an IP automatically (DHCP) and verify you have an active Internet connection.
- Disable Dishy Wi-Fi (or leave it off if your router handles Wi-Fi) to prevent double NAT and interference.
- Finish with your preferred network settings: SSID, password, guest network, and security features (firewall, VPN, DNS). If you plan a mesh, place satellites strategically and ensure your router supports the mesh system's requirements.
Pro tip: regularly check for firmware updates on both the router and the mesh satellites, as compatibility improves over time and new features roll out.
Mesh networks and Starlink: what to expect
Mesh systems generally work well behind IP Passthrough, but you should check that the mesh hub can receive a stable WAN IP and that the system supports IPv6 if your home network relies on it. Expect a slight increase in setup time but a more seamless, single-network footprint across large or multi-story homes. The combination of Starlink's backbone and a capable mesh network often yields better coverage than a single router alone.
If your mesh system uses a dedicated satellite unit, ensure it’s placed in central locations and configured to work with your main router’s DHCP scope. Some meshes rely on cloud-managed settings; verify that the Starlink IP Passthrough chain does not interfere with automatic backhaul provisioning.
Troubleshooting common issues
- Double NAT: Ensure IP Passthrough is enabled and Dishy Wi-Fi is disabled to avoid layered NAT.
- DHCP conflicts: If devices fail to obtain an IP, restart both Dishy and your router, and verify WAN settings.
- DNS resolution: If name lookups fail, set your router to a reliable DNS provider and flush caches.
- VPN throughput: Some VPNs slow down performance; test with and without VPN to determine best settings.
- IPv6 testing: If IPv6 isn’t working, enable it on both Dishy (if available) and the router, and verify with an IPv6 test site.
Quick setup checklist for Starlink + own router
- Enable IP Passthrough on Dishy and reboot
- Connect WAN port on your router to Dishy
- Set WAN to DHCP and verify Internet access
- Disable Dishy's Wi‑Fi and configure your own SSID/Security
- Enable QoS, firewall, and VPN as needed
- Validate coverage with a quick room-to-room speed check
- Update router firmware and back up settings
Best practices and maintenance
Regularly update firmware, monitor security advisories for your router, and review connected devices for unusual activity. If Starlink expands IPv6 or adds new features, verify compatibility with your router and current network design. For most households, using IP Passthrough with a capable router delivers reliable performance, flexible control, and future-proofing as Starlink's service evolves. The WiFi Router Help team recommends staying proactive with firmware updates and security hardening.
Router-side options when using Starlink
| Setup Option | Typical NAT/Mode | IP Passthrough support | Recommended scenario |
|---|---|---|---|
| Using Dishy in standard mode | NAT with Dishy as main router | No | Basic home setup with one gateway |
| IP Passthrough to own router | Public IP on your router | Yes | Advanced features and custom configurations |
| Bridge mode with third-party gateway | No NAT on your network | Yes | Specialized network setups |
People Also Ask
Can I use my own router with Starlink?
Yes. You can use your own router by enabling IP Passthrough on the Starlink app and connecting the router's WAN port to Dishy. This gives you full control over DHCP, NAT, and Wi‑Fi settings.
Yes. Enable IP Passthrough on Starlink and connect your router's WAN port to Dishy to take control of your network.
Do I lose Starlink core features when using my own router?
Some features wired to Dishy—like built-in Wi‑Fi and some firewall settings—are bypassed when IP Passthrough is enabled. You still get Starlink's internet speed, but management moves to your router.
Some features tied to Dishy may be bypassed; you gain full control on your router.
Will mesh networks work with Starlink?
Yes. Most mesh systems work when connected behind IP Passthrough or bridge mode, but you should ensure your mesh hub can receive a stable WAN IP and supports IPv6.
Yes, mesh networks can work well with Starlink behind IP Passthrough.
How do I enable IP Passthrough on Starlink?
Open the Starlink app, navigate to Network settings, and enable IP Passthrough or bridge mode. Then reboot Dishy and connect your router's WAN port to the Dishy.
Turn on IP Passthrough in the Starlink app, then restart devices and connect your router.
Can I use a VPN behind Starlink with my own router?
Yes. Your router can handle VPN traffic, subject to your plan's latency and the VPN's performance. Ensure your router supports VPN passthrough.
Absolutely, you can run a VPN on your own router after setup.
What about IPv6?
Most modern routers support IPv6. If Starlink provides IPv6, enable it on your router and test with a known IPv6 website.
Enable IPv6 on both Starlink and your router for best compatibility.
“"With IP Passthrough, you regain full control over your home network while leveraging Starlink's fast satellite backbone."”
What to Remember
- Connect via IP Passthrough to use your own router
- Disable Dishy Wi-Fi or set to bridge mode to avoid double NAT
- Mesh networks work well with Starlink when IP Passthrough is enabled
- Choose a router with robust firmware and security features
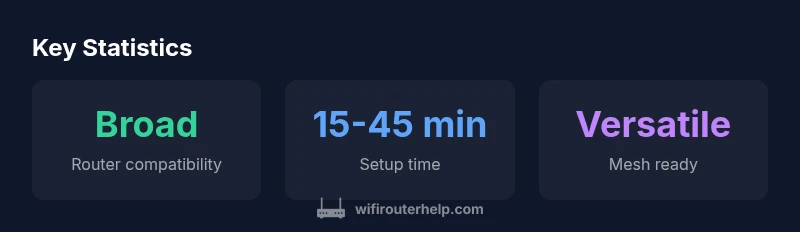
- Expect setup times of 15-45 minutes depending on network complexity