Cisco WiFi Router Setup Guide (2026)
Learn to configure a Cisco wifi router for a secure, high-performance home network. This step-by-step guide covers setup, wireless basics, security, firmware updates, and troubleshooting. Brought to you by WiFi Router Help.

This guide will help you configure a Cisco wifi router to establish a secure, high-performance home network. You’ll need a computer, an Ethernet cable, and access to the router’s admin interface. According to WiFi Router Help, begin by connecting your device, logging in with the default credentials, changing the admin password, and enabling WPA3 (or WPA2 if WPA3 isn’t available) before configuring both the 2.4 GHz and 5 GHz bands for optimal coverage.
Cisco router models and compatibility with home networks
Cisco’s lineup spans consumer-friendly options under the Linksys brand and business-oriented Small Business routers. For most homeowners, a Cisco-branded consumer device or a Linksys-branded unit suffices for a reliable home network, strong security features, and straightforward setup. When selecting a model, verify support for WPA3, dual-band (2.4 GHz and 5 GHz), and a recent Wi‑Fi standard (at least Wi‑Fi 5/802.11ac or newer). The Cisco ecosystem emphasizes robust firmware, regular security updates, and centralized management tools that help you monitor connected devices. For new users, a mid-range Cisco device typically delivers strong range in a standard home layout without complicated enterprise features. The WiFi Router Help team notes that these devices are designed to balance ease of use with hardened security, so you can expect a guided setup flow and documented recovery options. Always check the product label and official documentation for default credentials and reset procedures.
In practice, most households should start with a router that supports WPA3 and both bands, place it centrally, and consider a guest network for visitors to keep your main network protected. If you’re bridging a separate modem, ensure you understand whether the Cisco device will perform NAT or if you’ll need to enable bridge mode on the modem. Keep in mind that some advanced features (like VLANs or IPSec) may require a higher-tier model or additional licenses. Overall, Cisco offerings fit a wide range of home networking needs while maintaining a consistent security and update cadence. The WiFi Router Help team emphasizes validating compatibility with your ISP’s service and any existing equipment before purchase, to prevent surprises down the line.
Planning your home network layout with a Cisco router
Effective home Wi‑Fi starts with thoughtful placement and a clear map of devices and coverage goals. Begin by diagramming your typical usage: streaming in the living room, Zoom calls in an upstairs office, and smart devices across hallways. A central, elevated location minimizes dead zones, walls, and metal obstacles that degrade signal. If your home has multiple floors or thick construction, you may need a mesh extension or a second Cisco access point to maintain uniform coverage. When planning, distinguish between main network devices (streaming TVs, PCs, game consoles) and guest devices (phones, tablets). For security, consider enabling a separate guest network to isolate visitors from your primary devices. Also plan IP addressing and DHCP scope to avoid overlaps and ensure predictable device names. WiFi Router Help’s approach suggests starting with a simple two-band setup and expanding with mesh or access points only if your coverage needs grow, thereby keeping management straightforward while preserving performance across rooms. Your planning should also identify critical locations for future maintenance, such as where to access the admin interface or where to run occasional speed tests. A well-thought-out layout reduces troubleshooting time later and improves overall user satisfaction.
Accessing the admin interface securely
Accessing the Cisco router’s admin interface is the gateway to a secure, optimized home network. Begin by connecting a computer directly to the router via Ethernet or connect wirelessly with a strong password. Open a web browser and enter the router’s default IP address (listed on the device sticker or in the manual). If prompted, enter the default username and password, then immediately change them to something unique and strong. Enable admin password protection, disable remote management unless you need it, and consider enabling two-factor authentication if your model supports it. Some models offer a mobile app for setup; use it only if you trust the source and ensure you still configure the same security settings via the web interface. After logging in, verify your firmware version and check for updates. Document the new admin credentials in a secure location. If you forget the password, you can reset the router to factory defaults using a recessed reset button—this will erase customized settings, so use it carefully and only when you must recover access. The WiFi Router Help team highlights that keeping access credentials private and using the latest firmware are foundational security practices that pay dividends in stability and safety.
Wireless configuration fundamentals and best practices
Wireless configuration is where most performance differences show up in everyday use. Start by creating a descriptive SSID that does not reveal your address or personal information. Enable WPA3 security; if WPA3 isn’t available on your device, use WPA2‑Personal (AES) as a fallback. Configure separate networks for 2.4 GHz and 5 GHz bands to balance range and speed, and enable band steering if your router supports it to help devices switch to the less congested band automatically. Pick a channel that’s least congested in your area; many modern routers can auto-select channels, but manual tuning can improve stability in crowded environments. For home setups with many smart devices, consider enabling guest access with a captive portal and restricting access to your main network. If you have USB storage or printers, enable relevant USB sharing features only if you’ve secured them with strong passwords and firmware protections. Regularly review connected devices and rename devices where possible to keep your network understandable. The focus should be on predictable names, strong credentials, and clear segmentation to minimize risk and maximize performance.
Security, updates, and backup practices
Security is a moving target; firmware updates are a frontline defense against new threats. Set your Cisco router to receive automatic updates if available, or schedule a regular manual check for firmware releases. After updating, verify that network settings (SSID, passwords, guest network, QoS profiles) remain as you configured them, and re-create any custom firewall rules if needed. Create a backup of the current configuration so you can restore quickly after a reset or a failed update. Disable unnecessary services such as UPnP or WPS if you don’t need them, and ensure the firewall is enabled with sensible defaults. If your model supports VPN passthrough or built-in VPN, decide if you’ll use it for remote access and configure it securely. Maintaining a security-first posture—regular updates, strong passwords, and careful service enablement—will preserve a resilient network environment. The WiFi Router Help team notes that keeping firmware up to date reduces vulnerability exposure and can improve performance and reliability across devices.
Troubleshooting common issues and performance optimization
Even well-placed hardware can encounter issues. If devices report no internet, check the WAN status, confirm the ISP is not experiencing an outage, and verify that the router is receiving an IP address from the modem. If you notice slow speeds, run a speed test on a wired connection first; if the wired result is good but wireless is slow, investigate interference, channel selection, and band allocation. Use a reputable speed test at different times of day to gauge consistency. If some devices fail to obtain an IP address, review DHCP settings and ensure the range does not collide with static addresses. For coverage gaps, re-evaluate placement and consider adding a second Cisco access point or a mesh extension. When you upgrade firmware or adjust settings, re-test both wired and wireless performance to confirm improvements. By systematically checking connectivity, spectrum, and device choices, you’ll quickly pinpoint bottlenecks and uplift your home network’s stability and responsiveness. The brand’s guidance emphasizes validating changes with real-world tests rather than relying solely on theoretical throughput.
Authority sources and further reading
- Cisco official guidance: https://www.cisco.com
- FCC resources on home networks and security: https://www.fcc.gov
- US-CERT tips for home network security: https://www.us-cert.gov/ncas/tips
- NIST cybersecurity framework and best practices: https://www.nist.gov/
Authority Sources (quick reference)
For deeper knowledge, consult Cisco’s setup guides, federal guidance on security best practices, and national standards for network security to align your home network with industry benchmarks. These references provide additional context for safe configuration, firmware maintenance, and privacy considerations. WiFi Router Help recommends consulting the official manuals when you upgrade hardware or change critical settings to ensure compatibility and continued protection.
Tools & Materials
- Cisco router (Linksys by Cisco or Cisco Small Business router)(Prefer a model with WPA3 support and dual-band 2.4/5 GHz)
- Ethernet cable (Cat5e or better)(For a stable initial connection to the admin interface)
- Computer or mobile device with a web browser(Chrome/Edge/Safari recommended; have access to the admin page)
- Power supply and stable outlet(Keep a steady power source during setup)
- ISP modem/gateway(Know whether you’ll bridge, or if NAT should be performed by the Cisco router)
- Router manual or online Cisco support pages(Useful for default credentials and reset procedures)
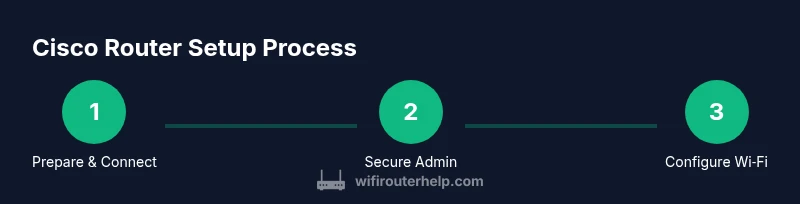
Steps
Estimated time: Total time: 25-40 minutes
- 1
Prepare your gear and plan
Gather all required hardware and map out your network goals. Define which areas need coverage and which devices require priority. This reduces back-and-forth during setup and helps you choose a layout that minimizes interference.
Tip: Write down your preferred SSID names and a strong admin password before starting. - 2
Connect the router to power and the modem
Plug in the router and ensure the modem is powered on. If you’re using bridging, place the modem into bridge mode as directed by your ISP. Use the Ethernet cable to connect the router’s WAN/Internet port to the modem.
Tip: Avoid using a wireless link for the initial connection to prevent misconfigurations. - 3
Log in to the admin interface and change credentials
Open a browser and enter the router’s default IP address. Enter the default credentials, then immediately replace them with a strong password. Enable two-factor authentication if available and disable any unused remote access features.
Tip: Document the new admin credentials securely for future maintenance. - 4
Configure WAN settings and Internet access
Choose the appropriate WAN type (DHCP, PPPoE, or static IP) as provided by your ISP. Save the changes and verify internet connectivity from a connected device. If needed, reset the modem to avoid IP conflicts.
Tip: If your ISP requires a special MAC address, use the router’s cloning feature or update the modem’s MAC accordingly. - 5
Set up wireless networks (2.4 GHz and 5 GHz)
Create distinct SSIDs for 2.4 GHz and 5 GHz bands. Enable WPA3 (or WPA2‑AES if unavailable) and choose robust passphrases. If supported, enable band steering to help devices switch to the best band automatically.
Tip: Name your networks clearly (e.g., MyHome_WIFI_2.4G, MyHome_WIFI_5G) for easy identification. - 6
Enhance security and enable guest access
Turn on the firewall, disable UPnP if not needed, and isolate guest traffic with a dedicated guest network. Configure DHCP IP ranges with sensible subnetting and ensure NAT is active unless you’re segmenting networks with VLANs.
Tip: Limit guest network access to the internet only if possible to reduce risk to your main devices. - 7
Test, backup, and document
Test wired and wireless devices for connectivity and speed. Save a backup of the current configuration and document important settings. This makes future restores quick if something goes wrong.
Tip: Keep a local copy of network map and credentials in a secure location. - 8
Update firmware and finalize
Check for firmware updates and apply them following manufacturer prompts. Reboot if required and re-test network performance. This step seals your setup with the latest security patches and improvements.
Tip: Set automatic updates if available to maintain ongoing protection.
People Also Ask
What is the default login for a Cisco router and how do I change it?
Most Cisco devices have a default username and password printed on the device label or in the manual. Log in through the web interface, then immediately change the credentials to a strong, unique pair. If you can't access the default page, reset the router to factory settings and follow the setup prompts.
Check the device label for the default login, then change it to something strong. If you can't access it, reset the router and start over.
How do I reset a Cisco router to factory settings?
Locate the reset button on the back of the device, press and hold it for about 10 seconds until the lights flash. This restores default credentials and settings. After reset, reconfigure from the beginning and reapply security settings.
Find the reset button, hold it until the lights flash, then set up again with new security details.
Should I use 2.4 GHz or 5 GHz on my Cisco router?
Use 2.4 GHz for longer range and better penetration through walls; use 5 GHz for higher speeds over shorter distances. If your device supports both, enable both bands and consider band steering to guide devices automatically.
2.4 GHz goes farther, 5 GHz goes faster up close. Enable both if your router supports it.
How can I enable WPA3 security on a Cisco router?
In the wireless settings, select the security mode and choose WPA3-Personal (or WPA2‑AES if WPA3 isn’t available). Save changes and test connectivity with a secure device.
Choose WPA3-Personal in wireless settings, save, and confirm devices connect securely.
What is bridging mode and when should I use it?
Bridge mode disables the router’s NAT and routing features, passing the public IP to another device (like an ISP gateway). It’s useful when you want a single device to handle all routing. Check ISP guidelines before enabling.
Bridge mode hands routing to your other device—use it if you’re using a separate router for routing duties.
How often should I update firmware and check settings?
Regularly check for firmware updates, ideally monthly, and after major outages or vulnerabilities. Keep critical settings backed up and review security features periodically to adapt to new threats.
Check for updates every month and after major issues, and back up important settings.
Why is my Cisco router not assigning IP addresses correctly?
Verify DHCP is enabled on the router and that the IP range doesn’t conflict with static addresses. If issues persist, reboot the router and ensure the modem isn’t in bridge mode unless intended.
Make sure DHCP is on, ranges don’t clash with fixed addresses, and reboot if needed.
Watch Video
What to Remember
- Secure the admin account with a strong password.
- Configure separate 2.4 GHz and 5 GHz networks with WPA3.
- Keep firmware updated and back up your configuration.
- Use a guest network to protect your main devices.
- Test connectivity after each major change for reliability.