Verizon Router Extender Setup: The Complete How-To Guide
Learn how to extend your Verizon Wi-Fi with a compatible extender. This step-by-step guide covers placement, pairing methods, troubleshooting, security, and maintenance for reliable whole-home coverage.

Extend coverage from your Verizon router by adding a compatible extender, position it midway between the router and weak spots, then configure using the app or web interface. Ensure it supports current Wi‑Fi standards and uses the same SSID for seamless roaming.
How a Verizon router extender can improve home coverage
A Verizon router extender can dramatically improve wifi coverage in large homes, multi-story layouts, or spaces with thick walls. By creating a bridge between your main router and devices in dead zones, you can push stable signals deeper into rooms where signal strength previously dropped. According to WiFi Router Help, a Verizon router extender can bridge signal gaps by creating a wired or wireless link. The WiFi Router Help team found that positioning the extender roughly halfway between the main router and the farthest device usually yields the best balance of speed and reliability. In practice, you’ll still want to avoid metal appliances, large mirrors, and dense concrete that can interfere with radio waves. Think about high-traffic zones first—living rooms, home offices, and bedrooms—then adjust the extender’s location if you notice new weak spots.
Key takeaway: proper placement matters more than buying the most powerful device. A small adjustment in distance or angle can unlock significant gains in throughput for multiple devices.
Compatibility, standards, and choosing the right extender
Verizon routers and most third-party extenders support common Wi‑Fi standards such as 802.11ac and 802.11ax. When selecting an extender, look for models that explicitly advertise compatibility with carrier-provided gateways or term “works with” Verizon setups. Decide whether you want a traditional range extender or a mesh-like system; mesh solutions often provide a single network name (SSID) and easier roaming, but may cost more and require compatible hardware. If you prefer simplicity, a single extender configured to extend the existing SSID and password can suffice. Always check that the extender offers WPA3 or at least WPA2 security and supports both 2.4 GHz and 5 GHz bands for best performance. Eventual gains come from matching hardware capabilities to your home’s layout and internet speed requirements.
Tip: before buying, confirm the extender’s backhaul option (wireless or wired). A wired Ethernet backhaul can dramatically improve performance in busy households and reduce the impact of interference in crowded bands.
Planning the placement and test plan
Placement is the most critical variable after hardware choice. Start by locating the router in a central, elevated spot, avoiding basements or tucked away cabinets. Place the extender roughly halfway between the router and the primary dead zones, ensuring there’s a clear path and minimal obstructions. Use a smartphone or laptop to run quick speed tests in various rooms after each relocation; aim for at least 50–70 Mbps on devices that typically use Wi‑Fi, adjusting until you see a stable improvement. If your extender supports a secondary Ethernet backhaul, connect it with a short Ethernet cable to the router for a stronger, more reliable link. Keep the router and extender on different channels if needed to minimize co-channel interference while maintaining the same SSID for roaming convenience.
Note: record the best-positioned location with a simple sketch or photos so you can revert if needed.
Troubleshooting common issues
If you experience dropped connections, first confirm both devices are on compatible firmware versions and that the extender is within range of the main router. For WPS-based pairing, press the WPS button on the router and then on the extender within a short window; if pairing fails, use the manual setup via the extender’s app or web interface. When speeds dip, test with multiple devices to rule out a single-device issue. Check that the extender isn’t positioned behind large objects like bookcases or electronics cabinets, and re-run speed tests after each relocation. If devices repeatedly fail to roam, consider giving the extender its own SSID temporarily during setup and then re-enable roaming once stable.
Common culprits include outdated firmware, placement too far from the router, and conflicting SSIDs. Regular maintenance—firmware updates and periodic repositioning—helps sustain performance.
Security, firmware updates, and maintenance
Security should be a core consideration in any home network upgrade. Enable WPA2 or WPA3 on both devices, use a strong, unique password for admin access, and disable WPS after setup to minimize residual risk. Set a reminder to check for firmware updates at least once a quarter, as manufacturers continually patch vulnerabilities and improve performance. If you rely on guest networks for visitors, keep guest access isolated from primary devices, and consider enabling client isolation where supported. Finally, test your network after updates to confirm there are no regressions in coverage or speeds and adjust if necessary.
Authority sources and practical references
For policy and security best practices, refer to reputable sources that inform safe wireless configurations:
- FCC: Consumer guides on home Wi-Fi basics and security. https://www.fcc.gov
- CISA: Cybersecurity guidance for small networks and device hardening. https://www.cisa.gov
- NIST: Wireless network security standards and recommendations. https://www.nist.gov/topics/wireless-network-security
These sources help ensure you follow widely-accepted security practices while optimizing your Verizon router extender deployment.
Tools & Materials
- Verizon router extender(Ensure compatibility with your Verizon gateway and supports 2.4/5 GHz bands.)
- Smartphone or computer(For initial setup and ongoing management via app or web interface.)
- Ethernet cable (Cat5e or better)(Use for wired backhaul if available between extender and router.)
- Power outlet near router/extender(Stable power source to avoid dropouts during setup.)
- Latest firmware for extender(Ensure you can install updates during setup.)
- Verizon account credentials(Needed if you manage the gateway through a carrier app.)
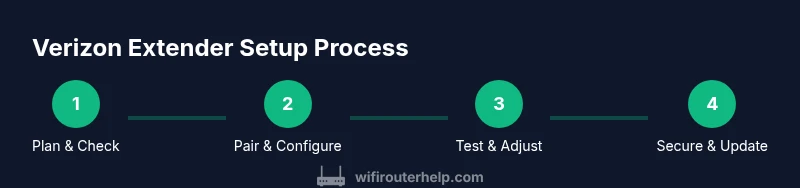
Steps
Estimated time: 25-45 minutes
- 1
Check compatibility and plan placement
Identify a compatible extender and map out a path from the router to the farthest rooms with Wi-Fi needs. Consider obstacles, wall materials, and device placement in high-traffic areas. This planning reduces the need for repositioning later.
Tip: Choose a spot roughly midway between router and dead spots, avoiding metal appliances and thick walls. - 2
Reset extender to factory settings
If the extender has been used before, perform a factory reset to clear prior configurations. This helps ensure a clean, predictable setup experience.
Tip: Use a pin to hold the reset button for at least 10 seconds until the indicator lights blink. - 3
Power on and wait for ready status
Plug in the extender and allow it to boot fully. Wait for the correct LED indicator that confirms the device is ready to pair.
Tip: Give it 60–90 seconds; rushing may skip the boot sequence and cause setup failures. - 4
Pair with the Verizon router via app or WPS
Choose your preferred pairing method: WPS for quick setup or the extender’s app/web interface for guided configuration. Follow prompts to link the devices.
Tip: If you use WPS, press the router’s WPS button first, then the extender’s WPS button within a short window. - 5
Configure shared network settings
Decide whether to use the same SSID for seamless roaming or assign a distinct SSID during setup. Ensure security settings (WPA2/WPA3) and the password are strong.
Tip: For simple roaming, keep the same SSID and password as your main network. - 6
Place for optimal coverage and test
Relocate the extender if speeds drop in certain rooms. Run speed tests in multiple locations to validate coverage.
Tip: Document the best spot with a quick schematic so you can revert if needed. - 7
Enable security features and update firmware
Turn on the recommended security protocol and check for firmware updates. Scheduling regular updates keeps your network safer.
Tip: Disable WPS after setup to reduce exposure; keep firmware current.
People Also Ask
Do I need a Verizon extender specifically for my FiOS setup?
While non-Verizon extenders can work, Verizon-branded or explicitly supported models often guarantee better compatibility with FiOS gateways and automatic feature support. Check that the extender claims compatibility with your gateway.
If you’re using FiOS, a Verizon-supported extender ensures smoother setup and better compatibility with your gateway.
Can I use WPS to connect the extender?
WPS can simplify pairing, but it has known security weaknesses. Prefer app-based or web-based pairing and disable WPS after setup.
WPS is convenient but less secure; use it only during setup and disable afterward.
Will using an extender slow down my internet?
Extenders can reduce speed by design, especially on wireless backhaul. Using Ethernet backhaul or upgrading to a mesh system can mitigate speed loss.
Yes, some slowdown can happen; wired backhaul often minimizes this.
Should I keep the same SSID as my main network?
Keeping the same SSID helps devices roam without reconnecting. If roaming issues appear, temporarily separate the networks to isolate a problem.
Same SSID makes devices move seamlessly; if issues arise, try separate networks during troubleshooting.
How do I know where to place the extender for best results?
Place the extender midway between router and weak zones with minimal obstructions. Use real device tests to confirm the strongest signal in key rooms.
Put it halfway and test signals in common rooms to confirm.
How often should I check for firmware updates?
Check monthly or enable automatic updates if available. Updates often fix security issues and improve compatibility.
Check for updates monthly to keep security and performance current.
Watch Video
What to Remember
- Plan placement before buying hardware.
- Use a single network name for smooth roaming when possible.
- Regularly update firmware to maintain security and performance.
- Test coverage with real devices to validate improvements.