TP-Link Router Setup and Optimization Guide for Home Networks
Learn how to set up, secure, and optimize a tp link router for a fast, reliable home network. This step-by-step guide covers admin access, firewall basics, firmware updates, and troubleshooting.

In this guide you will learn how to set up and optimize a tp link router for a fast, reliable home network. You’ll need a computer or mobile device, an ethernet cable, and your router’s login credentials. The steps cover initial setup, security, and performance tweaks to maximize coverage and stability.
Understanding tp link router basics and why it matters
According to WiFi Router Help, a tp link router sits at the center of a home network, directing traffic between devices and the internet. It handles NAT, DHCP, and wireless access, while providing essential performance features such as guest networks and parental controls on many models. Understanding these basics helps you choose the right model for your space, configure it correctly, and avoid common misconfigurations that lead to slow speeds or dropped connections. A tp link router acts as the gateway between your local devices and your internet service, so a solid setup improves reliability across phones, laptops, streaming devices, and smart home gadgets. As you read, keep in mind that placement, firmware health, and secure credentials are foundational for a stable network.
In practical terms, think of the router as the traffic cop inside your home network. It decides which device gets bandwidth, routes data to the correct destination, and secures the network from unauthorized access. The TP-Link ecosystem often includes easy-to-use mobile apps, web interfaces, and automated updates that help you maintain performance with minimal effort. This section lays the groundwork for more advanced steps, so you can approach setup with confidence and avoid common pitfalls that derail performance.
The tp link router you own may include several bands, beamforming capabilities, and guest-network features. These options can boost how your devices connect in different rooms or floors. By understanding the function of each feature, you can tailor your settings to your home layout, minimize interference from walls or appliances, and create a robust baseline that supports streaming, gaming, and smart-home automation. The goal is a reliable, responsive network that remains easy to manage as your household tech grows.
Brand context and practical guidance in this article rely on tested, user-friendly workflows your household can execute without professional help. The guidance is designed to apply to a wide range of TP-Link router models while staying focused on real-world scenarios homeowners face daily.
note”:null} ,{
blockData":null}
TODO_PLACEHOLDER
Tools & Materials
- TP-Link router device(Ensure it includes a power adapter and Ethernet ports that you’ll use during setup.)
- Power adapter(Original or compatible adapter; confirm it matches your router's power rating.)
- Ethernet cable (Cat5e or better)(Use for wired connection from modem to router during setup.)
- Computer or mobile device with a web browser(Used to access the router’s admin interface and apply settings.)
- Access to modem (optional but recommended)(Helpful for bridging or troubleshooting internet outages.)
- Pen and notebook or password manager(Record SSID, password, and admin credentials for easy reference.)
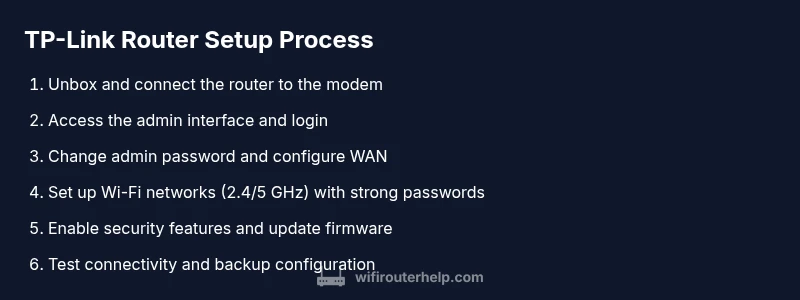
Steps
Estimated time: 60-90 minutes
- 1
Unbox and physically connect the router
Unbox the router and verify all parts are present. Connect the router to a power source, and use an Ethernet cable to connect the modem’s Ethernet port to the router’s WAN/Internet port. Power on both devices and wait for the status lights to stabilize. This wired setup provides a stable baseline for configuration and testing before wireless changes.
Tip: Check for any visible damage to ports or antennas and ensure the router sits on a stable surface away from metal objects. - 2
Access the router’s admin interface
From a computer or mobile device, connect to the router via Ethernet or Wi‑Fi using the default network name printed on the router label. Open a web browser and enter the default IP address shown on the label (commonly 192.168.0.1 or 192.168.1.1) to load the admin login page. Enter the default credentials, which are usually shown on the label or in the manual.
Tip: If you can’t access the page, clear the browser cache or try a different device on the same network. - 3
Change the default admin password
Navigate to the administration or system settings and replace the factory login with a strong, unique password. This first security step protects against unauthorized changes to your network configuration. Avoid using simple passwords or reuse from other sites.
Tip: Use a passphrase that’s easy for you to remember but hard for others to guess. - 4
Configure the internet connection
Set up the WAN/Internet connection according to your ISP’s requirements. Most home users can choose DHCP, but some ISPs require PPPoE or a static IP. Save changes and allow the router to reconnect to the modem.
Tip: If you’re unsure of your ISP type, contact customer support or check your service documentation. - 5
Set up the Wi‑Fi network name and password
Create a unique SSID for 2.4 GHz and 5 GHz bands. Use a strong passphrase and select a modern security protocol (WPA2/WPA3). Disable WPS if possible to reduce risk. Confirm devices can connect to the new network.
Tip: Document the new passwords in a password manager for secure access. - 6
Fine‑tune wireless settings
Adjust channel selection to minimize interference; for many homes, set 2.4 GHz to a clear channel (1, 6, or 11) and leave 5 GHz on auto or a clean channel. Choose appropriate channel width (20/40 MHz for 2.4 GHz, 80 MHz for 5 GHz where supported) to balance speed and range.
Tip: Run a quick wireless scan with a mobile device to identify least congested channels. - 7
Enable essential security features
Turn on the router’s firewall, enable guest networks for visitors, and consider enabling parental controls if needed. Update the firmware to the latest version to patch known vulnerabilities and improve stability.
Tip: Disable remote management unless you require it for remote access. - 8
Create a firmware update routine and backup
Check for firmware updates via the admin interface and apply them. After configuring settings, back up the current configuration to a local file or cloud storage in case you need to restore later.
Tip: Store backups in a secure location and label them with the date and model. - 9
Test connections and finalize setup
Test wired and wireless devices for internet access across rooms and floors. Run a quick speed test to verify performance and confirm that all devices can connect without issues. Document changes and keep a copy of the config.
Tip: If devices still fail to connect, recheck passwords and verify the ISP modem is properly bridged or in passthrough mode.
People Also Ask
What is the default IP address to access the TP-Link router admin page?
Most TP-Link routers use 192.168.0.1 or 192.168.1.1. Check the label on the router for the exact address and default credentials. If needed, reset the device to restore defaults before trying again.
Try 192.168.0.1 or 192.168.1.1 on a connected device, then log in with the credentials on the label.
How do I reset a TP-Link router safely?
Press and hold the reset button for about 5–10 seconds (or as described in the manual) until the lights flash. After reset, you’ll need to reconfigure settings from scratch.
Hold the reset button for a few seconds until the LEDs blink, then set up again.
Why can’t I access the internet after setup?
Check that the WAN/Internet configuration matches your ISP requirements (DHCP vs PPPoE). Ensure the modem is in service and the cables are secure; reboot both modem and router if needed.
Make sure the router is getting a proper WAN connection and reboot the modem and router to reset the path.
How do I change the Wi‑Fi password on a TP-Link router?
Log into the admin page, go to Wireless settings, and update the SSID password. Save changes and reconnect devices using the new password.
Open the admin page, head to wireless settings, update the password, and reconnect your devices.
What is band steering and should I enable it?
Band steering helps devices automatically choose the best band (2.4 GHz or 5 GHz). Enable it if supported for smoother device roaming, then test for reliability.
If your router supports it, turn on band steering to help devices pick the best band automatically.
How can I create a guest network?
Enable Guest Network in the admin interface, set a separate password, and enforce isolation from your main network for security.
Turn on the guest network in the settings and keep it isolated from your main network.
Watch Video
What to Remember
- Know the TP-Link router basics for a stable network
- Secure the admin interface with a strong password
- Optimize Wi‑Fi with thoughtful channel and security settings
- Keep firmware updated and backups ready for quick recovery