TP-Link Archer AX3000 Setup Guide: Install, Secure & Optimize
Learn how to set up the TP-Link Archer AX3000 router, secure your network, and optimize performance with step-by-step guidance from WiFi Router Help.

You're going to configure and optimize your TP-Link Archer AX3000 router for reliable Wi-Fi 6 coverage across your home. This guide walks you through initial setup, security hardening, and performance tweaks that you can apply today. According to WiFi Router Help, following these steps will improve stability, reduce dead zones, and simplify ongoing maintenance.
What is the tp link archer ax3000?
The tp link archer ax3000 is a Wi‑Fi 6 router designed to deliver higher speeds and better coverage for homes with multiple devices. While the marketing numbers on the box may shout about theoretical rates, real-world performance depends on layout, interference, and firmware. In this section, we break down the hardware features, the signal architecture, and what makes this model stand out among mid-range routers. You get dual-band radios, MU-MIMO, OFDMA, and beamforming support, all aimed at reducing congestion when many devices are connected simultaneously. For homeowners, the AX3000 class offers a practical balance of price and performance, especially when paired with a solid modem and reasonable placement. To get the most from the Archer AX3000, you’ll want to understand how its beamforming, band steering, and smart connect features help distribute traffic efficiently across rooms and floors. Throughout this section, we’ll tie those capabilities to real-world scenarios—streaming in the living room, video conferencing in a home office, and gaming on a console in the basement.
Planning your network layout for Archer AX3000
Effective placement can make or break your Archer AX3000 experience. Start by choosing a central, elevated location away from thick walls and metal appliances, which can blunt signal strength. Consider a two-story layout and place the router roughly halfway between the primary devices and the areas with the worst coverage. Use separate SSIDs for 2.4 GHz and 5 GHz networks, or enable Smart Connect if your devices support it. This section also covers how to map device needs to zones in your home, plan for guest access, and anticipate future additions like smart hubs or a mesh extension if your space grows.
Setup prerequisites and getting started
Before you dive into the setup, gather the essentials: the Archer AX3000 router, the included power adapter, an Ethernet cable, and a computer or mobile device with a web browser or TP-Link's app installed. If you’re replacing an existing gateway, power down the old device before connecting the AX3000. Connect the WAN/Internet port on the router to your modem with the Ethernet cable. Power up, wait for the lights to stabilize, and prepare to access the web interface or the TP-Link app for configuration. In this section we outline both wired and wireless access methods to start the setup confidently.
Configuring wireless settings and security
Wireless configuration is where most users personalize their network. Create strong, unique passwords for both the admin interface and the Wi‑Fi networks. Name your SSIDs clearly (e.g., HomeWiFi-2.4, HomeWiFi-5) and enable WPA3 when available, or use WPA2‑AES if devices don’t support WPA3. Enable guest network isolation to keep visitors off your main network, and adjust the 2.4 GHz and 5 GHz channels to minimize interference. This section also covers enabling firewall protections, turning off WPS if not needed, and setting a default admin password to prevent unauthorized access.
Performance tuning: channels, QoS, and firmware
Optimizing performance involves channel selection, QoS rules, and timely firmware updates. For most homes, auto channel selection works well, but you can manually scan for the clearest 2.4 GHz and 5 GHz channels in your area. Quality of Service (QoS) rules help prioritize gaming or video calls, while leaving less critical devices on best-effort delivery. Keep firmware up to date to patch security vulnerabilities and improve stability. In this section we’ll discuss practical knobs you can adjust, how to test impact, and when to revert changes if performance worsens.
Troubleshooting common issues with the Archer AX3000
Connectivity drops, slow speeds, and unexplained resets are common pain points. We cover steps to diagnose physical connection problems, confirm ISP settings, reset passwords, and verify whether the issue is device-specific or network-wide. Reset procedures, simple reboots, and safe factory resets are explained with clear guardrails to prevent data loss. We also discuss when to contact support and how to collect logs for faster issue resolution.
Tools & Materials
- TP-Link Archer AX3000 router(Includes power adapter and documentation)
- Ethernet cable (Cat5e or better)(For reliable wired setup and initial configuration)
- Computer, tablet, or smartphone(With a web browser or TP-Link app installed)
- Active modem connection (optional if upgrading)(Needed if you’re replacing an existing gateway)
- Physical environment space(Open shelf or high chest away from metal objects)
Steps
Estimated time: Total time: 20-40 minutes
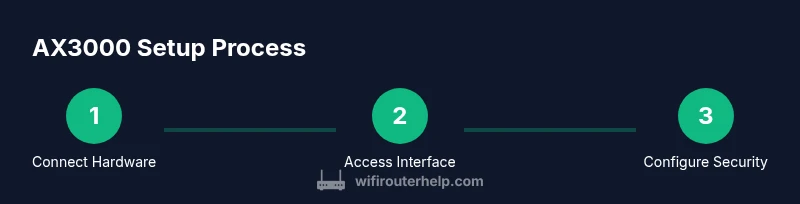
- 1
Connect the hardware
Unbox the router, connect the modem to the WAN/Internet port with an Ethernet cable, and plug in the power. Wait for the LEDs to illuminate in a stable pattern. This establishes a wired baseline for setup and helps ensure a consistent connection during configuration.
Tip: If the modem was previously in bridge mode, reboot it after connecting the AX3000 to ensure the new router becomes the primary gateway. - 2
Access the router interface
On a connected device, open a browser and enter the default address shown on the label (commonly http://tplinkwifi.net or 192.168.0.1). Log in with the default credentials printed on the router or in the quick start guide. This grants access to the web UI or the TP-Link app for initial setup.
Tip: If you can’t reach the interface, be sure your device is on the same network and temporarily disable any VPNs or proxies that might block local addresses. - 3
Update firmware
Check for the latest firmware via the web UI or TP-Link app and install it. Firmware updates fix known issues and improve security. After the update, reboot the router to ensure all changes take effect properly.
Tip: Back up current settings if the UI offers a backup option before updating, so you can restore quickly if something goes wrong. - 4
Configure internet connection
Choose your connection type (DHCP, PPPoE, or Static IP) as provided by your ISP. Enter any required credentials and save. If your whole-house devices immediately start losing connectivity, re-check the WAN settings and re-run the connection test.
Tip: If you’re unsure of the correct type, contact your ISP or check the service details on your account page. - 5
Set up wireless networks
Create distinct SSIDs for 2.4 GHz and 5 GHz bands, or enable Smart Connect if you want automatic band steering. Use strong, unique passwords and select WPA3 if possible. Confirm guests have a separate network with limited access to your main devices.
Tip: For devices far from the router, assign them to the 2.4 GHz network; for devices near the router or with high bandwidth needs, use 5 GHz when possible. - 6
Enable security and maintenance
Turn on firewall features, disable WPS if not needed, and set a strong admin password for the router. Schedule regular firmware checks and backups of your configuration. Test the network by running speed tests from multiple rooms to verify coverage and consistency.
Tip: Keep a written note of your admin password in a safe place and enable two-factor authentication if the router UI supports it.
People Also Ask
What is the Archer AX3000 and who should consider it?
The Archer AX3000 is a Wi-Fi 6 router designed for homes with multiple devices and moderate to large coverage needs. It balances performance and price and supports modern security features. It’s suitable for users upgrading from older Wi‑Fi standards who want stable performance in typical home layouts.
The Archer AX3000 is a Wi‑Fi 6 router that targets households with several devices. It offers solid performance at a reasonable price and is a good upgrade for most homes needing better coverage.
Should I enable WPA3 security on the AX3000?
If your devices support WPA3, enable it for stronger security. If not, use WPA2‑AES or mixed mode to preserve compatibility. Avoid leaving the network on WEP or an open configuration.
If your devices support it, use WPA3 for stronger security. If not, WPA2 with AES is acceptable, and avoid legacy options that are insecure.
How do I update the Archer AX3000 firmware?
Check for updates via the web interface or TP-Link app, download the latest version, and install. Reboot the router after updating to ensure changes take effect.
Open the router’s interface or the app, check for updates, install, then reboot to apply changes.
What if I forget the router admin password?
Use the reset button on the back of the router to restore factory defaults, then reconfigure the device. After reset, set a new admin password immediately.
If you forget the admin password, reset the router and set up a new password during reconfiguration.
Can I use the AX3000 as part of a mesh system?
The AX3000 is primarily a standalone router. It can work with a compatible satellite if the system is designed to support a single-mesh configuration, but it won’t replace a dedicated mesh kit.
It’s mainly a stand-alone router; you may pair it with compatible components, but it’s not a full mesh solution by itself.
How can I test network performance after setup?
Run speed tests on multiple devices in different rooms, check for consistent throughput, and verify both 2.4 GHz and 5 GHz bands are functioning as intended.
Test speeds on devices in various rooms to confirm good coverage and both bands are delivering as expected.
What should I do if devices drop offline frequently?
Reboot the router and check for interference sources. Ensure firmware is current, and consider reassigning devices to different bands if congestion is detected.
Reboot, check for interference, update firmware, and balance devices between bands to reduce congestion.
Is guest network isolation important?
Yes. A guest network isolates visitor devices from your main network, helping protect personal data and smart home devices from potential threats.
Guest networks keep visitors off your main devices, which helps protect your home network.
Watch Video
What to Remember
- Install the Archer AX3000 with central placement for best coverage.
- Secure networks using strong passwords and WPA3 when available.
- Keep firmware updated and back up settings before major changes.
- Test performance across rooms to confirm stable coverage.
- Use guest networks for visitors to keep main devices protected.