TP-Link Archer AX10: Setup, Security, and Optimization
A practical, step-by-step guide to setting up and optimizing the TP-Link Archer AX10 router, covering initial setup, security, performance tweaks, and troubleshooting for home networks.

Learn how to set up the TP-Link Archer AX10 quickly and securely. This guide covers initial unboxing, connecting to your modem, configuring the web UI or app, securing Wi‑Fi with WPA3/WPA2, and optimizing performance with QoS and smart steering. Follow the step-by-step process to get reliable coverage in a typical home and future-proof your network.
Why the Archer AX10 matters for home Wi-Fi
For homeowners seeking a balance of cost and capability, the TP-Link Archer AX10 delivers a reliable entry into Wi‑Fi 6. According to WiFi Router Help, the Archer AX10 offers solid coverage for typical single- and medium-family homes without the complexity of higher-end models. Its dual‑band design supports common devices like smartphones, laptops, streaming devices, and smart home gear. While it may not replace a premium mesh system in a large mansion, it provides consistent performance for most apartments and small houses. In this section, we explore what makes the AX10 a practical choice, what limitations to expect, and how its feature set maps to real-world use. You'll learn how to position it for best signal, pick the right firmware channel, and what to expect during the initial configuration. This is the core foundation before you dive into setup and optimization.
Planning your network layout for Archer AX10
Your setup will perform best when you plan coverage before unboxing. Start by mapping your home layout and identifying central locations that minimize walls and metal obstacles. Place the AX10 on a high shelf or a desk in the main living area to maximize range on both floors. Keep it away from microwave ovens, cordless phones, and large metal appliances, which can create interference. If you have a multi-story home, consider a single-router layout on the middle floor and adjust antenna orientation for a balanced signal footprint. Use the free site surveys or simple range tests by walking from room to room with a connected device to see where the signal drops and where it remains strong. Document your intended SSIDs and password choices so you can follow the setup steps without backtracking.
Quick-start: Unboxing and hardware setup
Unboxing is straightforward: confirm you have the AX10 router, the power adapter, an Ethernet cable, and a device to configure the router. Connect the router to power, then connect the WAN/Internet port to your modem with a standard Ethernet cable. Wait a minute or two for the device to boot, then connect a laptop or phone to the router's default Wi‑Fi network or to the router's default IP if you prefer a wired connection. The quick start process is designed to get you online with minimal fuss, after which you move into the official configuration interface. If your internet remains offline after power-on, recheck the cable connections and try restarting the modem and router in sequence.
Accessing the router and initial configuration options
To make permanent changes, you’ll access the router’s admin interface. You can use a web browser by navigating to the router’s default address (often 192.168.0.1 or 192.168.1.1) or open the TP-Link Tether app for mobile setup. The first login should prompt you to create a strong admin password and set up basic security questions. Enable automatic firmware updates so the AX10 stays protected against known vulnerabilities. If you lose access, perform a factory reset by holding the reset button for 10 seconds and re-connecting.
Securing your network: WPA2/WPA3, guest network, parental controls
Security is foundational for a home network. In the Wireless settings, choose WPA3 Personal if available; if not, select WPA2/WPA3 mixed mode to protect older devices. Create a unique SSID for your main network and enable a separate guest network to keep visitors isolated from your primary devices. Enable the firewall, ensure UPnP is disabled unless required, and keep the admin password separate from your Wi‑Fi password. For households with kids or guests, use parental controls to restrict inappropriate content during certain hours. Always update firmware to ensure the latest security patches are installed.
Configuring Wi-Fi: SSIDs, passwords, and security settings
Create distinct networks for 2.4 GHz and 5 GHz with separate, memorable names and strong passwords. Use a passphrase of at least 12 characters combining letters, numbers, and symbols. If your goal is easiest device management, enable an automatic band selection feature (often labeled Band Steering or Smart Connect) so newer devices naturally migrate to the faster 5 GHz band when possible. Keep encryption set to WPA3 or WPA2/WPA3 mixed mode and disable WPS if your model supports it to reduce attack surfaces. After saving changes, test connectivity from multiple devices and adjust the coverage by tweaking antenna orientation or moving the router slightly.
Performance optimization: QoS, band steering, and channel selection
With basic setup complete, you can tune performance to match your household usage. Enable QoS rules to prioritize video conferencing and gaming traffic, especially if you have a crowded network. Use the router’s Band Steering or Smart Connect option to balance devices across 2.4 GHz and 5 GHz networks. For best stability, set the 2.4 GHz channel to a less congested value and the 5 GHz channel to a higher, cleaner channel. If you live in a dense area, consider turning off auto channel selection for one band and manually selecting a channel with less interference. Periodically review client connections to identify slow devices and adjust priorities accordingly.
Advanced features: IPTV, VLANs, AP mode
Some Archer AX10 firmware builds offer advanced features that can help dedicated users. If IPTV is provided by your ISP, ensure multicast settings are correct and consider configuring VLANs as your router demands require. In complex homes or wired backhaul scenarios, AP mode lets you use the AX10 as a pure access point instead of a router, which can simplify network design. Bridge mode may also be available if you want to place the AX10 behind a different router. Always consult the user guide for exact steps, as features can vary by firmware version and region.
Firmware updates and maintenance
Regular firmware updates fix security holes and add features. Check for updates in the admin interface or TP-Link’s mobile app, and enable automatic updates if you want the router to stay current without manual checks. After each update, re-test your network to confirm all devices reconnect properly and adjust settings if any options reset during the upgrade. Consider exporting a backup of your current configuration so you can restore quickly if a change produces unexpected results. Keeping a simple network map with device names helps you verify that new devices connect correctly over time.
Troubleshooting common issues
If you cannot access the admin page, verify you are connected to the AX10’s network and try a wired connection to rule out wireless issues. If the internet is not working after setup, reboot both the modem and router in sequence and verify the WAN/Internet settings match your ISP’s requirements. If devices show weak signals on some floors, adjust antenna orientation and consider a mid-floor placement. When a device does not receive a DHCP address, ensure DHCP is enabled on the router and that it is not in bridge mode unless intentionally configured. Finally, check for a failed firmware update that may have disabled features; reapply the update if necessary.
Tools & Materials
- TP-Link Archer AX10 router(Main device for setup and configuration)
- Power adapter(Included in box)
- Ethernet cable(Use for modem connection or PC setup)
- Smartphone or computer(Required to access web UI or Tether app)
- Web browser or TP-Link Tether app(For configuring settings)
- Stable internet connection from ISP(Optional during initial setup if testing offline mode)
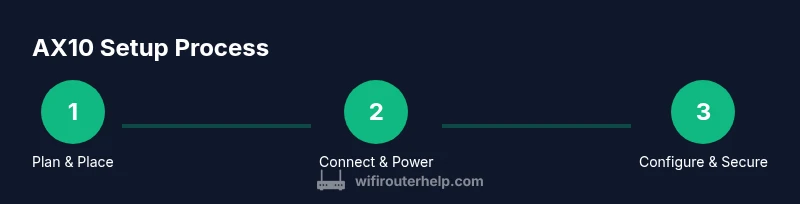
Steps
Estimated time: 30-60 minutes
- 1
Plan and place AX10
Before powering up, decide a central, elevated location for best coverage. This minimizes dead zones on multiple floors and reduces interference from furniture. A quick test walk after placement confirms viable signal in common living areas.
Tip: Aim for a central spot on the main floor; avoid tucked-away corners or closets to maximize reach. - 2
Connect to power and modem
Plug in the AX10 power adapter and connect the WAN/Internet port to your modem with an Ethernet cable. Wait 60–120 seconds for the router to boot before proceeding.
Tip: Keep the modem powered during boot to prevent IP conflicts. - 3
Access the configuration interface
Open a web browser or the TP-Link Tether app and navigate to the router's default address (typical 192.168.0.1 or 192.168.1.1). Log in with the default credentials and set a strong admin password.
Tip: If you can’t reach the login page, try a wired connection or check the label on the bottom of the router for the correct address. - 4
Create admin credentials and update
Create a unique admin password and enable automatic firmware updates. This step protects your network and saves time on future maintenance.
Tip: Use a password manager and avoid reuse of passwords from other sites. - 5
Set up primary Wi‑Fi networks
Configure two networks: 2.4 GHz and 5 GHz with distinct SSIDs and strong passphrases. Ensure encryption is set to WPA3 or WPA2/WPA3 mixed mode if WPA3 isn’t available.
Tip: Keep your main network name simple and your password long and complex. - 6
Enable guest network and security features
Create a guest network to isolate visitors from your devices. Turn on the firewall and disable UPnP unless you need it for specific devices.
Tip: Guest networks should have separate passwords and limited access to LAN resources. - 7
Tweak performance settings
Explore QoS and Band Steering options. Prioritize video calls and gaming, and balance devices between bands to keep traffic smooth.
Tip: Test with a few devices streaming or gaming to confirm improvements. - 8
Save, reboot, and test
Apply changes, reboot if prompted, and verify that all critical devices reconnect automatically. Test internet access on multiple devices across rooms.
Tip: Keep a quick reference of SSIDs and passwords in a safe place. - 9
Backup and plan maintenance
Export a backup of your configuration and schedule periodic checks for updates or changes in your home network use.
Tip: Backups save time if a future change needs rollback.
People Also Ask
What is the best placement for the AX10 in a multi-story home?
Aim for a central location on the main floor to minimize stairs as signal barriers. Test coverage on each floor and adjust placement or add a mesh satellite if hot spots persist.
Place the AX10 on the middle floor for balanced coverage and test multiple rooms.
How do I reset the AX10 if I forget the admin password?
Use the reset button on the back of the router for about 10 seconds to restore factory settings, then reconfigure from scratch.
Hold the reset button for about 10 seconds and reconfigure the router.
Can I use the AX10 with my existing modem?
Yes. Connect the AX10 to your modem via Ethernet and configure DHCP as needed. If you have a separate router upstream, place the AX10 behind it using the appropriate mode.
Yes, you can use it with most modems by connecting it via Ethernet and configuring DHCP.
Is WPA3 supported on the AX10?
The AX10 supports WPA3 Personal where available; if WPA3 isn’t present on some devices, use WPA2/WPA3 mixed mode to maintain compatibility.
Yes, WPA3 is supported where available; mix with WPA2 if needed for older devices.
What is the difference between AX10 and higher-end TP-Link models?
AX10 is a budget Wi‑Fi 6 model with essential features, suitable for small homes. Higher models offer more ports, stronger performance, and advanced features like enhanced QoS and more robust hardware.
AX10 is a budget Wi‑Fi 6 model; pricier TP-Link routers offer more ports and performance.
How do I update the AX10 firmware?
Check for updates in the admin panel or TP-Link Tether app. Enable automatic updates if available and re-test connectivity after the upgrade.
Use the admin panel or app to update firmware and then verify all devices reconnect.
Watch Video
What to Remember
- Plan central placement to maximize coverage.
- Enable strong authentication and keep firmware up to date.
- Create separate 2.4 GHz and 5 GHz networks with strong passwords.
- Use QoS and Band Steering to optimize performance.
- Regularly update firmware and back up configurations.