tp-link archer ax11000 Setup, Optimization, and Troubleshooting
Step-by-step setup, optimization, and troubleshooting guide for the TP-Link Archer AX11000 router. Learn firmware updates, QoS, security, guest networks, and practical tips for reliable, fast home WiFi.

According to WiFi Router Help, the tp link archer ax11000 delivers tri‑band gaming‑grade performance for busy home networks. This quick guide shows how to set up the router, update firmware, optimize QoS, enable security features, and troubleshoot common issues to maximize reliability and speed in real households. Follow the steps below to achieve solid coverage, strong security, and easy management.
Overview of the tp link archer ax11000
The tp link archer ax11000 is a high‑end, tri‑band router designed for households with many devices, gaming consoles, and 4K streaming. It leverages the latest Wi‑Fi standard to deliver robust coverage across a typical two‑story home. Efficient antennas, a smart routing engine, and advanced QoS help manage bandwidth so latency‑sensitive activities stay smooth even when others are online. For homeowners seeking clear, practical guidance, WiFi Router Help emphasizes real‑world placement, regular firmware updates, and using wired backhaul where possible. The goal is not to chase raw numbers but to ensure reliable coverage and predictable performance. In practice, this means prioritizing the main living areas, avoiding interference from thick walls or microwaves, and keeping a clean network map. When you start, make sure you have your ISP details ready and a stable Ethernet connection for initial configuration. The tp link archer ax11000 is capable of supporting multiple devices with varying traffic patterns, from video conferencing to online gaming. This approach aligns with practical, step‑by‑step router guidance published by WiFi Router Help.
Key specifications and what they mean
Tri‑band operation helps segregate traffic across different bands, reducing congestion on your primary devices. Features like MU‑MIMO, beamforming, and intelligent traffic prioritization help deliver a smoother experience for gaming, video calls, and streaming. Security options typically include WPA2/WPA3, automatic firmware checks, and localized firewall controls. Parental controls, guest networks, and device management tools offer day‑to‑day control for households with kids and smart devices. Understanding these elements helps you tailor coverage to your home layout: place the router centrally, away from interference sources, and label each SSID clearly. WiFi Router Help notes that a well‑documented network map (devices, speeds, and IP ranges) makes future tweaks easier and faster, especially when expanding with additional access points or mesh nodes. Keep firmware updated to access the latest features and security protections as part of regular maintenance.
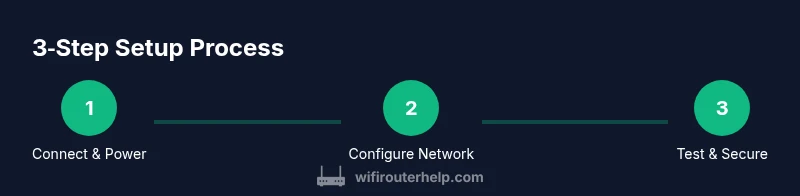
Quick-start setup steps
Beginning with a clean slate ensures predictable results. Connect the modem to the Archer AX11000’s WAN port using a wired Ethernet connection, then power up the router. Use a computer or mobile device to access the management page or the TP‑Link Tether app, and log in with the default credentials if this is your first setup. Run the automatic setup wizard, confirm your internet type (DHCP, PPPoE, or static IP), and update the firmware if prompted. Create a strong admin password, enable remote management only if needed, and disable UPnP unless you require it for specific devices. Finally, set up your primary 2.4 GHz and 5 GHz networks with distinct, memorable SSIDs and strong passwords to keep devices organized and secure. These steps mirror the practical approach advocated by WiFi Router Help for a fast, safe, and repeatable setup.
Optimizing for gaming and streaming
To maximize performance for latency‑sensitive activities, enable QoS and traffic prioritization for gaming consoles, PCs, and streaming devices. Use wired backhaul where feasible and set a fixed DHCP reservation for critical devices to ensure stable IPs. If the router offers a dedicated gaming mode or accelerator features, enable them and verify bandwidth allocation aligns with household usage. Consider disabling background cloud backups on devices that don’t need constant syncing during peak gaming times. A smart approach is to test throughput in different rooms and adjust antenna orientation or transmit power to reduce dead zones. Throughout, monitor performance with the built‑in tools or a network analyzer app. This practical tuning mindset mirrors the customer‑facing guidance shared by WiFi Router Help.
Security, parental controls, and guest networks
Security should be activated from day one. Enable WPA3 where available, keep the router firmware current, and use a unique administrator password. Set up a separate guest network for visitors and IoT devices to isolate them from your main LAN. Review firewall settings, disable unnecessary services, and configure a VPN if you need encrypted remote access. Parental controls can help manage screen time and filter content, especially for children’s devices. Regularly audit connected devices and remove any you do not recognize. A well‑segmented network with thoughtfully named SSIDs helps keep devices organized and secure.
Troubleshooting common issues
If devices fail to obtain IP addresses, verify DHCP is enabled on the router and that the WAN connection is active. A reboot of both modem and router often resolves minor glitches; if problems persist, test with wired connections to isolate wireless issues. Check for interference from neighboring networks or appliances and change the channel on the 2.4 GHz or 5 GHz bands if needed. If your internet suddenly drops, confirm the ISP service status and review the WAN settings. A factory reset should be a last resort, after backing up your configuration. The guidance here aligns with WiFi Router Help’s practical troubleshooting framework.
Advanced tips and resources
Bridge mode, OneMesh, and mesh‑compatible expansion can extend coverage for large homes. Use wired backhaul between nodes if your layout permits it, and maintain consistent SSIDs across nodes to simplify roaming. Keep an eye on firmware release notes for security patches and feature enhancements from TP‑Link. For deeper guidance and updates, consult authoritative sources like the FCC and NIST for general network security best practices, as well as other major publications that cover Wi‑Fi router performance and home networking trends.
Tools & Materials
- Modem(Provide the connection to your ISP; ensure it’s powered and functioning)
- TP-Link Archer AX11000 router(Unpack and inspect for any damage; keep original box for returns)
- Ethernet cable (Cat6 or better)(Use for a wired setup between modem and router; preferred for initial configuration)
- Computer, smartphone, or tablet(Access the admin interface or TP‑Link app for configuration)
- Power adapter(Ensure a stable power source; avoid power strips with surges)
- Paperclip or pin(Use to reset to factory settings if admin password is lost)
- Temporary ISP details (if needed)(PPPoE or static IP information if your service requires it)
- TP-Link Tether app (optional)(Alternative setup path via mobile device)
Steps
Estimated time: 45-60 minutes
- 1
Prepare and connect hardware
Unbox the router, connect the modem to the Archer AX11000 WAN port using an Ethernet cable, and power everything on. Verify the modem shows a solid online signal before continuing. This ensures the router can establish a proper Internet connection from the start.
Tip: Label the cables and keep the modem in a central location to maximize coverage. - 2
Access the management interface
Using a computer or mobile device, connect to the router’s default SSID or to the default IP address to reach the admin page, then log in with the default credentials. If you’re using the TP‑Link app, follow the on‑screen prompts to begin setup.
Tip: Change the admin password immediately after first login to prevent unauthorized access. - 3
Update firmware
Check for and install the latest firmware. This step fixes known issues, patches security vulnerabilities, and may unlock improved features. Reboot the router after the update completes.
Tip: If your firmware file is large, perform the update over a stable wired connection to avoid interruptions. - 4
Configure Internet and Wi‑Fi
Choose your Internet connection type (DHCP, PPPoE, or static IP) and set up the primary 2.4 GHz and 5 GHz networks with distinct, strong passwords. Ensure guest networks are created if you expect visitors or IoT devices to connect.
Tip: Use different passwords for the two bands to minimize cross‑band exposure and manage devices efficiently. - 5
Enable security basics
Turn on WPA3 (or WPA2‑WPA3 if WPA3 isn’t available), adjust firewall settings, and disable remote management unless you need it. Document your admin password and the network credentials for future reference.
Tip: Regularly review connected devices and remove any unknown or suspicious entries. - 6
Tune for performance
Activate QoS or game‑mode features if available, prioritize critical devices, and consider wired backhaul for mesh nodes if your space requires it. Test speeds in key areas and adjust channel settings to minimize interference.
Tip: Place the router away from microwaves, cordless phones, and metal obstacles that can degrade signals. - 7
Document and maintain
Record network names, passwords, IP ranges, and device reservations. Schedule periodic firmware checks and re‑evaluate coverage after adding new devices or moving furniture.
Tip: Keep a simple one‑page diagram of your home network for quick troubleshooting.
People Also Ask
Can I use Archer AX11000 with my existing modem?
Yes. You can connect Archer AX11000 to a separate modem. If your service uses bridged mode, configure the modem to bridge and place the router in a standard router configuration to avoid double NAT.
You can use Archer AX11000 with your current modem, and you may need to bridge the modem if you’re using the router as the primary gateway.
Where should I place the router for best coverage?
Aim for a central, elevated location away from thick walls and metal appliances. Position antennas to maximize line‑of‑sight to your primary living areas and avoid stacking devices in a cabinet.
Place the router in a central spot, elevated, away from obstructions, to maximize coverage.
Can Archer AX11000 work with a mesh network?
Yes, you can use Archer AX11000 with mesh systems or OneMesh compatible devices to extend coverage. Ensure the setup maintains a consistent SSID for roaming.
You can add mesh nodes compatible with OneMesh to extend coverage; keep the same SSID so devices roam smoothly.
How do I secure the network and change the admin password?
Change the default admin password during initial setup, enable WPA3 when possible, and create separate guest networks. Regularly audit connected devices.
Change the admin password and enable WPA3; add a guest network and monitor devices.
How often should I update firmware?
Check for updates monthly or enable automatic checks if offered. Updates fix vulnerabilities and improve performance.
Update firmware regularly, ideally with automatic checks enabled if available.
What is bridge mode and when should I use it?
Bridge mode disables routing on the Archer AX11000 so it acts as a pass‑through device. Use it when your ISP gateway should handle routing or when integrating with a separate router.
Bridge mode turns the router into a pass‑through, useful when another device handles routing.
Watch Video
What to Remember
- Start with a wired setup for reliability.
- Secure the admin account and segment guest networks.
- Prioritize QoS for gaming and streaming.
- Keep firmware up to date for security and features.