How to Set Up and Optimize the tp link archer ax23
Learn how to set up and optimize the tp link archer ax23. This step-by-step guide covers login, security, optimization, and troubleshooting for a reliable home network.

You will set up the tp link archer ax23, create a secure Wi‑Fi network, and optimize performance for reliable home coverage. This guide covers login, basic configuration, security best practices, and common troubleshooting steps. By following these steps, you’ll have a fast, stable network with strong security. According to WiFi Router Help, starting with a clean setup reduces future issues.
Why tp link archer ax23 matters for home networks
The tp link archer ax23 is a solid choice for many homes, offering Wi‑Fi 6 performance, better range, and improved device support compared with older standards. It combines straightforward setup with robust security features, making it a good fit for typical households, gamers, and small offices. The WiFi Router Help team notes that this router balances price and performance well for most households, especially when you enable up-to-date encryption and a sane default network name. By starting with a clear plan for SSID naming, password strength, and guest access, you can avoid many common issues later on. This section lays the foundation for a smooth, scalable network that grows with you and your devices, from smartphones to smart TVs and IoT devices. Remember to document your network settings so you can reproduce a clean setup if you ever need to reset.
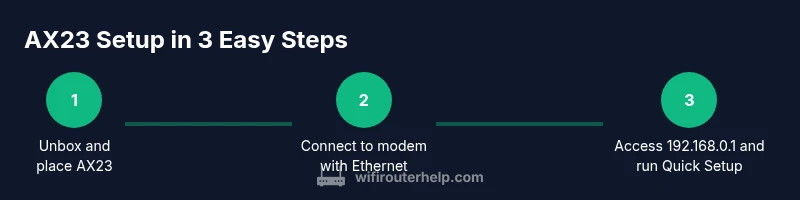
Unboxing and initial placement
Start by unboxing and verifying all components: AX23 router, power adaptor, Ethernet cable, and quick start guide. Place the router in a central location away from thick walls and metal appliances to maximize coverage. A high, open shelf often delivers the best signal into multiple rooms. If you share walls with a driveway or a metal cabinet, consider relocating the router or adding a simple mesh node later. WiFi Router Help recommends a stable power source and avoiding proximity to microwaves or cordless phones, which can cause interference. Finally, keep the router upright for optimal heat dissipation and longevity.
Physical connections: modem and cables
Connect the AX23 to your modem using a standard Ethernet cable from the modem’s Ethernet port to the router’s WAN/Internet port. Ensure the cable is snug and that the modem is powered on before the router. After connecting, plug in the AX23 and allow the device to boot fully; the status LEDs should show a stable pattern. If you see blinking or red indicators, consult the troubleshooting tips later in this guide. This step establishes the essential link between your ISP and your home network.
First login: accessing the admin UI
With your computer or smartphone connected to the AX23’s default network, open a web browser and enter the router’s default IP address (usually 192.168.0.1 or 192.168.1.1) or use the TP‑Link app to locate the device. The default credentials are typically printed on the router label. Change the admin password immediately to prevent unauthorized access. This initial login sets the stage for configuring Internet, Wi‑Fi, and security settings. If you encounter login issues, you can perform a factory reset and try again, but ensure you have any critical settings backed up since a reset erases customizations.
Quick Setup wizard: getting online fast
Most Archer AX23 models include a guided Quick Setup wizard. Follow the prompts to select your connection type (Dynamic/PPPoE/Cable, etc.), set a clear network name (SSID), and choose an encryption method. For most homes, WPA2‑PSK or WPA3‑Personal provides a good balance of compatibility and security. The wizard also helps you set up the guest network, which keeps your main network private while still offering connectivity for visitors. If your ISP requires specific settings, you’ll land on the correct screens during the WAN setup step.
WAN/LAN basics: configuring Internet access
After the Quick Setup, review WAN settings to ensure the AX23 is using the correct connection type from your ISP (dynamic IP, PPPoE, or static IP). Enter your username and password if PPPoE is required, or leave dynamic IP if you’re on a standard residential plan. Next, review LAN settings to ensure the router’s local network uses a non‑conflicting IP range (for example, 192.168.1.x). Enable DHCP to assign IPs automatically to devices, and reserve fixed IPs for important devices if needed. Proper WAN/LAN setup prevents IP conflicts and improves reliability.
Security foundations: WPA2/WPA3 and admin access
Enable WPA3‑Personal if supported by your devices; otherwise, WPA2‑Personal remains a solid choice. Create a strong, unique passphrase and avoid common words or predictable patterns. Disable WPS if your model exposes it, as it can be exploited. Be sure to change the router’s default admin username and password, and enable a management password that’s different from your Wi‑Fi password. Regularly review connected devices and remove unfamiliar entries.
Wireless configuration: SSID, channels, and band steering
Give each band (2.4 GHz and 5 GHz) a distinct, memorable SSID and a strong password. If you experience congestion on one band, switch to the other or enable band steering so capable devices connect to the faster network automatically. Choose a channel based on interference: auto is convenient, but manual channel selection may deliver more consistent performance in busy neighborhoods. For guests, set up a separate guest network with internet access only to protect your devices.
Advanced settings: QoS, port forwarding, and device management
Quality of Service (QoS) allows you to prioritize latency‑sensitive traffic like gaming or video calls. Use device‑level prioritization for critical gear such as work laptops or gaming consoles. If you need specific services accessible from the internet, configure port forwarding with careful exposure only to required devices. Enable UPnP if you need simple automatic port configuration, but be mindful of security implications. Finally, consider setting a regular firmware update schedule to close known vulnerabilities and improve performance.
Maintenance and troubleshooting: keeping AX23 healthy
Regularly check for firmware updates and apply them to fix bugs and improve security. If you notice slower speeds, run a quick speed test from a wired device, then compare results from different areas of your home. Check for interference sources (wireless devices, baby monitors) and adjust channels or relocate the router if needed. If you experience persistent dropouts, test with a wired connection to verify whether the issue is wireless or ISP‑level. The WiFi Router Help team emphasizes documenting changes and keeping a backup of your configuration.
Authority references and ongoing learning
For deeper guidance, consult trusted sources on router security and best practices. Notable authorities include government and academic publications that discuss Wi‑Fi security standards and home networking best practices. This ongoing learning ensures your network remains resilient as devices and threats evolve. By following the steps above and staying informed, you can keep your tp link archer ax23 performing at a high level.
Tools & Materials
- tp link archer ax23 router(Ensure it ships with latest firmware or update after setup)
- Ethernet cable (Cat5e or better)(For reliable modem connection during setup)
- Modem (ISP-provided or own)(Must be compatible with Archer AX23 WAN port)
- Smartphone or computer(Used to run the admin UI and the TP-Link app)
- Recent browser or TP-Link app(Chrome/Edge or TP-Link app for mobile setup)
- Backup of current settings (optional)(Helpful if you’re updating a working network)
Steps
Estimated time: 60-110 minutes
- 1
Unbox and inspect components
Open the box and verify all parts are present. Check the router, power adapter, Ethernet cable, and quick start guide. Confirm there are no visible damages and read the quick start notes for any model‑specific instructions.
Tip: Lay items on a non-conductive surface and organize cables before starting. - 2
Connect AX23 to your modem
Attach one end of the Ethernet cable to the modem and the other end to the WAN/Internet port on the AX23. Make sure a snug connection is seated to prevent intermittent drops. This creates the essential link between your ISP and your home network.
Tip: Use the yellow WAN port if present, and avoid connecting to a LAN port to prevent misrouting. - 3
Power up and wait for startup
Plug in the AX23 and give it 60–90 seconds to boot. Observe the LED indicators; a solid power light usually signals readiness. If LEDs are blinking in an abnormal pattern, power cycle the device and recheck connections.
Tip: Avoid unplugging the router during first boot to prevent corrupted startup. - 4
Connect a device to the default network
On your phone or laptop, connect to the router’s default 2.4 GHz network. Use the default Wi‑Fi name and password found on the label. This ensures you’re directly accessing the AX23 for initial configuration without external interference.
Tip: If you can’t see the default network, move closer and ensure the router is properly powered. - 5
Log in to the admin interface
Open a browser and navigate to the router’s IP address (often 192.168.0.1 or 192.168.1.1). Enter the default credentials from the label, then immediately change the admin password. This step locks down access before you alter any settings.
Tip: Store credentials in a password manager to avoid reuse across devices. - 6
Run Quick Setup and choose Internet type
Follow the on‑screen prompts to select your connection type (Dynamic IP, PPPoE, etc.). Enter any required ISP details. Completing this step establishes Internet access for all connected devices.
Tip: If unsure, contact your ISP to confirm the correct connection type before proceeding. - 7
Configure WAN/LAN and enable DHCP
Verify WAN settings align with your ISP and ensure LAN is configured to a non‑conflicting IP range. Enable DHCP to automatically assign IPs to devices for seamless connectivity.
Tip: Reserve fixed IPs for critical devices (workstations, NAS) to simplify port forwarding later. - 8
Set up Wi‑Fi security and guest network
Enable WPA3‑Personal if available; otherwise use WPA2‑Personal. Create strong, unique passwords and enable a separate guest network. This keeps your main network protected from guest devices.
Tip: Disable WPS if your model exposes it to reduce potential attack vectors. - 9
Tune advanced settings and test
Adjust QoS, channel selection, and basic NAT settings as needed. Run speed tests from wired and wireless devices to verify performance. Confirm no devices are undesiredly using network resources.
Tip: Document changes and keep a backup of current configuration.
People Also Ask
How do I access the Archer AX23 admin page?
Use a device connected to the router and navigate to the default IP address shown on the label (commonly 192.168.0.1 or 192.168.1.1). Enter the default credentials, then change the admin password. If the page doesn’t load, verify the device is on the same network and try a different browser.
Open your browser, go to the router's IP address from the label, log in with the default credentials, and update the password.
What if I can’t get internet after setup?
Double‑check WAN settings and ensure the modem is online. Reboot both modem and AX23, then re‑run the Quick Setup wizard. If you still have issues, verify the ISP connection type and credentials with your provider.
Restart your modem and router, check WAN settings, and retry the Quick Setup. Contact your ISP if problems persist.
How can I extend coverage in dead zones?
Place the AX23 centrally and consider a mesh extender or second unit if needed. Use band steering and adjust channels to reduce interference. Optimize antenna orientation and ensure obstacles don’t block signals.
Try central placement and, if needed, add a mesh extension and optimize channels.
Should I enable guest network?
Yes. Create a separate guest network to isolate visitors from your main devices. Restrict access to local resources while keeping internet access available. Remember to enable a password and rotate it periodically.
Yes—guest networks keep your devices private while allowing guests to connect.
Is firmware updating important for AX23?
Firmware updates fix bugs, patch security flaws, and sometimes improve performance. Enable auto‑update if your model supports it, or check manually every few months. Always back up settings before updating.
Keep firmware current to stay secure and reliable.
What is the best way to back up settings?
Use the router’s export or backup feature after a successful setup. Save the file to a safe location. Restore from this backup if you ever reset the device or migrate settings to a new AX23.
Export your configuration to a safe place for easy recovery.
Watch Video
What to Remember
- Set up AX23 with secure defaults and customizations.
- Choose strong WPA/WPA3 and unique SSIDs for each band.
- Test and adjust channels to minimize interference.
- Keep firmware updated and document changes for future recovery.