tmobile home internet router: setup, optimization, and troubleshooting
Step-by-step guide to setting up, optimizing, and troubleshooting a tmobile home internet router. Learn secure configuration, performance tweaks, and common fixes from WiFi Router Help.

By the end, you'll confidently set up your tmobile home internet router, create a strong Wi‑Fi name and password, enable essential security features, and verify a reliable home network. You'll know how to connect devices, run speed tests, and diagnose common issues. This guide covers initial setup, practical optimizations, and safe troubleshooting workflows to keep your network stable.
What is the tmobile home internet router?
According to WiFi Router Help, the tmobile home internet router is a modern gateway that combines cellular backhaul with a built‑in Wi‑Fi network. These devices simplify home networking by routing traffic, providing built‑in firewall features, and allowing easier management compared to separate modems and routers. A typical gateway supports both 2.4 GHz and 5 GHz bands and offers basic parental controls. Users commonly use it as the primary home gateway, or as a backup to fixed broadband. When you first power it on, you get a Wi‑Fi network name (SSID) and a password that you’ll use to connect devices.
Understanding this gateway helps you plan placement, minimize dead zones, and diagnose issues quickly. The WiFi Router Help team notes that keeping the device in a central location, away from thick walls or metal appliances, yields the best coverage across common living spaces. The device also acts as a bridge between mobile broadband and your home network, so features like guest networks and firewall settings can be managed from the same interface.
For authoritative guidance on wireless security, refer to FCC resources and NIST recommendations. If you’re expanding coverage, you’ll want to consider mesh helpers or strategic positioning to maintain a stable signal throughout the home.
Planning your network: layout and coverage considerations
A solid home network starts with a thoughtful layout. Place the router at a high, central spot away from obstructions like concrete walls and large metal appliances. Elevation reduces interference and helps the signal reach far rooms. Take into account device count, streaming needs, and the worst‑case path between the gateway and your farthest room. If you live in a multi‑story home, you may need a secondary access point or a mesh booster to eliminate dead zones. When planning coverage, keep in mind the 2.4 GHz band travels farther but offers slower speeds, while the 5 GHz band provides higher throughput at shorter distances. The WiFi Router Help team recommends testing three or four spots with a simple speed test to compare the results.
In addition to physical placement, you should check the channel usage in your area. If neighboring networks overwhelm a channel, you’ll experience interference that reduces speed. Use a smartphone app to scan nearby networks and select the least congested channel for the 2.4 GHz and 5 GHz bands. For security‑focused readers, FCC tips and NIST guidelines emphasize minimizing exposed surface area and ensuring a strong password to protect your home network.
If your home has particularly thick walls or RF interference from other electronics, consider a mesh extension or a wired backhaul to preserve performance. WiFi Router Help analysis shows that intelligent placement and, when needed, a wired backhaul significantly improve reliability in larger homes. For comprehensive guidance, consult FCC and NIST resources linked in this article.
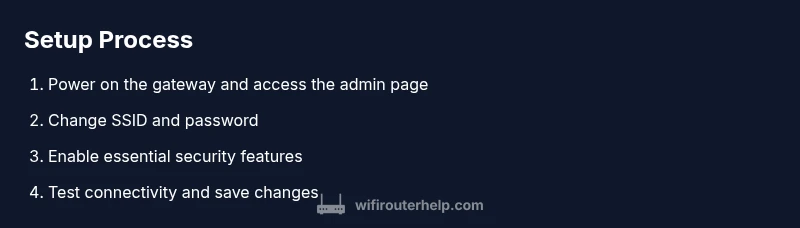
Initial setup and first run: connecting the gateway, powering, and accessing the admin interface
The first run is one of the most important steps. Start by powering the gateway and ensuring a stable plug‑in power source. Connect a computer or smartphone via Ethernet or the default Wi‑Fi network, then open the gateway’s admin page in a browser. The exact address and login credentials vary by model, so refer to your device’s label or quick start guide. In many setups, you’ll be prompted to sign in and begin a quick setup wizard that guides you through basic configuration and security defaults.
During this initial phase, take notes of your network name (SSID) and password. If your gateway offers auto‑updates, enable them to ensure you have the latest security patches. You may also be asked to choose between guest networks and parental controls; these features help manage who connects to your network and what content they can access. Some models also provide built‑in DNS and firewall options—explore these thoughtfully to balance usability with protection.
For readers who want to harden their configuration, avoid enabling remote management from the WAN interface. Keeping remote access off reduces exposure to the internet, while still allowing secure local administration. If you have trouble finding the admin page, try a different device or reset the gateway to factory defaults as a last resort, then re‑run the setup wizard.
Optimizing wireless settings for speed and stability
Optimization focuses on two core goals: maximizing speed and preserving reliability across devices. Start by giving your network a clear, unique SSID and a strong passphrase. If your router supports both 2.4 GHz and 5 GHz bands, consider separate SSIDs for each band or a combined SSID that enables smart steering if your model supports it. Weigh the option to set 20/40/80 MHz channel widths depending on your environment; smaller homes or dense apartments may benefit from 20/40 MHz for better throughput stability, while larger homes with fewer neighboring networks can use wider channels for higher speeds.
Next, optimize channels. In crowded neighborhoods, auto channel selection may jump between crowded options. Manually set the 2.4 GHz channel to a less congested number (commonly 1, 6, or 11 in the US) and test 5 GHz with a similar approach. For devices that require ultra‑low latency (gaming consoles or workstations), enable Quality of Service (QoS) to prioritize essential traffic like video calls or game data. If your router supports beamforming or MU‑MIMO, enable these features for improved multi‑device performance. Remember to apply and test after each change with a quick speed test and a few real‑world tasks like streaming a video or video conferencing.
As you implement improvements, document the settings so you can revert quickly if needed. Also, keep firmware updated; many performance improvements and security patches are delivered via updates. The FCC and NIST emphasize maintaining secure, up‑to‑date configurations to reduce vulnerability windows.
Security essentials: passwords, guest networks, firewall, and updates
Security should be built into every layer of your home network. Start by changing the default admin password to a strong, unique phrase and disabling remote management from the WAN side. Enable WPA3‑Personal if available, or at least WPA2‑AES, and ensure your Wi‑Fi password is long and unique. Create a separate guest network for visitors to protect your main network and simplify keystrokes for guests who temporarily connect.
Keep firewalls enabled and review any built‑in parental controls to ensure they align with household needs. If your gateway supports automatic firmware updates, enable them; otherwise, set a regular manual check as part of your maintenance routine. It’s helpful to keep a small log of changes so you can audit what you’ve done if issues arise. For authoritative guidance on security, see FCC and NIST resources linked in this article.
A final precaution is disabling WPS if your device offers it. WPS is convenient but can introduce weaknesses in some configurations. If you run into compatibility issues after turning off WPS, connect devices manually by entering the network password.
Maintenance, troubleshooting, and knowing when to contact support
A healthy router needs periodic maintenance and a clear troubleshooting workflow. Schedule a monthly quick check: confirm firmware status, confirm device connections, and run a speed test. If you experience inconsistent performance, try a few targeted steps in order: reboot the gateway, verify the internet connection status, test from multiple devices, and check for interference sources. If problems persist, reduce the number of connected devices during peak times to identify if congestion is the root cause.
When to contact support: if the gateway shows consistent outages, if you cannot access the admin interface after following standard steps, or if your devices fail to obtain an IP address. Be prepared with your account number, device model, and a summary of changes you’ve made. If you suspect a service issue, check the provider’s outage map and status pages before calling. For additional guidance, consult FCC and NIST resources referenced in this article.
Tools & Materials
- Smartphone or computer(Needed to access the admin page and run speed tests)
- Ethernet cable (optional but recommended)(For a stable initial connection during setup)
- Paper and pen or notes app(To record SSID, password, and settings)
- Router manual or quick-start guide(Refer to model‑specific instructions)
Steps
Estimated time: 30-60 minutes
- 1
Prepare and locate the gateway
Find the T-Mobile home internet router and have the power adapter nearby. Ensure you have a device ready to access the admin interface and an up-to-date browser. This step sets the foundation for a smooth setup, so don’t skip it.
Tip: Check that the unit is plugged in and the indicator lights show normal operation. - 2
Connect your device to the gateway
Use an Ethernet cable for a wired connection or connect to the default Wi‑Fi network to begin initial configuration. A direct connection reduces interference and makes the setup wizard reliable.
Tip: If you’re using Wi‑Fi, be close to the router during setup to minimize initial connection drops. - 3
Access the admin interface and start setup
Open the gateway’s admin page in a browser and sign in. If your model uses a wizard, follow it to configure network name, security, and basic settings. Save changes before exiting.
Tip: If you don’t know the address, check the device label or quick-start guide; some models use a local IP like 192.168.x.x. - 4
Change default credentials and configure Wi‑Fi
Set a strong admin password, enable WPA2/WPA3, and create a unique SSID for each band if your router supports it. This step protects your network and helps you distinguish between bands for device placement.
Tip: Avoid using easily guessable names or common passwords; consider a passphrase rather than a simple password. - 5
Adjust channels and test performance
Tune 2.4 GHz and 5 GHz channels, adjust channel width to balance speed and stability, and enable QoS if needed. Run a quick speed test and stream a video to verify real‑world performance.
Tip: Test at different times of day to capture typical performance variations. - 6
Enable updates and set a maintenance plan
Turn on automatic firmware updates if available and schedule monthly checks to review status and test connectivity. Document changes for future reference.
Tip: A simple maintenance log helps you revert changes if something breaks.
People Also Ask
How do I access the T-Mobile home internet router's admin page?
Typically you connect a device to the gateway's Wi‑Fi or an Ethernet port, then open a browser to the gateway’s local address. Sign in with the admin credentials provided in the user guide and follow the setup wizard or navigate to the configuration pages manually.
Open a browser from a connected device and enter the gateway's local address to sign in and start configuring.
How can I change my Wi‑Fi network name and password?
Log in to the gateway admin page, locate the Wireless or Wi‑Fi settings section, and edit the SSID and passphrase for the 2.4 GHz and 5 GHz bands. Save the changes and reconnect devices using the new password.
Go to the router’s settings, update the names and passwords, save, and rejoin your devices with the new credentials.
What security settings should I enable on my T‑Mobile router?
Use WPA2‑AES or WPA3 if available, disable WPS if you can, enable the firewall, and keep firmware updated. Create a strong admin password and limit remote management for added protection.
Turn on strong encryption, keep firmware current, and disable unnecessary remote access to protect your network.
Why is my Wi‑Fi slow after setup?
Common causes include interference on shared channels, too many devices on the network, or a distant gateway. Test with different channels, reposition the router, and consider QoS or a mesh expansion if the home is large.
Try changing channels and moving the router to a central spot; if issues persist, check device load and bandwidth usage.
Do I need a separate router with T‑Mobile home internet?
Most setups work with the built‑in gateway, but some users prefer a dedicated router for advanced features like richer QoS, VPN support, or broader device compatibility. Check compatibility and your service plan before buying.
For advanced features, you can use a separate router, but ensure it plays well with your gateway’s settings.
Watch Video
What to Remember
- Plan placement for best coverage
- Secure your Wi‑Fi with strong passwords
- Keep firmware updated for security and performance
- Test performance after each change
- Document settings for easy troubleshooting