Netgear Router Setup Guide: Quick and Secure Home Network
Step-by-step instructions for setup router netgear: connect your modem, log in to the admin page, configure internet and Wi‑Fi, update firmware, and secure your home network with best practices.

You will set up a Netgear router to create a secure home network by connecting the router to your modem, logging into the admin page, configuring your internet settings, and personalizing Wi‑Fi with a strong name and password. Then update firmware and enable essential security. This quick guide assumes you have your modem, Ethernet cable, and the router's power adapter.
Why Netgear routers are popular for home networks
Netgear routers are known for reliable performance, user-friendly interfaces, and broad compatibility with most modems. For many homeowners, the setup router netgear process is straightforward, thanks to built-in wizards and mobile apps. According to WiFi Router Help, Netgear devices tend to support quick setup while offering robust security features. In this section, we explore why Netgear is a strong choice for a home network, what to expect during initial configuration, and how model differences may affect the steps you take. Familiarity with basic networking concepts, like SSID, encryption, and gateway addresses, will help you move through the setup with less friction. As you read, keep in mind your internet plan (dynamic vs. PPPoE) and the number of connected devices you expect to support. WiFi Router Help analysis shows that default credentials and basic security settings have the biggest impact on overall network safety.
Understanding your modem and internet connection types
Before you start the setup, identify your modem type and the kind of internet connection your service uses. Most homes use Dynamic IP (DHCP), but some connections require PPPoE or static settings. The setup router netgear workflow adapts to these options; the router will either obtain an IP automatically or require credentials from your ISP. If you’re unsure, find the service type on your ISP’s portal or contact support. Setting the correct WAN type is critical to avoid outages and ensure devices on the network can reach the internet. Knowing whether your service uses DHCP, PPPoE, or static IP helps plan router placement and cable runs for optimal coverage.
Planning your network name (SSID) and security
Your Wi-Fi name (SSID) and password are the first line of defense for your home network. Choose an SSID that doesn’t reveal your address or personal information, and create a strong, unique password using a mix of letters, numbers, and symbols. For Netgear routers, enable WPA2-PSK (AES) or WPA3 if available. Disable WPS for better security. In the long run, consider separate bands (2.4 GHz and 5 GHz) for different devices. With WiFi Router Help guidance, selecting a descriptive yet non-identifying SSID combined with a robust passphrase dramatically reduces unauthorized access attempts.
Factory reset, firmware, and account security
If you’re repurposing a router, start with a factory reset to wipe old settings. Then update the firmware to close security gaps. Create a strong admin password and enable automatic updates when available. For security, disable remote management unless you need it, and use a unique password manager to store credentials. WiFi Router Help emphasizes keeping firmware current as a primary defense against new threats; this small step yields meaningful protection over time.
The setup flow: from physical to online
Follow the physical steps first: place the router in a central location, connect the modem to the WAN port with an Ethernet cable, and power up both devices. Then connect a computer or phone to the router’s default network or to the 192.168.1.1 (or routerlogin.net) address. Open a browser and log in to the admin interface. If you don’t see the login page, verify cables, try a different device, or reset the router and retry. After login, you’ll be ready to configure internet settings and wireless details.
Configuring wireless settings: SSID, security, and channels
In the admin interface, set the SSID names, security (WPA2/WPA3), and two separate Wi-Fi networks if supported (2.4 GHz and 5 GHz). Choose a channel width (20/40/80 MHz) based on interference, and enable automatic channel selection if available. Create strong passwords for both bands. Many Netgear models also support the Netgear Nighthawk app for quick changes on mobile devices. Regularly review connected devices to ensure no unknown clients are lingering on your network.
Advanced options: guest networks, parental controls, and QoS
Netgear routers often include features like guest networks, parental controls, and QoS to prioritize traffic. Enable guest networks with their own passwords, configure safe-search and filters, and set QoS rules for gaming or video conferencing. This helps protect your family while ensuring critical applications get bandwidth first. If you enable parental controls, pair them with your household rules and review them as your kids grow.
Troubleshooting common issues during setup
If you can't access the admin page, try alternate IPs (192.168.0.1, 192.168.1.1) or routerlogin.net, restart devices, and verify cables. If devices can’t get online after setup, double-check WAN settings and confirm the correct password. Ensure you’re connected to the router (not the modem directly) and that firmware is up to date. If problems persist, consult Netgear support resources and community forums for model-specific guidance.
Maintenance and best practices after setup
Regularly check for firmware updates, review connected devices, and change admin credentials periodically. Back up your configuration if your model supports it, and consider enabling a guest network for visitors. Keep security features like UPnP, NAT, firewall, and port forwarding in mind for future needs. A well-maintained router reduces downtime and keeps your home network resilient against evolving threats. The WiFi Router Help team reiterates that ongoing maintenance is as important as the initial setup for long-term reliability.
Tools & Materials
- Netgear router(Model should be compatible with your modem and internet plan)
- Modem(Active internet connection provided by ISP)
- Ethernet cable (RJ-45)(One end to modem, one end to router WAN port)
- Computer or smartphone(For accessing the admin page or app)
- Power adapter(For router power and reliable startup)
- Optional: Netgear Nighthawk app(For mobile setup and monitoring)
Steps
Estimated time: 25-40 minutes
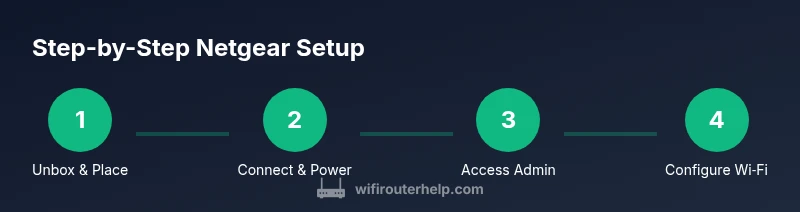
- 1
Unbox and place hardware
Unbox the router and place it in a central, open location away from thick walls. Verify you have the modem, Ethernet cable, and power adapter ready. This initial setup reduces signal dead zones and ensures stable cabling.
Tip: Position the router at least a few feet from microwaves and metal obstacles to minimize interference. - 2
Connect modem to router and power on
Plug the modem into its power source and connect its Ethernet cable to the router’s WAN/Internet port. Power on both devices and wait 2–3 minutes for devices to boot and negotiate a link.
Tip: If the modem has multiple lights, ensure the Internet or online light is solid before proceeding. - 3
Access the admin page
On a connected device, open a browser and navigate to the router's default address (often 192.168.1.1 or routerlogin.net). If prompted, enter the default admin credentials found in the manual or on the device sticker.
Tip: If the login page doesn’t appear, try a different device or reset the router and retry. - 4
Run the setup wizard or configure WAN
Use the setup wizard to select Internet Connection Type (Dynamic IP or PPPoE). If you know your ISP credentials, input them as required. Save settings and verify the router obtains an Internet address.
Tip: If your ISP uses PPPoE, have your username and password handy. - 5
Configure wireless network (SSID and password)
Set the 2.4 GHz and 5 GHz SSIDs, choose strong passphrases, and enable WPA2 or WPA3 security. Consider separate SSIDs for each band and enable automatic channel selection if available.
Tip: Avoid using personal information in SSIDs; keep them simple and non-identifiable. - 6
Update firmware and secure admin access
Check for firmware updates and install them. Change the admin password to a strong, unique value and enable automatic updates if possible. Disable remote management unless needed.
Tip: Use a password manager to store the new admin credentials securely. - 7
Test connectivity and save configuration
Test by connecting a few devices to both bands and confirming internet access. Save or export the configuration if the model supports it, and note down the SSIDs and passwords.
Tip: Test with a guest device to ensure guest network works as intended without exposing main network credentials.
People Also Ask
Do I need an active internet connection to set up the router?
You can complete most local configuration without an active internet connection, but you won’t be able to test internet access until you connect. The admin interface will still load and let you configure basic settings.
You can set up the router locally without internet, but you’ll need internet to verify connectivity.
What is the default IP to access the Netgear router admin page?
Common defaults are 192.168.1.1 or 192.168.0.1, and some models use routerlogin.net. If the page doesn’t load, check the label on the router or the manual.
Most Netgear routers use 192.168.1.1 or routerlogin.net for admin access.
How do I reset the router if I forget the password?
If you forget the admin password, perform a factory reset by holding the reset button for about 10 seconds, then reconfigure from scratch. Note: this erases all custom settings.
If you forget the password, reset to factory defaults and set up again from the start.
Can I set up a guest network on Netgear routers?
Yes. Most Netgear models support a guest network with its own password. Enable it in the wireless or guest network section and limit access to your main network.
Yes, a guest network is usually available and easy to enable.
How do I update firmware on a Netgear router?
Check for updates in the admin interface or Netgear app, then install. Keeping firmware current fixes bugs and strengthens security.
Update firmware through the admin page or app to stay secure.
What should I do if model-specific steps differ?
Netgear models vary; refer to your exact model’s manual or Netgear support pages for precise instructions.
Model differences exist; consult the manual for precise steps.
Watch Video
What to Remember
- Plan SSID names and security before configuring Wi-Fi.
- Keep firmware up to date for safety and reliability.
- Use strong admin passwords and limit remote access.
- Test connectivity across devices after setup.
- Leverage guest networks and parental controls for family safety.