Router Xfinity: Setup, Optimization, and Troubleshooting Guide
Step-by-step guide to configure and optimize your router xfinity, covering gateway vs bridge mode, Wi‑Fi security, guest networks, and common troubleshooting tips.

You will configure your router xfinity to provide reliable home Wi‑Fi, either by using the Xfinity gateway in gateway mode or by enabling bridge mode and using your own router. Key steps include locating the gateway, logging into the admin page, verifying the current mode, updating firmware, and setting up secure Wi‑Fi. Before you begin, gather your Xfinity account credentials, a connected device, and an Ethernet cable for a stable setup.
Understanding the Xfinity Gateway vs. standalone router
When you start working with router xfinity, you should know there are two common ways to get reliable Wi‑Fi from Xfinity: use the Xfinity gateway (a combined modem/router) provided by the service, or connect your own router behind the gateway in bridge mode. The standard gateway is designed for easy setup and handles DHCP, NAT, and firewall duties, which is convenient for typical households. However, many homes benefit from a dedicated third‑party router with advanced features like higher‑quality firmware updates, robust QoS controls, and enhanced parental controls. In this guide, we’ll cover both approaches, explain how to decide which path fits your home network, and give you a clear, secure setup path. According to WiFi Router Help, understanding the limitations of built‑in firmware and the risk of double NAT can save you hours of troubleshooting. If you’re aiming for stable gaming or streaming performance, bridging the gateway and routing through a separate device is often the superior option. Remember that some Xfinity services rely on the gateway for voice or specific configurations, so in some cases you may need to keep the gateway as the primary router and tailor features to avoid conflicts. Router xfinity becomes straightforward when you map your goals to the right setup.
Mapping your network needs: coverage, speed, and security
A successful router xfinity project starts with clear goals: sufficient coverage for your living space, stable speeds for your devices, and solid security to protect family members. Evaluate your home’s size, walls, and interference from appliances when planning placement. Understand that the 2.4 GHz band travels farther but is more prone to congestion, while the 5 GHz band offers higher speeds over shorter distances. If you have many smart devices, a dual‑band setup with separate SSIDs or a combined SSID that’s easy to remember can help you route devices to the best band automatically. Prioritize security by enabling WPA3 (or at least WPA2) and disabling WPS if possible. If you plan to host guests, create a guest network with a strong, isolated password. Throughout this section, remember that small changes—like selecting the least congested channel or updating firmware—can yield noticeable improvements. As you tune, track performance with a quick speed test after each change to understand its impact. WiFi Router Help highlights that consistent updates and deliberate channel management are the keys to sustained performance across most homes.
Prerequisites and planning before you start
Before touching your Xfinity gateway or any third‑party router, map out a plan. Collect login details for both your Xfinity account and the gateway admin page, confirm your internet plan supports the speeds you expect, and decide if you will use Bridge Mode or NAT routing. Identify devices that require low latency (gaming consoles, work laptops) and those that need broad coverage (smart TVs, smart speakers). Create a simple network diagram in your notebook or a digital note app outlining the position of the gateway, potential access points, and the guest network you might offer. If you own a separate router, verify its compatibility with your Xfinity service and check for any firmware requirements. This planning phase reduces backtracking and ensures you configure only what you need, saving time and avoiding conflicts during setup. As you plan, keep in mind the main goal: a reliable, secure home network with minimal downtime.
How to choose the right setup: bridge mode vs NAT gateway
Choosing between bridge mode and NAT gateway depends on your goals. If you want to maximize speed and give full control to a capable third‑party router, bridge mode is often ideal because it turns off the gateway’s routing features and prevents double NAT. If you prefer a simpler, all‑in‑one solution with fewer devices to manage, using the gateway in its default router mode is fine, especially for smaller homes or renters who want plug‑and‑play simplicity. When you enable bridge mode, you typically disable DHCP on the gateway and let your own router manage IP addresses. Some Xfinity services may rely on the gateway for certain features or voice services, so verify your plan before changing modes. In many cases, bridging the gateway yields better performance for gaming and streaming, but it may require you to adjust WAN settings on your primary router. The key is to align your setup with your tech comfort level and home needs, then implement changes gradually to monitor results.
Step-by-step preparation checklist
To keep things organized, run through this checklist before you touch anything: 1) Confirm your Xfinity service plan and speed tier; 2) Write down or back up current gateway settings; 3) Gather login credentials for the gateway admin page and your Xfinity account; 4) Choose whether you’ll use bridge mode or NAT; 5) Decide on your Wi‑Fi names (SSIDs) and strong passwords; 6) Prepare a wired connection for initial setup; 7) Plan placement for optimal coverage; 8) Have a plan to test after each change. A clear plan reduces the number of trips to the router and speeds up the process while helping you avoid double NAT or misconfigurations. If you’re uncertain, take it slow and verify each change with a quick speed test and device connection check.
Basic configuration you should perform immediately
Once you’re ready to configure, start with a clean baseline: 1) Log into the gateway admin page with a wired device to avoid wireless drops; 2) Update firmware to the latest version; 3) Change the default admin password to a strong, unique credential; 4) Rename your Wi‑Fi networks (both 2.4 GHz and 5 GHz) and set robust passwords; 5) Enable WPA3 if supported, otherwise WPA2 that’s as strong as possible; 6) If using guest networks, enable them with restricted access to your main LAN; 7) Review firewall and remote management settings and disable features you don’t need; 8) Save and back up your configuration for future recovery.
Advanced optimizations for stability and speed
Here’s how to squeeze more performance from your Xfinity setup: optimize channel selection by choosing the least congested channel based on your area; use 5 GHz for high‑speed devices and 2.4 GHz for long‑range coverage. If your home has dead zones, consider mesh extenders or a second access point positioned mid‑way between the gateway and the farthest rooms. Enable Quality of Service (QoS) rules to prioritize latency‑sensitive traffic (like gaming or video calls) over bulk downloads when needed. Enable beamforming if supported to direct signals toward connected devices. For households with many IoT devices, a properly segmented network with separate SSIDs helps minimize interference. Regular firmware updates, periodic reboots, and performance monitoring ensure long‑term stability. If you suspect a specific room has weak signal, test with a mobile device at multiple heights and positions to identify a better router placement.
Troubleshooting common issues
Common issues with router xfinity setups include weak Wi‑Fi in certain rooms, devices failing to connect after changes, and speed inconsistencies. Start by rebooting the gateway and affected devices, then check that the correct SSID and password are being used. If you recently switched to bridge mode, ensure your primary router is correctly handling DHCP and NAT. Check Ethernet cabling for faults, especially if you rely on wired clients. If speeds are lower than expected, run a speed test on a wired connection to establish a baseline and compare against your plan. Ensure firmware on all devices is current and that you have not enabled features that conflict with your network design (for example, two routers both trying to NAT). If problems persist, revert to previous known good settings and reapply changes more gradually.
Security and ongoing maintenance
Security is ongoing work, not a one‑time task. Schedule periodic firmware checks and updates, monitor connected devices, and review port forwarding rules to minimize exposed services. Disable remote admin access if you don’t need it and enable local management only. Use strong, unique passwords for both Wi‑Fi and the admin console, and consider a password manager for convenience. Regularly back up router configurations after major changes, and keep a simple changelog so you can trace what was done and when. For households with children or guests, manage access with a time‑based filter and guest password rotation. The WiFi Router Help team emphasizes that consistent maintenance is the foundation of a fast, secure home network.
Authority sources
- FCC.gov: https://www.fcc.gov
- CISA.gov: https://www.cisa.gov
- NIST.gov: https://www.nist.gov
Authority sources
- FCC.gov: https://www.fcc.gov
- CISA.gov: https://www.cisa.gov
- NIST.gov: https://www.nist.gov
Tools & Materials
- Smartphone, tablet, or laptop with web browser(To access the gateway admin page and manage settings)
- Xfinity account credentials(Used to log in to the admin portal and manage services)
- Ethernet cable(Wired connection for stable initial setup)
- Current router login credentials(If credentials are on the device label, use them for first login)
- Power outlet(Keep device powered during setup)
- Notebook or note app(Record SSIDs, passwords, and changes)
Steps
Estimated time: 30-60 minutes
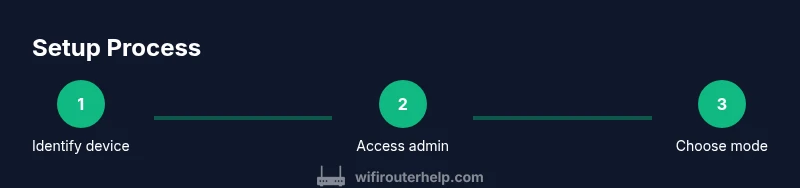
- 1
Identify your Xfinity gateway or modem
Locate the device provided by Xfinity, note the model, and confirm whether you will use bridge mode or NAT routing. If you're planning to use your own router, map out how it will connect to the gateway and what features you want to enable on the primary router.
Tip: Take a photo of the device label for quick reference to defaults like IP address and login credentials. - 2
Access the admin interface securely
Connect a computer to the gateway with a wired or trusted wireless connection. Open a browser and enter the gateway IP (commonly 192.168.0.1 or 10.0.0.1). Sign in with the admin credentials. If you don’t know the password, use the label or contact Xfinity support.
Tip: Use a wired connection during initial login to avoid drops from wireless changes. - 3
Check current mode and plan
Review whether the gateway is in router mode or bridge mode. If you plan to use your own router, you’ll typically want Bridge Mode or IP Passthrough to avoid double NAT. If you rely on the gateway for certain services, consider leaving it in router mode and configuring features to minimize conflicts.
Tip: Document the current configuration before changing anything so you can revert if needed. - 4
Decide on Bridge Mode vs NAT gateway
Choose Bridge Mode if you want full control via a separate router. Choose NAT routing if you want simplicity and fewer devices to manage. Verify service compatibility—some services may require the gateway to remain active for proper operation.
Tip: If you’re uncertain, start in router mode and test performance before switching to bridge mode. - 5
Update firmware and secure access
Check for the latest firmware and apply any available updates. Change the default admin password to a strong, unique credential and enable WPA3 (or WPA2 at minimum) for Wi‑Fi security. Review firewall settings and disable unnecessary remote access.
Tip: Back up the current configuration before applying updates. - 6
Configure Wi‑Fi names and security
Set separate SSIDs for 2.4 GHz and 5 GHz (or a unified SSID if supported). Choose meaningful names, avoid personal identifiers, and use robust passwords. If supported, enable WPA3 and consider disabling WPS to reduce risk.
Tip: Test each band’s coverage in typical living spaces after renaming. - 7
Create guest network and parental controls
Set up a guest network with its own password to segregate devices and protect your main network. Explore parental controls to manage screen time and content filtering, especially for family networks.
Tip: Limit guest network access to the internet only when possible. - 8
Test connectivity and performance
Run wired and wireless speed tests from multiple rooms. Check device connectivity, streaming quality, and gaming latency. If performance is off, try re‑seating the gateway, changing channels, or repositioning antennas.
Tip: Document test results for future reference and optimization. - 9
Back up, document, and plan maintenance
Save a copy of the new configuration and write down changes to passwords and SSIDs. Schedule routine checks for firmware updates and network health, and keep notes of any future adjustments.
Tip: Create a short changelog to track updates over time.
People Also Ask
What is the difference between an Xfinity gateway and an independent router?
An Xfinity gateway combines a modem and router in one device, while a separate router handles Wi‑Fi and routing from the network. If you want more advanced features, bridge mode lets you use your own router for full control.
The gateway is a combined modem and router; use bridge mode to connect your own router for more control.
How do I access the Xfinity gateway admin page?
Connect a device to the gateway, open a browser, and enter the gateway IP (commonly 192.168.0.1 or 10.0.0.1). Sign in with your Xfinity account or the credentials on the device label. If you forget, use the support options to recover access.
Open a browser, type the gateway IP, and sign in with your Xfinity credentials.
Can I use my own router with Xfinity service?
Yes. You can generally use your own router by placing the gateway in bridge mode or enabling IP passthrough. Some services may require the gateway for certain features, so check compatibility before changing modes.
Yes—bridge mode or IP passthrough lets you use your own router.
What should I do if devices can’t connect after setup?
Verify you’re connected to the correct SSID, check your password, and confirm the gateway isn’t in a conflicting mode (bridge vs NAT). Reboot devices and check cabling for faults. If problems persist, revert to a known good backup and apply changes one at a time.
Reboot devices, verify SSIDs, and confirm the mode matches your plan.
How do I reset the Xfinity router safely?
Try a soft reset or power cycle first. A factory reset should be a last resort because it erases customized settings. Always back up current configurations before making major changes.
Soft reset first; factory reset only if necessary.
Where can I find the default login details?
Default credentials are usually on the device label. If you’ve changed them and can’t recall, you may need to recover access or perform a controlled reset to restore defaults.
Check the device label; otherwise you may need to reset.
Watch Video
What to Remember
- Plan before touching settings and document current configuration.
- Bridge mode often improves performance with a dedicated router.
- Secure Wi‑Fi with strong passwords and updated firmware.
- Test after each change to verify impact on speeds and coverage.
- Maintain a simple change log for future reference.