Router for Xfinity: Setup, Bridge Mode, and Performance
Learn how to choose, configure, and optimize a router for Xfinity. This guide covers compatibility, bridge mode vs IP passthrough, security, and practical steps to maximize speed and coverage in homes of all sizes.

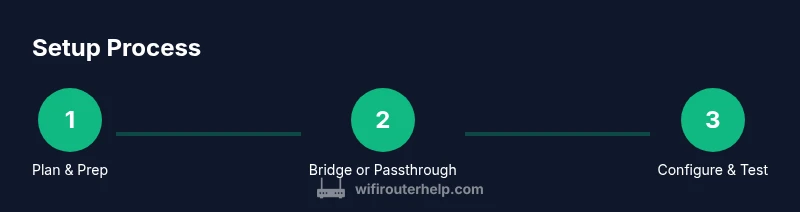
Goal: Learn to replace or supplement your Xfinity gateway with a compatible router for improved speed and coverage. We'll cover how to verify compatibility, set up in bridge or IP passthrough mode, configure Wi‑Fi and security, and tune performance. Essential tools include your Xfinity account details, a supported router, and access to your modem's admin page.
Why a dedicated router for Xfinity matters
For many homes, replacing the Xfinity gateway with a dedicated router can unlock better range, faster speeds, and more reliable connections. The WiFi Router Help team notes that a separate router helps avoid double NAT and gives you advanced features like QoS, parental controls, and guest networks. With the right setup, you can tailor your network to your floor plan and device mix, from smart hubs to gaming consoles and smart speakers. In short, a dedicated router often leads to a simpler, more stable home network and clearer control over everything that connects to WiFi. If you’re upgrading your home network in 2026, this guide will walk you through practical, step-by-step actions to get the most from a router for Xfinity.
Compatibility and planning for your Xfinity service
Before you buy or configure a new router, confirm that your service supports a third‑party router in bridge mode or IP passthrough. Xfinity often allows bypassing the gateway’s routing features so your own device can handle NAT, DHCP, and Wi‑Fi. The exact steps can vary by account and plan, so start by logging into your Xfinity account, then check the gateway’s admin interface or contact support to confirm whether bridge mode or IP passthrough is available. WiFi Router Help analysis shows that bridging commonly reduces double NAT and improves gaming and streaming performance in homes with multiple devices.
Bridge mode vs IP Passthrough: choosing the right method
Bridge mode effectively turns the Xfinity gateway into a modem, handing routing duties to your own router. IP passthrough maps a single public IP to your router while still routing other traffic through the gateway. In most homes, bridge mode is simpler and eliminates double NAT, but some setups benefit from IP passthrough if you need the gateway’s firewall features or easy remote management. Consider your device mix, the need for VPNs, and whether you rely on the gateway’s Wi‑Fi or plan to run all wireless from your own router.
Hardware and pre‑setup checklist
Gather a compatible dual‑band router with current firmware, a CAT5e/6 Ethernet cable, and a computer or mobile device for configuration. Have your Xfinity account credentials handy to disable the gateway’s Wi‑Fi and to enable bridging if supported. Ensure you know the login IP address of your gateway and your new router, plus the power adapters for both devices. Finally, confirm your internet plan’s advertised speed so you can set realistic expectations for your new router’s performance.
Network topology and IP addressing basics
When you replace the gateway, you’ll decide between using your router’s DHCP server and enabling a simple LAN scheme. In bridge mode, your router becomes the central point for IP addresses, DNS, and firewall rules. In IP passthrough, the gateway still acts as the primary router, but your router handles Wi‑Fi and LAN devices. Choose an IP range that doesn’t conflict with the gateway’s default, and plan for a consistent subnet (for example, 192.168.1.0/24) to keep device management simple.
Configuring the router: WAN, LAN, and Wi‑Fi settings
Connect the router’s WAN port to the gateway’s LAN port using an Ethernet cable. Access the router’s admin panel and set WAN to obtain an IP address automatically via DHCP unless you’re applying static settings for a specific network. Create a strong SSID and passphrase for both bands, enable WPA3 if available, and disable WPS for security. Configure a guest network and adjust basic firewall settings to block unsolicited traffic from the internet while allowing necessary services.
Optimizing Wi‑Fi performance: channels, bands, and QoS
Use 2.4 GHz for coverage and 5 GHz for speed where possible. Choose a channel with minimal interference; many modern routers automatically select the best channel, but manual tuning can help in crowded apartments. Enable features like beamforming and MU‑MIMO if your hardware supports them. Implement QoS rules to prioritize latency‑sensitive devices such as work laptops and consoles, and set aside bandwidth for essential traffic during peak times.
Security basics: passwords, updates, and protections
Use a unique, long password for your Wi‑Fi networks and the router admin page. Keep firmware up to date; enable automatic updates if available. Disable remote management from the internet unless you need it, and enable a firewall with sensible defaults. Add a guest network to isolate visitors, and consider enabling client isolation to prevent devices on the same network from talking directly to each other.
Troubleshooting common issues and quick fixes
If devices can’t connect, double‑check the bridge or passthrough configuration and ensure the gateway Wi‑Fi is disabled. Reboot both devices in the correct order (gateway first, then router) and verify LED indicators for power and link status. If speeds drop, rerun speed tests, inspect cable quality, and confirm you’ve chosen the proper Wi‑Fi bands and channels. Consult the router’s logs for clues about failed authentications or IP conflicts.
Maintenance and ongoing care for a stable home network
Regularly check for firmware updates on your router and, if applicable, the gateway. Monitor connected devices and adjust QoS as your home grows or changes. Periodically review security settings, rotate passwords, and test backup configurations for essential services. Keeping a simple network map helps you troubleshoot quickly when new devices join your network.
Tools & Materials
- Compatible dual‑band router(Support for 2.4/5 GHz, current firmware, and bridge/IP passthrough capability.)
- Xfinity account login(Needed to enable bridge mode or IP passthrough on the gateway.)
- Ethernet cable (Cat5e or better)(One end to gateway LAN, the other to router WAN.)
- Computer or mobile device(For admin access to both gateway and router.)
- Power supplies for both devices(Match adapter specs and keep spare if possible.)
- Bridge mode or IP passthrough guide(Reference material to understand the correct method for your plan.)
Steps
Estimated time: 90-120 minutes
- 1
Power down both devices
Unplug the gateway and your router, then pause for 30 seconds to clear residual charges. This ensures a clean reset and avoids chain-reaction errors during setup.
Tip: Have reset pins handy in case a factory reset is needed. - 2
Factory reset if necessary
If you’re migrating from the gateway, a factory reset on the router can prevent stale settings from causing conflicts. Do not perform reset during the middle of configuration if you’re unsure.
Tip: Note the default admin credentials before reset. - 3
Connect the router to the gateway
Use an Ethernet cable from the gateway’s LAN port to the router’s WAN port. Ensure a solid link before powering on the gateway again.
Tip: Plug in the gateway first, then the router. - 4
Disable gateway Wi‑Fi
Log into the gateway admin page and turn off its Wi‑Fi radios to prevent interference with your new network. This step is important for avoiding double NAT when bridging.
Tip: Document the gateway’s default settings for easy recovery. - 5
Enable bridge mode or IP passthrough
In the gateway settings, enable bridge mode or IP passthrough so your router can manage NAT and DHCP.
Tip: If available, choose bridge mode for a clean topology. - 6
Configure WAN on your router
Access the router’s admin panel and set WAN to DHCP (automatic IP) unless your setup requires static addressing.
Tip: Note the WAN IP after setup for troubleshooting. - 7
Set up primary Wi‑Fi networks
Create distinct 2.4 GHz and 5 GHz SSIDs with strong, unique passwords. Prefer WPA3 if your hardware supports it.
Tip: Avoid using default SSIDs to discourage tampering. - 8
Create guest and security settings
Enable a guest network and adjust firewall settings. Disable WPS and consider client isolation for extra security.
Tip: Limit guest network access to the internet if possible. - 9
Test wired and wireless connectivity
Connect devices via Ethernet and Wi‑Fi to verify speed, stability, and coverage across different rooms.
Tip: Run a few speed tests and verify consistency across bands. - 10
Tune channels and QoS
Experiment with channel selection and enable QoS for latency‑sensitive devices (work laptops, consoles).
Tip: Start with auto channel selection, then test manually if needed. - 11
Update firmware and save configuration
Check for latest firmware on both devices and back up your configuration if the router supports it.
Tip: Enable automatic updates for ongoing protection. - 12
Document and plan maintenance
Record your network topology and key settings, then schedule periodic reviews (every 3–6 months).
Tip: Keep a small network map for quick troubleshooting.
People Also Ask
Can I use my own router with Xfinity instead of the standard gateway?
Yes, you can use a third‑party router with Xfinity by enabling bridge mode or IP passthrough on the gateway. This allows your router to handle NAT, DHCP, and Wi‑Fi, often improving performance and control.
Yes, you can use a third‑party router by enabling bridge mode or IP passthrough.
What is the difference between bridge mode and IP passthrough, and which should I use?
Bridge mode disables the gateway's routing, handing all IP duties to your router. IP passthrough forwards the gateway's public IP to your router while the gateway handles other traffic. Bridge mode is simpler and avoids double NAT; IP passthrough is useful if you need the gateway's firewall features.
Bridge mode gives your router full control; IP passthrough forwards one IP to your router.
Will using a third‑party router slow down my internet?
A better router generally improves performance, especially with modern wifi features and proper placement. Speed depends on your plan, hardware, and network layout; if you encounter bottlenecks, upgrading can help.
A newer router can improve performance, depending on your plan and setup.
Do I need bridge mode for better Wi‑Fi coverage?
Bridge mode is commonly used to hand routing to your own device, which often improves coverage by consolidating control on a single router. However, IP passthrough can work well if you need the gateway’s features intact.
Bridge mode helps, but passthrough can work if you need the gateway features.
How do I choose a Wi‑Fi channel when many networks are nearby?
Run a Wi‑Fi analyzer on a mobile device to see which channels are least crowded, then manually set your router to that channel. In crowded spaces, enable auto channel selection first and reassess after a few days.
Scan for the least crowded channel and set it manually, or rely on auto.
Is WPA3 supported by most new routers for Xfinity setups?
Most modern routers support WPA3; if your model does, enable it for stronger security. If WPA3 isn’t available, WPA2‑AES with a long password is a solid alternative.
WPA3 is common on new routers; enable it if possible, otherwise use WPA2‑AES.
What to Remember
- Verify compatibility before buying a new router.
- Choose bridge mode or IP passthrough to avoid double NAT.
- Secure networks with WPA3 and strong passwords.
- Test and tune Wi‑Fi channels and QoS for best performance.
- Document settings to simplify future maintenance.