Router to Modem Cable: Complete Setup Guide
Learn how to connect a router to a modem cable using a proper Ethernet connection, configure WAN, secure your network, and troubleshoot common issues for a stable home network.

By the end of this guide you will confidently connect a router to a cable modem using the correct Ethernet cable, configure the WAN settings, and verify internet access. You’ll need a standard Ethernet cable (Cat5e or better), access to the modem’s GUI, and the router’s admin credentials. Follow the step-by-step setup for a stable home network.
What is a router to modem cable and why it matters
A router to modem cable is the standard Ethernet connection used to link your cable modem to a home router. It carries internet data between the two devices and lets the router distribute IP addresses and Wi‑Fi to every connected device. In most setups, this cable is a plain RJ-45 Ethernet cable, not a USB or coaxial cable. Using the correct cable and ports matters for stability, speed, and security.
According to WiFi Router Help, many beginners misidentify the WAN port or rely on the wrong Ethernet cable, which can leave devices without internet or create flaky connections. The WiFi Router Help team found that choosing a quality Cat5e or better cable and using the router’s designated WAN port reduces setup time and minimizes interruptions. Understanding this cable's role helps you avoid simple mistakes and get your network online quickly.
In ordinary homes, the router to modem cable sits between the cable modem and the router. The modem often handles the bridge to your ISP, while the router manages local networks, firewall rules, DHCP, and wireless settings. When the cable is correctly seated and the devices are powered in the right order, you’ll enjoy a reliable, repeatable connection that scales with your household needs.
Understanding your network layout: modem, router, and ISP
Most home networks follow a simple chain: the internet connection from your ISP enters the home via a cable modem, which then connects to a router using an Ethernet cable. The router creates a local network (LAN), assigns IP addresses via DHCP, and distributes Wi‑Fi access to devices like laptops, phones, and smart speakers. In many setups, the router also includes an integrated firewall that helps protect connected devices from external threats. Some households still have separate devices (basic switches or access points), but the core idea remains the same: the modem connects to the router, and the router serves the local devices.
Understanding this layout helps when you plan where to place devices for the best performance. Ideally, the modem should be in a central location with the router nearby to reduce cable length and signal loss. If your ISP provides a modem‑router combo, the process changes slightly because the single device performs both roles. In that case, you would place your secondary router behind the combo device if you want to expand Wi‑Fi coverage or create a separate wired network, rather than attempting a direct WAN connection from the two units.
Choosing the right Ethernet cable and ports
The heart of the router‑to‑modem connection is a reliable Ethernet cable. Use at least Cat5e; Cat6 or higher is preferred for future speed and reduced crosstalk. RJ-45 connectors are standard on both modem and router ports. Always avoid older phone cables or USB cables for this link, as they do not support the required network speeds. Cable length should be just enough to reach from the modem to the router without excess slack.
Identify the correct ports before connecting. The modem typically presents a LAN port to carry data to your router, while the router’s WAN/Internet port accepts that data and routes it to your LAN. Some routers label the port as WAN, Internet, or sometimes you’ll see a distinct color for WAN. Connecting to the correct ports ensures your devices receive valid IP addresses and can access the internet efficiently.
Prerequisites and safety tips before you begin
Before you touch any hardware, power down both devices to avoid surges or static discharge. Verify you have administrative access to both the modem and router. Prepare a suitable Ethernet cable (Cat5e or better) and a device to access the router’s admin UI (a laptop, phone, or tablet).
Be mindful of placing equipment. Keep cables away from heat sources and moisture, and avoid running cords across high‑traffic areas where they can be tugged or tripped. If you’re working with a combined modem‑router from your ISP, note the difference in management: you may need to disable the Wi‑Fi on the combo unit if you’re using your own router to avoid interference. Finally, test your power outlets so both devices can stay powered during the setup.
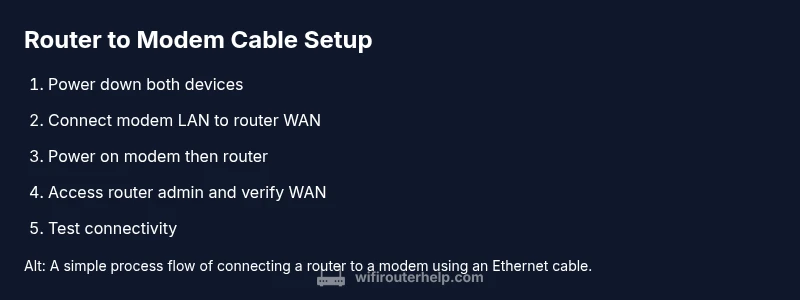
Step-by-step overview: connecting the router to the modem
This section provides a concise overview of the actions you’ll take to establish the router‑to‑modem link. It explains which ports to use, the order in which to power devices, and what success looks like after each action. By following these steps, you’ll ensure a clean, repeatable setup that you can replicate if you ever move or reset equipment. The goal is a stable, password‑protected network with reliable WAN status.
After establishing the physical connection, you’ll verify that your router recognizes the modem and that devices can obtain IP addresses. If you encounter a service interruption, recheck port connections, power‑cycle devices in the recommended order, and ensure the router is not in bridge mode unless that is your explicit intention.
Troubleshooting common issues
If you don’t see internet after connecting the router to the modem, start with the simplest checks: ensure the Ethernet cable is firmly seated in the correct ports, verify the WAN status in the router UI, and confirm the modem shows a stable online state. If the router’s WAN light is off or red, power cycle both devices with a short wait between them. A common pitfall is attempting to use the wrong port or a faulty cable. Swapping to a known good Cat5e/Cat6 cable often resolves most issues.
If you cannot access the router’s admin page, verify you’re connected to the router’s network and that you are using the correct IP address (commonly 192.168.0.1 or 192.168.1.1). A factory reset may be necessary if credentials are lost, but only as a last resort. Ensure your computer’s network settings are set to obtain an IP address automatically (DHCP) and that there is no misconfiguration in your browser or VPN that blocks access.
Best practices for reliable home networking after wiring
After your router is connected, implement best practices to maximize performance and security. Change the default admin password and enable WPA3 (or WPA2 at minimum) on your Wi‑Fi network. Update firmware on both the modem (if applicable) and the router to protect against known vulnerabilities. Create a dedicated guest network if you frequently entertain visitors, and consider enabling QoS (Quality of Service) to prioritize essential devices like work laptops or conferencing equipment. Regularly review connected devices and monitor for unusual activity. WiFi Router Help recommends routine firmware checks and password hygiene to sustain long‑term reliability.
If you’re expanding coverage or adding more wired ports, consider a small switch and organize cables to minimize clutter. Maintaining a clean setup not only improves performance but also makes future maintenance easier. The WiFi Router Help team emphasizes consistency in configuration across devices to prevent conflicts and ensure a predictable network experience.
How to test and verify the connection
Testing begins with confirming that WAN status is green or labeled as connected in the router’s interface. Next, perform a wired speed test directly from a connected computer to gauge baseline throughput and compare it with your ISP’s advertised speeds. Then, check Wi‑Fi performance on multiple devices to ensure both bands (2.4 GHz and 5 GHz) are functioning properly. If you’re using a mesh or multiple access points, verify that roaming is seamless and that devices switch cleanly between nodes.
WiFi Router Help analysis shows that reliability improves when your WAN connection is stable and your DHCP server is functioning correctly. If you notice discrepancies between wired and wireless performance, diagnose potential interference sources (microwave ovens, cordless phones, neighbors’ networks) and adjust channel settings or relocate access points. Keep a simple checklist handy so you can repeat the process if you ever need to reconfigure the network.
Final notes on the router to modem cable setup
This guide aimed to equip you with actionable steps to connect your router to a modem cable safely and effectively. A clean setup reduces troubleshooting time and helps maintain consistent speeds across devices. For ongoing success, keep firmware updated, monitor device activity, and periodically verify WAN status. The WiFi Router Help team recommends reviewing your network configuration at least every six to twelve months to adapt to new devices and internet plans.
Tools & Materials
- Ethernet cable (Cat5e or better)(Prefer Cat6 for future-proofing; length should fit your setup (1–3 m commonly).)
- Modem(Ensure it powers on and has an online connection from your ISP.)
- Router(Place near center of home; have admin credentials ready.)
- Computer, smartphone, or tablet(To access the router/modem admin pages via a web UI.)
- Power supplies for modem and router(Ensure outlets are accessible during setup.)
- Optional: spare Ethernet switch(For expanding LAN ports if needed.)
- Cable ties or organizer(To keep cables tidy and traceable.)
Steps
Estimated time: 20-35 minutes
- 1
Power down devices
Unplug the modem and the router to start the process safely. Wait 30 seconds to discharge capacitors and reset any internal state. This helps prevent electrical noise from affecting the ports when you reconnect.
Tip: A short, deliberate power cycle often fixes many initial discovery problems. - 2
Identify ports on each device
Locate the modem’s LAN port and the router’s WAN/Internet port. The WAN port is usually labeled and may be a different color. Do not connect to a LAN port on the router for the initial bridge link.
Tip: If you’re unsure, check the device label or user manual for port diagrams. - 3
Connect via Ethernet
Plug one end of the Ethernet cable into the modem’s LAN port and the other end into the router’s WAN/Internet port. Make sure the cable is firmly seated on both ends, with no visible gaps.
Tip: Use a high-quality Cat5e or Cat6 cable to reduce potential interference. - 4
Power on the modem then the router
Reconnect the modem first and give it 60–120 seconds to establish a connection with your ISP. Then power on the router and wait another 60 seconds for the router to boot and acquire an IP from the modem.
Tip: Avoid unplugging the devices again during the boot sequence to prevent rewiring delays. - 5
Access the router’s admin interface
From a connected device, open a web browser and enter the router’s default IP address (often 192.168.0.1 or 192.168.1.1). Log in with the default credentials, then change the admin password for security. Confirm WAN status shows online.
Tip: If you don’t know the default credentials, check the label on the router or its manual. - 6
Configure basic WAN/DHCP settings
Ensure the router is obtaining an IP address from the modem via DHCP. Confirm the WAN IP shows a valid address and not 0.0.0.0 or 169.254.x.x. Save settings and reboot the router if needed.
Tip: If your ISP uses a fixed IP, you may need to enter a static WAN configuration instead. - 7
Test the connection and secure Wi‑Fi
Connect a device, run a quick speed test, and browse a couple of sites to verify connectivity. Enable WPA3 (or WPA2) security, set a strong Wi‑Fi password, and disable WPS if present. Update firmware if prompted.
Tip: Document your network name (SSID) and password in a safe place.
People Also Ask
Do I need a special cable to connect a router to a modem?
Usually a standard Ethernet cable (Cat5e or better) is sufficient. Avoid USB or other non-Ethernet cables for the link.
Normally, you just need a regular Ethernet cable, Cat5e or better.
Which port should connect to the modem?
Connect the modem to the router's WAN or Internet port using an Ethernet cable. This is the bridge that lets the router manage the local network.
Plug the modem into the router's WAN port.
What if I can't access the router's admin page?
Ensure you are connected to the router's network and use the correct IP address (often 192.168.0.1 or 192.168.1.1). If credentials are lost, reset the router as a last resort.
Make sure you're connected and use the right IP address; reset if needed.
Can I use Wi‑Fi instead of a wired connection for setup?
Wired connections are more reliable for initial setup. You can configure the router remotely after the LAN is established, but a wired connection minimizes risk during the critical WAN configuration.
Wi-Fi can work later, but wired is best for setup.
How do I test the connection after setup?
Run a wired speed test, check WAN status in the router UI, and load several websites to confirm stable internet access. Compare results with your ISP's advertised speeds.
Do a speed test and verify WAN status to confirm connectivity.
Is it safe to leave the modem and router on all the time?
Yes. Most home networking gear is designed for continuous operation. Keep firmware up to date for security and reliability.
Yes, you can leave them on; just maintain updates.
Watch Video
What to Remember
- Connect to the correct WAN port using a quality Ethernet cable.
- Power the modem first, then the router, and verify WAN status.
- Secure the network with a strong password and updated firmware.
- Test connectivity and document settings for future maintenance.