Router as VPN: A Step-by-Step Home Setup Guide
Learn how to turn your router into a VPN gateway to protect every device on your home network with practical steps, security tips, and troubleshooting guidance.

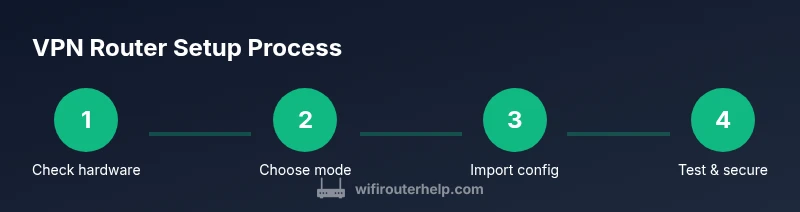
Set up your router to act as a VPN client or server so all devices on your network route through a single VPN tunnel. This quick answer points you to a complete, step-by-step guide with hardware checks and essential security tips. You’ll choose a mode, verify firmware, and follow a safe, test-driven configuration path.
What does it mean to use a router as a VPN?
In practical terms, turning your router into a VPN gateway means you configure your router to establish a VPN tunnel for traffic that passes through it. The router becomes the central point that encrypts and routes traffic before it leaves your home network. The main benefit is coverage: instead of installing VPN apps on every device, you apply the VPN at the network edge so every connected device is protected. It also makes remote access easier if you or family members want to reach home resources while traveling. However, there are trade-offs to consider: setup complexity is higher than a standard router, performance can drop due to encryption overhead, and some streaming devices or IoT gear may have compatibility challenges with certain VPN configurations. The WiFi Router Help team emphasizes that not all routers support VPN client/server modes, and those that do require compatible firmware. Before you start, check your model’s specifications, confirm that VPN methods you plan to use are supported, and set realistic expectations about speed. The end goal is a stable, privacy-conscious home network where encryption is active for outbound traffic. Throughout this guide you’ll explore when to choose client mode versus server mode, the kinds of hardware you’ll need, and how to implement a secure, maintainable VPN setup at the router level.
VPN modes on a router: client vs server vs passthrough
VPN client mode lets the router connect to a VPN service, so traffic from every device on your network is tunneled to the provider. This is typically the simplest path to network-wide privacy and usually works well for households with multiple devices. VPN server mode flips the idea: the router acts as a VPN server that remote devices can connect to, which is handy for remote access to home resources or secure file sharing while you’re away. Some routers also offer a passthrough option, which doesn’t make your router the VPN endpoint but allows VPN traffic to traverse the network via the router. Split tunneling, where only certain traffic uses the VPN, can balance privacy with local-network access and speed. The key decision is whether you want universal protection, remote access capabilities, or a hybrid approach that preserves local LAN resources for devices that don’t need a VPN.
Hardware and firmware prerequisites
To run a router as a VPN, you’ll need hardware and firmware that explicitly support VPN client or server functionality. Look for routers that advertise OpenVPN, WireGuard, or IPsec support, and ensure the firmware is up to date with the latest security patches. If your router’s stock firmware lacks VPN features, possibilities exist with alternative firmware that adds VPN capabilities, though this comes with a potential warranty and compatibility trade-off. A robust VPN setup also benefits from sufficient hardware resources: a capable CPU, enough RAM, and stable power. Check energy efficiency and cooling—heavy encryption tasks can push smaller devices. You’ll want a router that can handle encryption without becoming a bottleneck for your network traffic. Keep in mind that VPN throughput will drop some amount due to encryption and routing overhead, so plan your expectations accordingly and test with typical workloads before committing to a long-term configuration.
Step-by-step overview
Plan the flow of your VPN implementation before making changes. Start by confirming VPN capability and firmware version, then decide on client vs server mode (or both via a hybrid approach). Gather all VPN configuration details from your provider or your own server setup. Access the router’s admin interface over a wired connection to avoid dropouts, locate the VPN section, and input or import the configuration. Enable the VPN, apply changes, and perform a reboot if prompted. Finally, test connectivity from multiple devices, verify the external IP address, and adjust DNS or firewall settings as needed. This overview is a high-level map; see the dedicated STEP-BY-STEP block for granular actions, timings, and exact field names that appear in your router’s UI.
Performance, privacy, and security considerations
Enabling a router-wide VPN changes the privacy surface and can impact performance. Expect some speed reduction due to encryption and longer routing paths, especially if you connect to VPN servers far from your location. To minimize impact, choose VPN servers that are geographically close, enable hardware acceleration if your router supports it, and consider split tunneling for devices or destinations that don’t require encryption. Privacy gains include hiding your public IP from destinations you visit and reducing exposure to traffic monitoring on local networks. However, remember that a VPN on the router is only as strong as the least secure device; ensure regular firmware updates, strong router passwords, and disabling unused services. If you have smart home devices that require local network access, carefully tune your firewall rules and consider advertising a private DNS with privacy features to reduce leaks.
Troubleshooting common issues
If you can’t establish a VPN tunnel, double-check the server address, port, and protocol in the configuration. Authentication failures often stem from incorrect credentials or certificate data; re-import credentials and verify certificate dates. DNS leaks are common when IPv6 is enabled or DNS requests bypass the VPN; try disabling IPv6 on the VPN interface or switching to a DNS provider that supports private or encrypted DNS. Some devices may not route properly through the VPN, especially if they rely on local network discovery or printer sharing; in such cases, enable a split-tunnel for these devices or create static routes to ensure local devices remain reachable. When the VPN suddenly drops, look for stability issues with the VPN server, check for firmware updates, and enable automatic reconnect or a “kill switch” to prevent unencrypted traffic from leaking. Keep logs and status screens handy for reference during troubleshooting, and consider temporarily reverting to standard routing to verify baseline performance before re-enabling the VPN.
Security best practices and ongoing maintenance
Maintain VPN security by keeping firmware up to date, using strong, unique passwords, and enabling two-factor authentication where possible. Regularly audit your VPN configuration for outdated ciphers or weak keys and replace them with modern, approved standards. If you manage remote access, limit exposure by using strong access controls, rotating credentials, and monitoring connection attempts. For best results, back up your router configuration after a successful setup, and document changes with timestamps and rationale. Finally, periodically re-test your setup to catch any issues caused by external factors such as provider changes or network topology updates.
Next steps and decision points
After you complete the initial setup, monitor performance during typical daily use and revisit the VPN mode choice if necessary. If you require simple, universal coverage across devices in a small household, client mode with a nearby VPN endpoint is usually sufficient. If you want controlled remote access to home resources, server mode offers flexibility, but demands stronger security discipline. For mixed environments, a hybrid approach with selective split tunneling can provide a practical balance between privacy and performance. Evaluate your goals—privacy, access, and speed—then refine settings, DNS, and firewall rules accordingly. The decision points also include whether to upgrade firmware, switch to a different VPN protocol, or explore dedicated VPN appliances for more advanced setups.
Tools & Materials
- VPN-capable router(Supports VPN client/server features and at least one of: OpenVPN, WireGuard, or IPsec.)
- VPN provider account or VPN config files(Have credentials (username/password) or configuration files ready for client mode; server mode needs CA certs and server data.)
- Computer or mobile device for configuration(Use a wired connection when possible to avoid dropouts during setup.)
- Ethernet cable(Use for initial wired setup if the router is remote or remote access is required.)
- Uninterruptible power supply (UPS) or stable power(Minimize downtime during firmware updates or configuration changes.)
- Backup storage for router config(Save a copy of the working configuration before major changes.)
Steps
Estimated time: 60-120 minutes
- 1
Verify VPN-capable hardware and firmware
Check the router's model specifications to confirm VPN client/server support. Update to the latest firmware to ensure security and compatibility with current VPN standards.
Tip: If you’re unsure, search the model’s official docs for keywords like 'OpenVPN', 'WireGuard', or 'IPsec'. - 2
Choose VPN mode (client, server, or both)
Decide if you want all traffic to go through a VPN provider (client mode), remote access (server mode), or a combination using split tunneling.
Tip: A client-only setup is usually simplest and most reliable for beginners. - 3
Gather VPN configuration details
Obtain the necessary config files or credentials from your VPN provider, including server address, protocol, and encryption details.
Tip: Record server address, port, and protocol exactly as provided; small errors prevent the tunnel from establishing. - 4
Access router settings and locate VPN area
Log into the router’s admin UI over a wired connection; locate VPN, tunneling, or security sections where you’ll input the config data.
Tip: If VPN settings aren’t visible, consult the user manual or the firmware docs for model-specific instructions. - 5
Import/configure VPN and enable
Upload the VPN config or manually enter the details; enable the VPN client/server and apply changes. Reboot if prompted.
Tip: After applying, verify the status shows a connected VPN; avoid having multiple VPN sessions active simultaneously. - 6
Test connectivity and verify leakage
From a connected device, check your public IP address and run a DNS leak test to ensure traffic is properly routed through the VPN.
Tip: If you see leaks, consider disabling IPv6 or switching to a DNS provider with stronger privacy protections. - 7
Tune settings and secure the router
Enable a kill switch, adjust firewall rules, and configure any desired split tunneling. Save a backup of the final configuration.
Tip: Document changes so you can recover quickly if something goes wrong later. - 8
Monitor and maintain
Regularly check for firmware updates, review VPN logs, and test the tunnel after provider changes. Re-run tests after major home network changes.
Tip: Set a reminder to re-test quarterly and after major device additions to maintain protection.
People Also Ask
Can I run a VPN client on a consumer router?
Yes, many consumer routers support VPN client mode, but check your model’s documentation and ensure firmware is up to date before starting.
Yes, many consumer routers can run a VPN client, but verify hardware and firmware first.
What is split tunneling, and should I use it?
Split tunneling lets some traffic bypass the VPN to preserve local network access or speed. Use it when you have devices that don’t need VPN protection or when VPN speed is a concern.
Split tunneling lets some traffic bypass the VPN; great for performance and local access.
Will a router slow down my network?
Encryption and routing through a VPN add overhead, which can reduce throughput. Use nearby servers and enable hardware acceleration if available to minimize slowdown.
VPNs can slow speeds slightly; proximity and hardware help a lot.
What if the VPN connection drops?
Most routers offer automatic reconnect and a kill switch. Ensure you have automatic re-connect enabled and monitor the VPN status in the UI.
If the VPN drops, automatic reconnect helps keep traffic protected.
Is router-based VPN as secure as device-level VPNs?
Router VPN covers the network, but keep firmware updated and use strong credentials. Device-level VPNs can offer per-app control in some setups.
Router VPN provides network-wide protection; keep firmware current for best security.
Do I need to reboot after changes?
Many changes require a router reboot to apply correctly; expect a few minutes of downtime during setup.
Yes, a reboot is often needed to apply VPN changes.
What should I do if I can't find VPN options in the UI?
Consult the router manual, verify firmware supports VPN features, or consider alternative firmware that adds VPN support if your hardware allows it.
If VPN options are missing, check firmware or consider a compatible model.
Watch Video
What to Remember
- Plan VPN mode first and verify hardware compatibility
- Configure router-wide VPN to cover all devices
- Back up router configuration before changes
- Test for leaks and verify IP changes post-setup
- Maintain credentials and firmware for ongoing security