OPNsense Router: A Practical How-To Guide for Home Networks
A comprehensive, step-by-step guide to installing and optimizing an opnsense router for home networks. Learn hardware planning, core configuration, advanced features, and practical maintenance for reliable, secure connectivity.

By the end you will be able to install and configure an OPNsense router for a home network, including WAN/LAN setup, firewall basics, and essential security features. You’ll need compatible hardware (two NICs minimum), a USB drive for installation, and access to the OPNsense image. This guide walks you through a practical, step-by-step approach to a robust home firewall.
What is the opnsense router and why it matters for home networks
OPNsense is an open-source firewall and routing platform derived from pfSense. When you use it as an opnsense router, you gain granular control over traffic, security policies, and visibility into every device on your network. The core idea is to separate your network into zones, apply stateful firewall rules, and optionally route traffic through VPNs or IDS/IPS for extra protection. For many homeowners, this approach delivers a level of security and customization that consumer routers struggle to match. According to WiFi Router Help, the opnsense router ecosystem offers robust security features for home networks, including a modern web-based GUI, a modular plugin system, and straightforward upgrade paths. With WAN, LAN, and optional VLANs, you can segment traffic, prioritize streaming or gaming, and create dedicated networks for guests or smart devices. OPNsense supports OpenVPN and IPsec for VPN access and Suricata for intrusion detection. Taken together, these features make the opnsense router a compelling choice for users who want hands-on control without sacrificing usability.
Planning your OPNsense router deployment
Before you install anything, map out your network goals and hardware needs. An opnsense router shines when you design a trusted LAN, a dedicated WAN connection, and a management plane separate from consumer devices. At minimum, choose hardware with two NICs (one for WAN and one for LAN), a modest CPU, and enough RAM to support firewall rules and optional features like VPN. If you plan VLANs, ensure the hardware and switch support them and that the NICs can be assigned to multiple interfaces. Consider the noise, power, and cooling in a home environment; compact devices can work well, but ensure adequate cooling for long uptimes. Also decide how you will manage updates and backups: routine updates improve security; backups ensure you can recover quickly after a misconfiguration. For the opnsense router, a clean, version-controlled topology reduces debugging time and helps you scale as your network grows.
Installing OPNsense: hardware and installation steps
The installation process begins with selecting hardware that can run OPNsense reliably. Download the latest OPNsense image from the official site and verify the checksums to confirm integrity. Create a bootable USB drive using a tool appropriate to your OS, then boot the target device from that media. Follow the on-screen installer prompts to complete the installation, including language, keyboard layout, and administrator credentials. After installation, disconnect the installation media and boot into the new system. The first login will guide you through initial config; the default admin password should be changed immediately for security. Once you reach the dashboard, you can assign interfaces: WAN (usually your internet connection) and LAN (your home network). If you have a second NIC, you can configure additional interfaces for DMZ or separate guest networks. A successful install sets the stage for robust routing, firewall policy, and the addition of VPN or intrusion detection features.
Configuring core network services
With OPNsense installed, configure core network services to establish a stable foundation. Set WAN and LAN interfaces with appropriate IP addressing. For most home users, LAN uses a private IP range (for example, 192.168.1.0/24) and WAN is assigned via DHCP from your ISP or a static address if you have one. Enable the DHCP server on the LAN so clients receive IPs automatically, and decide whether you want DNS resolution to be handled by OPNsense (Unbound or dnsmasq) or forwarded to external resolvers. Create firewall rules that allow traffic from LAN to WAN and block unsolicited traffic from WAN. For added resilience, enable high availability (CARP) if you have multiple opnsense devices. Document the default gateway and DNS servers, and consider enabling a DNS-over-HTTPS resolver for privacy. Finally, set up a regular backup schedule so you can restore configurations quickly after changes or upgrades.
Advanced features for stability and security
OPNsense provides a suite of advanced features that boost security and reliability. For many home networks, enabling a VPN endpoint (OpenVPN or IPsec) lets you access your home resources securely while away from home. Suricata integration adds intrusion detection for outbound and inbound traffic, but requires tuning to minimize false positives. VLANs enable traffic segmentation—put smart home devices on one VLAN and guest devices on another, keeping your main network isolated. Firewall rules can be grouped into aliases to simplify management, and you can implement QoS (quality of service) to prioritize video calls or gaming. Logs and alerts help you stay informed about activity. Finally, consider hardening the admin interface: disable weak services, enforce HTTPS, and limit access by IP or VPN.
Troubleshooting common issues
Even a well-planned opnsense router can encounter hiccups. If you cannot reach the web GUI, verify that the device has network connectivity and that the LAN interface is configured correctly. Check the WAN status to ensure your ISP connection is up and that the right interface is connected. Look into system logs and firewall states for clues about blocked traffic. If VPN connections fail, confirm the correct port forwarding and authentication settings, and check that the certificate authorities are trusted by clients. If updates fail, verify download access, disk space, and the integrity of the update file. For intermittent problems, a staged approach—test a single feature, revert recent changes, then re-check—helps isolate the root cause. Finally, keep a healthy backup strategy so you can revert to a known-good configuration quickly after troubleshooting.
Maintaining your opnsense router for long-term reliability
Maintenance keeps an opnsense router performing well for years. Establish a routine for applying firmware updates and security patches; enable automatic updates if you prefer hands-off maintenance. Regularly back up configurations and export them to a safe location. Consider logging and alerting so you receive notifications about unusual activity, dropped packets, or a misbehaving NIC. Monitor hardware temperatures and ensure adequate cooling, especially on compact devices. Document network changes and keep a changelog so other family members or future you understand why settings were altered. Finally, test disaster recovery by restoring a backup in a controlled environment to verify that the process works as intended. With consistent maintenance, your opnsense router remains a secure, reliable pillar of your home network.
Tools & Materials
- OPNsense-compatible hardware (PC, mini PC, or dedicated firewall appliance) with at least 2 NICs(Two network interfaces recommended for WAN and LAN separation)
- OPNsense USB installer or bootable media(For initial install; ensure media matches hardware architecture (amd64))
- Ethernet cables (cat5e or better)(At least one for WAN, one for LAN)
- Keyboard and monitor or KVM switch (optional)(Helpful during initial setup if not headless)
- Power supply and surge protector(Stable power for device during setup and ongoing use)
- A spare USB drive (8-16 GB)(For installation image or backups if needed)
- Internet access for downloads and updates(Needed during install and for ongoing updates)
- Backup storage or cloud plan(Store config backups safely)
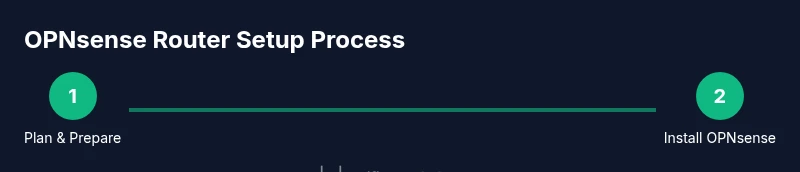
Steps
Estimated time: 1-2 hours
- 1
Download and verify the OPNsense image
Download the latest OPNsense image from the official site and verify the checksum to ensure integrity before proceeding. This prevents corrupted installs and potential security risks.
Tip: Always verify the hash against the official value before writing to media. - 2
Create installation media
Write the image to a USB drive using a tool appropriate for your OS, ensuring the write completes without errors. A clean USB reduces installer failures.
Tip: Use a dedicated USB drive for the install to avoid wear on other devices. - 3
Install OPNsense on hardware
Boot from the USB media and follow the on-screen prompts to install OPNsense. Configure language, keyboard layout, and admin credentials.
Tip: Choose a strong admin password and consider a separate admin user if possible. - 4
First login and initial setup
After installation, access the web GUI and complete the initial setup wizard. This includes network interfaces and admin authentication setup.
Tip: Change default passwords immediately and limit GUI access to trusted networks. - 5
Configure WAN and LAN interfaces
Assign WAN to your internet connection and LAN to your home network. Set IP addressing appropriate for each interface (DHCP for WAN, static or DHCP for LAN).
Tip: If using PPPoE or a static WAN, enter the exact credentials and IP details from your ISP. - 6
Enable core services (DHCP/DNS/firewall)
Activate LAN DHCP, choose DNS options (Unbound or forwarders), and create basic firewall rules to allow LAN→WAN and block WAN→LAN by default.
Tip: Keep a simple rule set initially, then expand rules as you add more devices. - 7
Add security enhancements (VPN/IDS)
Optionally configure a VPN endpoint (OpenVPN/IPsec) and enable Suricata for intrusion detection. Tune rules to reduce false positives.
Tip: Test VPN access with a trusted device before relying on it remotely. - 8
Set up backups and updates
Establish a backup routine for configuration and enable regular updates to keep your system secure.
Tip: Store backups off-device when possible and test restore procedures. - 9
Validate and monitor
Check system logs, firewall states, and network performance. Confirm devices obtain IPs and internet access works reliably.
Tip: Document changes and create a simple checklist for ongoing maintenance.
People Also Ask
What is an opnsense router and how does it differ from consumer routers?
An opnsense router is a dedicated routing and firewall platform built on open-source software. It provides granular control over rules, VPN options, and traffic management, unlike many consumer routers that offer limited customization. It combines routing, firewalling, and security features in a single, extensible system.
OPNsense router is a configurable, security-focused network device built on open-source software, offering more control than typical consumer routers.
Is opnsense suitable for a home network or only for businesses?
OPNsense works well for home networks, offering features like VLANs, VPN, and IDS/IPS at a price of greater complexity. For most homes, a properly sized system with thoughtful configuration provides stability and security similar to enterprise setups minus the cost of commercial appliances.
Great for home networks when planned and maintained; it scales with your needs.
What hardware do I need to run opnsense?
You need hardware with enough CPU, RAM, and at least two NICs; network cards should be supported by the underlying FreeBSD base used by OPNsense. A modest CPU with 2-4 GB RAM suffices for typical homes; add more for VPN or IDS features.
Two network interfaces and decent CPU/RAM to start.
Can I use a cable modem and residential internet with opnsense?
Yes, connect the modem’s Ethernet to the WAN port and configure the WAN interface type (DHCP, PPPoE, or static) according to your ISP. The LAN remains your private network, and you can tailor firewall rules and VPN as needed.
Yes, it works with common home internet setups.
How do I update opnsense safely?
Keep backups, review release notes, and apply updates during a maintenance window. Use the built-in update feature to install patches and test after update before resuming normal traffic.
Back up first and test after updating.
How can I backup and restore opnsense configurations?
OPNsense provides configuration backup/import/export in the UI. Regular backups to a safe location ensure you can restore settings after hardware failure or misconfiguration.
Export backups from the UI and store them securely.
Watch Video
What to Remember
- Install and secure your opnsense router with a solid foundation.
- Plan hardware and network topology before install.
- Enable core services (WAN, LAN, DHCP, firewall) first.
- Add VPN, VLANs, and IDS/IPS only after basics are stable.
- Back up configurations regularly and keep firmware updated.