pfSense Router Setup: A Complete Home Network Guide
Step-by-step instructions to install pfSense, configure WAN/LAN, set up firewall rules and VPN, and maintain a secure home network with best practices and troubleshooting tips.

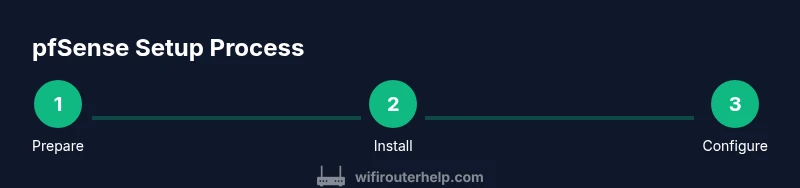
This guide helps you install pfSense, configure WAN and LAN interfaces, set up basic firewall rules, enable VPN access, and implement ongoing maintenance for a secure home network. You’ll learn hardware choices, essential settings, and practical tips to avoid common mistakes and improve reliability.
What pfSense is and why it's a strong choice for a home network
According to WiFi Router Help, pfSense is an open-source firewall and router platform that can replace consumer-grade gear with enterprise-grade features. It runs on standard x86 hardware and offers a powerful web-based interface for fine-grained control over traffic, security, and services. Homeowners and tech enthusiasts who want predictable performance, rigid security, and customization will find pfSense appealing. The platform supports robust features such as VLANs, captive portals, traffic shaping, VPN hubs, and detailed firewall rules without relying on per-device software. When comparing pfSense to consumer routers, you gain better visibility into traffic, stronger NAT control, and easier remote access management. The trade-off is a steeper learning curve and more upfront setup, which is why this guide walks you through a structured, step-by-step process.
WiFi Router Help analysis shows pfSense tends to deliver improved reliability and security when configured carefully for home networks.
Tools & Materials
- pfSense-compatible hardware(x86_64 hardware with at least 1-2 GB RAM for basic use; 4 GB or more recommended for VPN and multiple interfaces)
- pfSense installation media (ISO or USB)(Have a recovery drive ready; verify integrity of the ISO before writing)
- network cables and a switch(Cat5e/Cat6; plan for VLANs if you intend to segment networks)
- console access method(USB-to-serial adapter or IPMI/remote management if headless)
- UPS or power protection(Ensures pfSense stays online during outages and prevents config corruption)
- static WAN plan or DHCP for WAN(If your ISP assigns a static address, have it ready; otherwise note your DHCP behavior)
Steps
Estimated time: 60-140 minutes
- 1
Prepare hardware and download pfSense
Verify hardware compatibility with pfSense, back up any existing configurations, and download the latest pfSense CE image from the official site. Confirm enough RAM and CPU power for your anticipated load, especially if you plan VPN or multiple VLANs. This step sets a solid foundation before any install.
Tip: Double-check the hardware compatibility list and read release notes for any caveats. - 2
Create installation media
Use the downloaded ISO to create a bootable USB drive or optical media. Verify the media integrity with a checksum, then label the drive clearly to avoid confusion during the install. This step ensures a clean boot environment.
Tip: If you’re new to USB creation, tools like balenaEtcher are straightforward and cross-platform. - 3
Connect hardware and boot pfSense
Connect WAN and LAN interfaces to your pfSense device and boot from the installation media. Follow the on-screen prompts to start the installer, choose drive, and confirm installation. After the system reboots, access the web GUI at the default LAN IP.
Tip: During first boot, disconnect any unnecessary devices to avoid IP conflicts. - 4
Assign interfaces and initial network design
In the pfSense console or web GUI, assign WAN and LAN interfaces. Consider planning VLANs for guest networks, IoT devices, and your main LAN. Establish a clear addressing scheme (private subnets) and decide whether to enable CARP for HA in the future.
Tip: Label interfaces clearly (e.g., WAN, LAN, VLAN10) to minimize confusion later. - 5
Configure WAN and DNS basics
Set WAN type (DHCP or static) according to your ISP, and configure DNS forwarders or a DNS resolver. Ensure the pfSense box obtains an online time source and that your LAN devices receive DNS information reliably. This step stabilizes external connectivity.
Tip: Consider enabling DNS over TLS if you’re comfortable with advanced settings. - 6
Create firewall rules and NAT basics
Implement a conservative default deny policy and add outbound NAT rules as needed. Start with an allow-all rule on LAN for outbound traffic, then restrict necessary destinations. The firewall architecture is the core of pfSense security.
Tip: Aim for rule specificity and minimize permissive access to protect devices behind the gateway. - 7
Enable VPN access and remote management
Install or enable VPN options (OpenVPN or WireGuard) to securely connect from remote sites. Create server profiles, export client configurations, and test connectivity. Preserve admin access by disabling weak logins and enforcing strong credentials.
Tip: Prefer WireGuard for simplicity and speed, or OpenVPN for broader compatibility. - 8
Security hardening and backups
Lock down admin access, enable automatic updates, and configure regular backups of pfSense configurations. Store backups off-device and test restoration to verify integrity. Document changes for future troubleshooting.
Tip: Set a recurring backup schedule and verify restore periodically.
People Also Ask
What is pfSense and why choose it over consumer routers?
pfSense is an open-source firewall and router platform that replaces consumer gateways with advanced features like VLANs, VPN, and scalable firmware. It provides greater visibility and control over network traffic, which improves security and customization for home networks.
pfSense is a powerful router and firewall platform with advanced features that give you more control over your home network.
Do I need dedicated hardware for pfSense?
Yes. pfSense runs best on x86_64 hardware with adequate RAM and CPU. While you can experiment on repurposed machines, dedicated hardware yields steadier performance for VPNs and VLANs.
Dedicated hardware improves stability, especially if you use VPNs and multiple networks.
Can pfSense support VPNs like OpenVPN and WireGuard?
Yes. pfSense supports multiple VPN options, including OpenVPN and WireGuard. You can set up site-to-site or client VPNs for secure remote access.
pfSense supports OpenVPN and WireGuard for secure remote access.
How do I update pfSense safely?
Update pfSense from the web GUI, review change notes, and perform backups before applying updates. Test updates on a non-production device if possible.
Back up first, review notes, then update via the web interface.
What are common security mistakes with pfSense?
Common issues include leaving the admin interface exposed, using weak passwords, and overly permissive firewall rules. Regular audits and a defined change control process help.
Avoid exposing the admin interface and use strong credentials.
Is pfSense suitable for a home network with multiple VLANs?
Yes. pfSense excels at VLAN segmentation, allowing you to isolate guest, IoT, and primary devices for better security and performance.
VLANs work well in pfSense and improve security by isolation.
Watch Video
What to Remember
- pfSense offers enterprise-grade control for home networks.
- Plan interfaces and VLANs before touching firewall rules.
- VPN access improves remote reach without sacrificing security.
- Regular backups and updates reduce risk of outages.