Nighthawk X6 Setup and Optimization Guide
Step-by-step guide to set up and optimize the Nighthawk X6 router for reliable home WiFi. Learn configuration, QoS, channels, security, and troubleshooting with practical, expert guidance from WiFi Router Help.

Learn how to set up and optimize the Nighthawk X6 for strong, reliable home WiFi. This guide covers unboxing basics, admin access, network naming, security, and performance tuning with practical, step-by-step instructions.
Nighthawk X6: What it is and why it matters
The nighthawk x6 is a tri-band router designed to optimize home WiFi for multi-device households. With three wireless radios, it can manage simultaneous streams more efficiently than dual-band models, reducing congestion and improving overall throughput. According to WiFi Router Help, the nighthawk x6 helps balance devices across bands using Smart Connect to simplify setup and optimization. Understanding its capabilities—MU-MIMO, beamforming, and dedicated 5 GHz bands—helps you plan placement and configurations for the best possible coverage in typical homes. When you add in robust WPA3 security and a user-friendly admin interface, this router becomes a practical centerpiece for a modern connected home.
This article is written for homeowners and tech enthusiasts who want a clear, actionable path to reliable coverage. You’ll learn how to position the router, configure networks, fine-tune wireless settings, and troubleshoot common issues. Throughout, you’ll see practical tips that apply to real homes, not just lab environments.
Network design considerations for large homes
Large homes present unique challenges: thick walls, multiple floors, and devices that demand bandwidth at once. The Nighthawk X6’s tri-band design helps distribute traffic more evenly, but placement remains critical. Aim for a central, elevated location away from metal appliances and dense obstructions. If your home has long hallways or multiple floors, consider a wired or wireless backhaul strategy that leverages the X6’s two 5 GHz bands to keep devices on the best channel. For multi-device households, enabling Smart Connect can automatically steer devices to the least congested band. Keep in mind that walls, furniture, and electronics like microwaves can absorb or reflect signals; plan around them to maximize coverage across rooms and levels.
A well-planned layout minimizes dead zones and reduces the need for extenders or additional devices. If you already have a mesh system or extenders, confirm they are compatible with your x6 setup and use them to fill in gaps rather than duplicating coverage where it isn’t needed.
Getting the basics: prerequisites and unboxing
Before you begin, gather the essentials: the Nighthawk X6 router, the power adapter, an Ethernet cable, and a device to configure the router (a laptop, tablet, or smartphone). You’ll also want a stable internet connection for testing later. It’s helpful to have a notepad or notes app handy to document your SSIDs, passwords, and any custom settings. If you’re new to router administration, read through the manual’s safety and warranty sections so you understand what you’re allowed to change. This preparation reduces back-and-forth during setup and helps you stay organized as you configure security, guest networks, and parental controls.
Accessing the admin interface and initial configuration
To start, connect your computer or phone to the router’s default network (either via Ethernet or Wi‑Fi) and open the admin page through the address shown in the quick-start guide or the Netgear app. Sign in with the default admin credentials provided by the manufacturer. Once in, run the Setup Wizard if offered; otherwise proceed to set up your internet connection type (DHCP, PPPoE, or static). The goal of this stage is a stable internet path and a primary Wi‑Fi network (2.4 GHz and 5 GHz) with a strong password. If you’re merging legacy networks, consider enabling Smart Connect to automatically assign devices to the best band while preserving your preferred SSID names.
Fine-tuning for speed: channels, QoS, and beamforming
With basic connectivity established, focus on performance tuning. For many homes, leaving the 2.4 GHz channel on Auto and selecting clean, interference-free 5 GHz channels improves speed noticeably. Enable QoS to prioritize latency-sensitive tasks like gaming or video conferencing, and use beamforming where supported to direct signals toward active devices. If your devices support the newer 802.11ax or 802.11ac protocols, ensure those modes are enabled to maximize throughput. Consider enabling Smart Connect if you want automatic band optimization, but be prepared to customize if some devices consistently choose the wrong band. Regularly test speeds in multiple rooms to confirm coverage and adjust the router’s placement if needed.
This step is especially relevant for the nighthawk x6 in busy households, where a combination of Smart Connect, QoS, and smart channel selection yields noticeable improvements in streaming and gaming experiences.
Security, firmware updates, and maintenance
Security should be a priority in any home network. Enable WPA3 (or WPA2 if devices don’t support WPA3) and disable WPS if possible to reduce risk. Create a strong admin password for the router interface and consider setting up a guest network to keep visitors separate from your main network. Regularly check for firmware updates, preferably enabling automatic updates when available. Back up your configuration after a successful setup so you can restore quickly if needed. Documentation of your network names, passwords, and settings keeps you organized for future maintenance and troubleshooting.
Troubleshooting common issues and quick wins
Even a well-planned setup can encounter occasional hiccups. If a device can’t connect, double-check the SSID and password, and ensure the device is not blocked by MAC filtering or parental controls. If speeds drop, run a quick speed test from a wired device and compare with a wireless one; look for interference sources like cordless phones or microwave ovens on the 2.4 GHz band. Reboot the router and run the Setup Wizard again if necessary. When you relocate the router, re-run a speed test to confirm improved coverage in previously weak areas. For persistent problems, compare firmware versions against Netgear’s release notes and apply updates as recommended.
Quick-start recap and next steps
By understanding the Nighthawk X6’s capabilities, planning placement, configuring secure networks, and tuning wireless settings, you can achieve reliable home WiFi for multiple devices. If you need extra coverage in difficult spaces, consider a wired backhaul or gentle expansion with compatible extenders. Always keep firmware up to date and maintain a tidy, documented network setup so future changes are quick and predictable.
Tools & Materials
- Nighthawk X6 router(Ensure the model is the X6 with tri-band capabilities.)
- Power adapter(Original or compatible adapter; keep it near the router.)
- Ethernet cable (Cat5e or better)(For initial wired setup or testing wired speed.)
- Device to configure (laptop/tablet/phone)(Web browser or Netgear app; avoid public networks during setup.)
- Stable internet connection(Needed to test and validate WAN connectivity.)
- Notepad or notes app(Record SSIDs, passwords, and key settings for later reference.)
Steps
Estimated time: 25-40 minutes
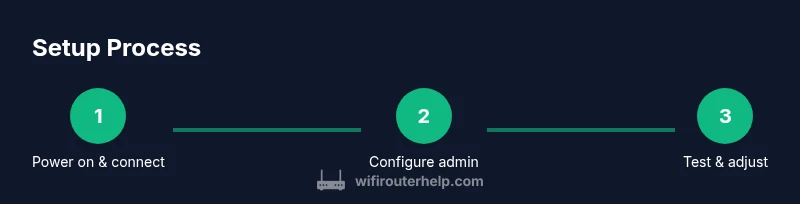
- 1
Power on and connect
Plug in the Nighthawk X6 and connect your configuring device to the router’s default network. Use a wired connection if possible for stability during setup. This ensures you can access the admin interface without wireless interference.
Tip: Wired connections during setup reduce dropouts and make initial changes smoother. - 2
Open the admin interface
Open a browser or the Netgear app and sign in to the router using the default credentials. If you don’t know the address, check the manual or the label on the router. This step gives you access to the setup wizard and advanced options.
Tip: If you encounter login pages, try a private/incognito window to avoid cached credentials. - 3
Run the Setup Wizard
Follow the Setup Wizard to configure the internet connection type and basic network names. If the wizard isn’t available, manually set WAN, LAN, and wireless settings. The goal is a stable path to the internet and a working primary SSID.
Tip: If you’re unsure of your ISP type, start with DHCP and adjust later if needed. - 4
Name networks and set passwords
Create distinct SSIDs for 2.4 GHz and 5 GHz networks, or enable Smart Connect if you prefer automatic band assignment. Use strong, unique passwords and avoid common phrases. This step protects your network while simplifying access for trusted devices.
Tip: Document both SSIDs and their passwords for future reference. - 5
Update firmware and configure security
Check for the latest firmware and install updates. Enable WPA3 (or WPA2 if needed) and disable WPS if possible. Consider enabling a guest network to isolate visitors from your main network.
Tip: Firmware updates often include security fixes; enable auto-updates if you’re comfortable with that. - 6
Tune wireless settings for performance
Adjust channels to minimize interference, enable QoS for latency-sensitive devices, and use beamforming if available. Decide whether to keep Smart Connect or switch to manual band assignments based on device behavior.
Tip: Test speeds in family rooms after changes to verify improvements. - 7
Test coverage and finalize
Run a speed test from several rooms and devices. If there are weak spots, reposition the router or add extenders with compatible backhaul. Save or export the configuration to your notes for future re-use.
Tip: Keep a small network map showing device locations and SSIDs for quick reference.
People Also Ask
What does the Nighthawk X6 offer for home networks?
The Nighthawk X6 is a tri-band router with MU-MIMO, beamforming, and Smart Connect designed for homes with multiple devices. It aims to balance bandwidth across devices to reduce congestion and improve overall performance.
The Nighthawk X6 provides tri-band wireless performance with smart features to balance devices on different bands.
Is the X6 suitable for gaming and streaming?
Yes. The X6 supports high-speed wireless bands and QoS settings, which help prioritize gaming and streaming traffic for smoother experiences.
Yes, with QoS and fast bands, it’s good for gaming and streaming.
Can I use the X6 with my existing modem?
The X6 connects to a modem via Ethernet. If you have a separate modem router setup from your ISP, you may set the X6 in bridge mode or use it as your primary router.
It connects to your modem through Ethernet; you may bridge if needed.
How often should I update firmware?
Check for updates monthly and enable automatic updates if you’re comfortable with that. Updates often include security fixes and performance improvements.
Check monthly; auto-updates are recommended.
What’s the difference between 2.4 GHz and 5 GHz bands on the X6?
2.4 GHz offers longer range but lower speeds and higher interference risk; 5 GHz provides higher speeds with shorter reach. Smart Connect helps assign devices to the best band automatically.
2.4 GHz covers more area; 5 GHz is faster but shorter range; Smart Connect helps.
Do I need extenders or a mesh system with the X6?
In larger homes or spaces with dead zones, extenders or a mesh system compatible with your X6 setup can help. Start with a wired backhaul if possible for best results.
Extenders or mesh can help fill gaps when needed.
Watch Video
What to Remember
- Power up and connect before configuring.
- Name networks and secure them with strong passwords.
- Enable QoS and Smart Connect for device balance.
- Update firmware regularly and monitor security.
- Test coverage and relocate as needed for optimal performance.