Set Up MyNetGear Router: A Step-by-Step Guide
Learn how to set up and optimize your mynetgear router with a clear, practical step-by-step approach. Includes security, performance tweaks, troubleshooting, and maintenance tips for a reliable home network.

Goal: Set up MyNetGear router and optimize performance while securing your network. You’ll need a computer or mobile device, power, and access to admin credentials. Follow these steps for a reliable home network and easy maintenance. This quick guide covers setup, security, performance, and troubleshooting so you can get online quickly and keep things stable.
Understanding mynetgear: What it is and why it matters
Your mynetgear router is the central hub of your home network. It handles traffic between your internet service and every device in your house, from phones to smart TVs. A solid setup improves reliability, speed, and privacy, while a sloppy one invites dropped connections and weak security. In this guide you will learn how to configure a mynetgear device for stable performance, simple maintenance, and clear control over who uses your network. For today’s households, a well tuned router is not a luxury but a practical necessity. As you work through the steps, keep in mind that the exact interface and terminology can vary by model, but the core concepts stay the same. According to WiFi Router Help, a careful initial configuration lays the foundation for long lasting results. You will see how to plan placement, define access rules, and optimize wireless coverage so every corner of your home can enjoy fast, reliable internet. Additionally, this guide emphasizes practical, real world steps to keep mynetgear operations smooth over time.
Planning your network layout for mynetgear
Before you connect cables, take a moment to map your home network. Identify where your modem lives, where the router will go, and which rooms have weak signal. A central, elevated position helps minimize interference from furniture and walls. Consider the walls material, the presence of microwaves, and the distance to streaming devices. For larger homes, plan a two floor layout and label zones for high priority devices such as work laptops and gaming consoles. Also decide on a single network name and password, or separate bands for 2.4 GHz and 5 GHz if your model supports it. This planning reduces dead zones and makes future changes easier. Keep a simple diagram and note your planned SSIDs and passwords in a secure place. The result is a plan you can follow during setup and when expanding the network later. The guiding principle is to maximize coverage while maintaining easy control for family members, and this approach translates well to mynetgear ecosystems.
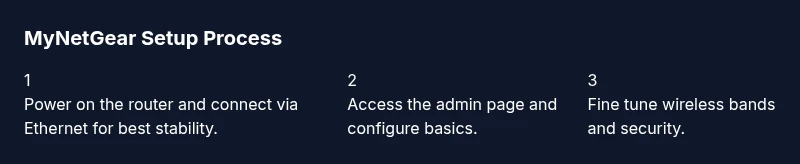
Quick-start: Connect, power, and access the admin panel
Start by plugging in your mynetgear router near the modem and turning it on. If you have a separate modem, connect the WAN port to the modem and wait for the lights to settle. Use a computer or mobile device to join the new network or connect with an Ethernet cable for the most stable setup. Open a browser and enter the router's default address such as 192.168.1.1 or the local hostname. You will be prompted to sign in with the default admin credentials, which you should change as soon as possible. If your model includes a setup wizard, run it and answer the few guided questions about your internet type, password, and whether you want the 2.4 and 5 GHz bands on or off. When you complete this step, save your settings and take a quick speed test to verify baseline performance. This approach minimizes surprises and gives you a reliable starting point for improvements. Remember to record the new admin password in a secure place. Starting with a solid admin access plan is essential for mynetgear reliability.
Fine-tune performance: Wi Fi settings, channels, and bands
The core of good Wi Fi performance is choosing the right settings for your environment. In most homes, enabling both 2.4 GHz and 5 GHz bands is beneficial, but you can tailor them to devices. The 2.4 GHz band travels farther but is more prone to interference from ovens and Bluetooth devices. The 5 GHz band offers higher speeds but shorter reach. If your router supports auto channel selection, leave it on; otherwise choose a channel with minimal interference by scanning nearby networks. Avoid overlapping channels and consider setting 20 or 40 MHz channel width for stability on crowded spectra. If your model supports beamforming or MU MIMO, enable it to improve performance with multiple devices. Name the networks clearly and ensure you publish distinct SSIDs for each band. Use WPA3 or at least WPA2 security with a strong passphrase. If you use the router for gaming or video conferencing, assign these devices to a QoS rule or to a separate priority profile to reduce latency. After adjusting settings, run another quick speed check in several rooms to confirm coverage and identify new dead zones. A small reorganization can make a big difference in everyday use, and this applies to mynetgear setups as well.
Security and access controls: login, password, and firewall
Security starts with the admin account. Change the default username and password during setup, and keep them unique and strong. Use a long passphrase with a mix of letters, numbers, and symbols, and enable automatic password changes if the feature exists. Keep the router firmware up to date and enable automatic updates if possible; this reduces exposure from known vulnerabilities. Configure the firewall for outbound and inbound traffic according to your needs, and disable UPnP if you do not rely on it for gaming or devices that require port mapping. Create a guest network with separate credentials for visitors to prevent access to your main devices. Consider enabling a basic parental controls feature if you share the network with children, and review connected devices periodically to recognize unauthorized access. Finally, disable remote management unless you need it, and only allow access from trusted networks. When finished, save the configuration and perform a quick reboot to ensure changes take effect. A few careful steps now prevent many security headaches later, especially on a mynetgear router where defaults are commonly known.
Advanced features: guest networks, QoS, port forwarding
Many MyNetGear routers offer guest networks, quality of service, and port forwarding. A guest network keeps visitors off your main network while still providing internet access, and you can set restrictions or a password. QoS rules let you prioritize traffic for critical activities like video calls or gaming, which helps reduce stuttering or lag. For port forwarding, document the ports you need to open and the devices that require them, and use the minimum necessary exposure. Avoid opening broad ranges that could invite risk. If your model supports a built in firewall profiles or attack detection, enable them. Some features require firmware support; check compatibility before enabling. Test changes by running targeted speed tests on high priority devices and monitoring latency. If you have multiple routers or mesh nodes, ensure they are synchronized with the same SSID and password, and review roaming performance. When done, back up the new settings to a file and label it for future reference. The right combination of features can dramatically improve reliability and control across your home network.
Maintenance: firmware updates and backups
Regular maintenance is the best long term defense against performance degradation. Check for firmware updates at least once a quarter, and enable automatic updates if available. After updating, recheck the network to ensure all devices reconnect automatically and that your SSID names have not changed. Back up your configuration after major changes so you can restore quickly if something goes wrong. Use a dedicated device to perform critical updates, and avoid updating during heavy usage times to reduce the risk of interruption. If your model supports a restore feature, create a local backup file that you can reimport after a reset. Document any changes in a notebook or digital note, including router IP addresses and admin credentials in a secure password manager. When you perform maintenance, give the area around the router a quick dusting to prevent overheating. Finally, test the whole network again with a few devices to confirm that performance is stable and that no new issues appeared after the update. Regular maintenance saves time and prevents bigger problems in a mynetgear setup.
Troubleshooting common issues
For most home networks, simple issues have straightforward fixes. If a device cannot connect, verify the device is on the correct network, check that the password is correct, and ensure the router is broadcasting on the proper band. If speeds seem slow, run a speed test from a wired device and compare results to your plan. Inaccurate readings can come from congestion, poor placement, or interference from microwaves and cordless phones. When the lights on the router indicate abnormal activity, consult the manual to interpret LED patterns and try a reboot. If the admin page is unreachable, attempt a wired connection directly to the router and check your computer’s network settings. A factory reset should be a last resort; if you must reset, preserve a backup, reconfigure quickly, and reapply your previous settings. For persistent problems, contact the manufacturer support channels and consider checking firmware release notes for known issues. A calm, methodical approach resolves most problems without replacing hardware, and mynetgear devices respond well to careful troubleshooting.
Add-ons and compatibility considerations with MyNetGear devices
Think of your MyNetGear router as the hub of a broader ecosystem. If you use range extenders or a mesh system, ensure compatibility with your router model and firmware version. When adding devices such as smart home hubs or gaming accessories, verify that they support the necessary wireless standards and encryption. Some older devices may require a fallback mode to connect reliably, so plan accordingly. Check the router's updated compatibility list and read user notes about firmware versions before integrating new hardware. If you rely on a fixed IP address, configure DHCP reservations to map devices to stable IPs. Finally, monitor performance after adding new components to confirm that changes do not degrade coverage. The aim is a cohesive network where all parts work together without surprising drops in speed or reliability, and this approach keeps mynetgear setups robust.
Tools & Materials
- Web browser or mobile app(Used to access the admin panel (http://mynetgear.local or the model's IP))
- Computer or smartphone(Device to configure settings and run tests.)
- Stable internet connection(Needed for initial setup and updates.)
- Ethernet cable(Wired connection for the most stable setup.)
- Power supply(Keep router powered during setup.)
- Notepad or password manager(Record passwords and important settings securely.)
Steps
Estimated time: Estimated total time: 60-90 minutes
- 1
Power on and connect
Start by placing the mynetgear router near the modem and plug it in. If you have a separate modem, connect the WAN port to the modem and wait for the lights to stabilize. Use a computer or mobile device to join the new network or connect with an Ethernet cable for stability.
Tip: Use a wired connection for the initial setup to prevent drops. - 2
Access the admin page
Open a browser and enter the router's default address such as 192.168.1.1 or the local hostname. Sign in with the default credentials and immediately change the password. If a setup wizard appears, follow its prompts to configure internet type, passwords, and band preferences.
Tip: If the wizard offers a quick setup, accept it but review each option before finishing. - 3
Run the setup wizard
Answer the guided questions about your internet type and security preferences. Choose whether to enable both bands and set distinct SSIDs. Save changes and move to wireless configuration. This step creates a stable baseline for later tweaks.
Tip: If you skip the wizard, you can still customize later, but follow up with a manual review. - 4
Set admin credentials and auto updates
Change the default admin username and a strong password. Enable automatic firmware updates if available to reduce risk from known vulnerabilities. Record credentials securely for future use.
Tip: Use a password manager to avoid reuse across sites. - 5
Update firmware
Check for firmware updates and apply them. After updating, reboot the router and verify devices reconnect automatically. Firmware updates improve performance and security.
Tip: Do not interrupt power during the update process. - 6
Configure wireless networks
Enable both 2.4 GHz and 5 GHz bands if your devices support them. Assign clear SSIDs and consider automatic channel selection to minimize interference. Ensure WPA3 or WPA2 is active with a strong passphrase.
Tip: Name networks distinctly to avoid confusion among family members. - 7
Set security features
Enable the firewall with sensible defaults and disable remote management unless required. Create a guest network to isolate visitors from your main devices. Review connected devices regularly.
Tip: Disable UPnP if not needed to close potential attack vectors. - 8
Test and validate
Run speed tests from multiple rooms and devices to confirm coverage. Check that parental controls and QoS appear as expected if used. Save a backup configuration for quick recovery.
Tip: Keep a written or digital note of your configuration for future reference. - 9
Finalize and document
Back up the configuration file and label it with date and model. Document changes and keep passwords in a secure manager. This makes future maintenance faster and safer.
Tip: Schedule quarterly reviews to keep the setup current.
People Also Ask
How do I access the MyNetGear admin page?
Connect a device to the router, then open a browser and enter the router IP (commonly 192.168.1.1 or mynetgear.local). Sign in with the default credentials and change them immediately. This is the first step to secure and customize your setup.
Open your browser, go to the router's IP, sign in, and change the default credentials.
What are best practices for maintaining MyNetGear security (passwords, updates)?
Use a long, unique password and enable automatic firmware updates if available. Regularly review connected devices and disable unnecessary remote access. These steps reduce exposure to common threats.
Use a strong password, keep firmware updated, and review connected devices regularly.
Can I set up a guest network on MyNetGear?
Yes. Enable a separate guest network in the admin interface, assign its own password, and limit access to your main network as desired. This keeps visitors from accessing your personal devices.
You can set up a guest network with its own password for guests.
What should I do if I forget the admin password?
If you forget the admin password, perform a factory reset on the router and reconfigure from scratch. After reset, immediately set a new password and save securely.
If you forget it, reset the router and set up a new password.
How can I improve Wi Fi in far rooms?
Place the router higher and closer to open space. Use both bands when possible, adjust channels to avoid interference, and consider mesh extenders if coverage remains poor.
Move the router higher, check channels, and consider extenders for far rooms.
Is it safe to enable UPnP?
UPnP can simplify port mapping but may introduce risk. Disable it if you do not need it for gaming or devices that require ports to be opened.
UPnP is convenient but can pose risks; disable unless required.
Watch Video
What to Remember
- Set up mynetgear with care to ensure stable performance
- Secure the admin page with a strong password and keep firmware up to date
- Optimize Wi Fi by using proper bands and channels for your home
- Leverage advanced features like guest networks and QoS carefully
- Maintain the router regularly to prevent problems and keep speeds high