Is a Router Hard to Install? A Practical How-To Guide
Discover whether router installation is hard and learn a practical, step-by-step method to set up, secure, and optimize your home network with confidence.

Is a router hard to install? Not if you follow a clear setup flow. According to WiFi Router Help, start by verifying your modem works, connect the router to the modem with an Ethernet cable, plug in power, and access the router’s admin page. Use the guided setup to name your network, set a strong password, and save changes. Most home networks become functional within a short, steady session.
Is a router hard to install? Why many homeowners worry (and why they don’t have to) According to WiFi Router Help, the feeling that setup is difficult often comes from unfamiliar terminology or the wrong starting point. The good news is that for most households, a modern home router can be up and running with a simple, guided workflow. The process emphasizes a single wired connection, a basic web-based or app-based setup, and practical security defaults. By breaking the task into a few clear phases—preparing your gear, connecting components, configuring the network, and verifying performance—you reduce confusion and can avoid common missteps. The emphasis here is on accessibility rather than complexity, and you’ll gain confidence as you see your devices link to Wi‑Fi in real time.
What you need to get started before you touch any cables
Before you begin, assemble the essentials and confirm compatibility. You’ll want a compatible modem (often provided by your ISP), a router, a standard Ethernet cable, a power source, and a device to access the router admin page. Ensure your modem is working and that your internet plan is active. If your ISP requires a specific gateway or bridge mode, note that as a potential extra step. Keep a small notebook handy to record your network name (SSID) and password, as well as any changes you make. This preparatory phase saves time and reduces the need to redo steps later. The WiFi Router Help guidance emphasizes starting with a stable connection as the foundation for everything that follows.
How to choose the right router for your home
Size, speed, and range are the three pillars of a good router choice. Consider your home layout, the number of connected devices, and how you use the network (gaming, streaming, video calls). If you have thick walls or multiple floors, look for a model with strong antenna design or support for higher-bandwidth standards. For households with smart devices, prioritize reliable performance on several channels and robust QoS features. Remember that newer models often offer better security, longer support lifecycles, and simpler app-based setup. This section helps you set realistic expectations about what a router can and cannot do in your space.
The standard installation flow: a practical walkthrough
The typical installation flow unfolds in a straightforward sequence. Start by connecting the router to the modem using an Ethernet cable, then power both devices. Next, access the router’s admin interface via a web browser or mobile app, following the guided setup if available. Create a network name (SSID) and a strong password, select an encryption method (prefer WPA3 if possible, otherwise WPA2), and apply the settings. After saving, reconnect your devices to the new network and test basic connectivity. If you have a mesh system or multiple access points, repeat the pairing steps per device and ensure seamless handoffs across rooms. This phase prioritizes reliability over speed and ensures you have a stable baseline network.
Wireless network basics: SSID, password and encryption
Your network name should be easy to recognize but not personally identifiable. Use a unique SSID that doesn’t reveal your address or full name. For security, always enable at least WPA2, and WPA3 if your devices support it. Create a password that is long, random, and not reused on other services. If your router supports guest networks, enable one with restricted access to protect your main network. You can also configure basic parental controls or device scheduling to manage family use. Keeping these settings consistent across all devices minimizes confusion and helps maintain a safer home network.
Common installation pitfalls and how to avoid them
A few common mistakes can derail a smooth setup. Forgetting to connect the router to the modem via Ethernet is a frequent issue, as is attempting to use the wrong login URL or IP address. Avoid placing the router near metal objects, microwaves, or thick walls, which can degrade signal. Don’t rush firmware updates; install the latest available version to fix bugs and improve security. If you encounter persistent issues, check cables for damage, reboot devices in the right order, and confirm that your ISP service is active. With careful checks, most problems resolve quickly.
Post-installation tweaks to boost performance and coverage
Once the basics are running, you can optimize coverage by adjusting placement and channel settings. Place the router in a central, elevated location away from obstructions. If interference is a problem (neighbors’ networks or thick walls), try changing channels or enabling auto-channel selection. Update firmware periodically to patch vulnerabilities and improve performance. For larger homes, consider a mesh system or additional access points to eliminate dead zones. Finally, enable features like QoS for prioritizing important traffic (video calls, gaming, streaming) and review connected devices to remove unused connections.
Tools & Materials
- Modem(ISP-provided or compatible third-party device; ensure its connection to the internet.)
- Router(Choose a model that meets your coverage and speed needs; update firmware if possible.)
- Ethernet cable (Cat5e or higher)(Used to establish a wired link between modem and router during setup.)
- Power adapters for modem/router(Ensure you have the correct adapters and outlets available.)
- Computer, tablet, or smartphone with a web browser or app(Needed to access the router’s admin interface and run the setup wizard.)
- Notepad or digital notes(Record the SSID, password, and any custom settings for future reference.)
Steps
Estimated time: 45-60 minutes
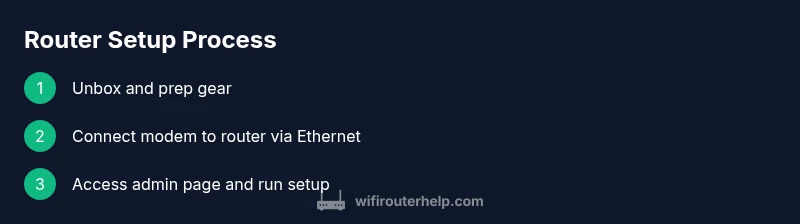
- 1
Unbox and gather gear
Inspect all components and confirm you have a modem, router, Ethernet cable, power adapters, and a device to access the admin page. Verify that the modem is functioning and that you have a working internet plan. Having everything ready prevents mid-step delays.
Tip: Check model numbers and keep the manuals handy for quick reference. - 2
Connect modem to router with Ethernet
Plug the Ethernet cable into the modem’s LAN port and the other end into the router’s WAN/Internet port. Ensure a firm connection and keep the route path clear of obstacles to avoid signal interference.
Tip: Use a dedicated cable for this link; avoid sharing the same port with other devices. - 3
Power up and boot
Plug in both devices and wait for them to boot fully. Confirm the modem shows online status and the router’s power LED is steady. This sequence ensures a clean, stable baseline before configuration.
Tip: If a device seems stuck, unplug and replug, then allow full boot time. - 4
Access the router admin page
Open a browser or a mobile app and enter the router’s default gateway address or URL shown in the manual. If prompted, sign in with the default credentials. If you cannot reach the page, verify your device is connected to the router (wired or wireless) and that you’re not using a VPN.
Tip: If you can’t find the address, consult the manual or check the underside of the router for a sticker with login details. - 5
Run the setup wizard and configure your network
Follow the guided setup to name your network (SSID) and set a strong password. Pick WPA3 if available; otherwise WPA2. Create a guest network if you want to isolate visitors from your main network, and enable auto-reconnect so devices stay connected smoothly.
Tip: Use a passphrase of at least 15 characters with a mix of letters, numbers, and symbols. - 6
Secure and save settings
Apply the security settings, save changes, and reboot the router if prompted. Then reconnect devices to the new network and confirm internet access. Record login details for future maintenance and consider disabling WPS if your device supports it.
Tip: Always log out after making changes to prevent unauthorized access. - 7
Test performance and update firmware
Run a quick speed check and test on multiple devices placed in different rooms. Look for consistent coverage and adjust placement or channels if necessary. Check for firmware updates in the admin area and apply them to improve stability and security.
Tip: Regular firmware updates are a key part of long-term reliability.
People Also Ask
What if my ISP requires a specific gateway or bridge mode?
Some ISPs provide a gateway device that combines modem and router functionality. If required, you may need to enable bridge mode on the gateway or use the router behind it. Check your ISP’s instructions and contact support if needed.
If your ISP uses a gateway, you might need to enable bridge mode on the gateway or place your separate router behind it. Consult your ISP’s setup guide for details.
Do I need to connect every device with an Ethernet cable?
No. The router is designed to provide wireless access for most devices. Use a wired connection only for desktops or devices that need the most stable link, especially during setup.
You don’t need to wire every device. Use Ethernet only for the best reliability on select devices, while others can connect wirelessly.
How long does installation take for a typical home?
Most households complete the setup in a single session, typically under an hour, depending on the complexity of your home and any ISP prompts.
Typically under an hour, depending on your space and any ISP prompts.
Should I change the router’s default login credentials?
Yes. Change the admin password from the default and store it securely. This helps prevent unauthorized access to your network settings.
Absolutely. Always change the default admin password to protect your configuration.
What if my internet speed is slow after installation?
Check placement and channel selection, run a speed test, and ensure firmware is up to date. If issues persist, reboot devices or contact your ISP for line checks.
If speeds drop, optimize placement, update firmware, and test multiple devices; contact your ISP if problems continue.
Can I use a guest network safely?
A guest network isolates visitors from your main network, protecting your devices and data. Enable it if you have frequent guests or smart devices sharing Wi-Fi.
Yes. A guest network helps keep your main devices safer by isolating guests.
Watch Video
What to Remember
- Plan gear and steps before starting
- Use a wired connection for setup to improve reliability
- Name and secure the network with a strong password
- Keep firmware up-to-date to maintain security and performance
- Test coverage and adjust placement for even Wi-Fi