Are Routers Easy to Set Up? A Practical Guide
Learn how easy it is to set up a home router with a clear, step-by-step process. This guide covers common setups, troubleshooting, and optimization to ensure fast, reliable WiFi throughout your home.

Setting up a home router is usually straightforward for most households. With a basic modem, computer or phone, and a few minutes, you can get online, customize your Wi‑Fi name and password, and secure admin access. This guide breaks down the easy path, common pitfalls, and practical steps to ensure a stable, fast home network.
Are Routers Easy to Set Up? What Most People Get Wrong
Are routers easy to set up? For many homeowners, the answer is yes—when you follow a simple, structured path rather than chasing every feature at once. According to WiFi Router Help, the common question many readers ask is how to simplify the process without getting overwhelmed by advanced settings. In practice, the core steps remain fairly consistent: power up the device, connect it to your modem, access the setup interface, and apply essential security settings. The real challenge isn’t the hardware; it’s navigating through the default configurations and understanding what to customize. If you rely on guided wizards and stay focused on essential tasks—SSID, password, and admin credentials—you can secure a reliable network in a reasonable amount of time. By approaching setup methodically, most households complete the basic configuration quickly and with predictable results, avoiding common missteps that create dead zones or unstable connections.
Understanding Your Home Network: Modes, Frequencies, and Spectrum
Home networks come in several flavors, from a single router to a mesh system. The choice affects ease of setup and coverage. Most households use a 2.4 GHz and 5 GHz dual-band router, which provides compatibility with older devices while offering higher speeds on newer ones. Understanding radio bands helps you place devices strategically: 2.4 GHz travels farther but is slower; 5 GHz is faster but has shorter reach and more walls to penetrate. If your home is large or has many walls, a mesh system or a range extender can simplify coverage without complicated configuration. When choosing gear, consider whether you need basic coverage or a scalable, future-proof network. This clarity will reduce setup time and prevent early upgrade decisions that complicate later adjustments.
Choosing the Right Hardware: Routers, Modems, and Mesh
You don’t have to buy everything at once, but selecting the right hardware is key to a smooth setup. A modem is required to connect to the internet; most homes will also need a router unless you have a gateway device from your ISP. If speed and reliability are critical, a dedicated router with modern WPA3 security and robust CPU power makes future upgrades easier. Mesh systems are worth considering for larger homes or multi-story layouts where a single router struggles. They simplify coverage by placing multiple nodes around the house, often with straightforward mobile apps for setup. Overall, choose a device that supports current standards (Wi‑Fi 6/6E if possible) and a modern security protocol, so your network remains fast and safe long after you finish setup.
A Clear Setup Path: From Unboxing to Online
Starting from the moment you unbox, follow a consistent sequence. First, connect the router to the modem using an Ethernet cable, then power both devices. Next, connect a computer or smartphone to the router’s default network name (SSID) and open the setup page. The wizard will guide you through essential steps: select your internet connection type, set a unique network name, and create a strong password. Finally, create an admin password and enable automatic firmware updates if available. This streamlined path minimizes guesswork and leads to a stable online experience quickly.
Common Pitfalls and How to Avoid Them
Several pitfalls can derail setup if you’re not careful. Placing the router in a cramped cabinet or behind thick walls can create dead zones. Failing to change the default admin password leaves your network vulnerable. Not updating firmware can leave you exposed to security flaws or performance issues. Relying on the ISP’s app alone may complicate future changes or third-party devices. To avoid these issues, position the router high and central, set strong, unique credentials, enable updates, and familiarize yourself with the basic admin interface rather than relying solely on mobile apps.
After Setup: Optimizing for Speed and Coverage
Once online, take a few steps to optimize performance. Use the 5 GHz band for higher-speed devices near the router and the 2.4 GHz band for longer-range devices further away. If you have a large or multi-story home, consider a mesh solution or a wired backhaul to maintain consistent speeds. Enable features like guest networks to isolate guest traffic, and set parental controls if needed. Regularly check for firmware updates and monitor connected devices so you can identify any new bottlenecks or security concerns early.
Tools & Materials
- Router and power adapter(Original power adapter and cable)
- Modem (if ISP provides only a gateway)(Coax/DSL cable as required by service)
- Laptop, tablet, or smartphone(Web browser or mobile app access)
- Ethernet cable (Cat5e/Cat6)(For a wired connection to the setup page)
- Web browser or device with admin access(Required to reach the router setup interface)
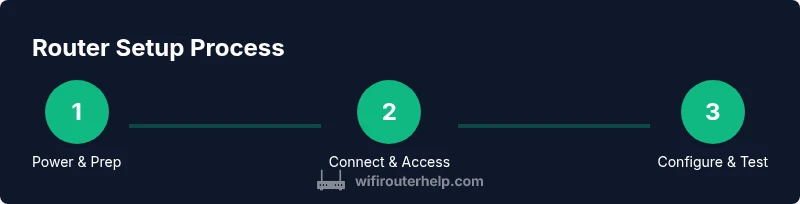
Steps
Estimated time: 25-40 minutes
- 1
Power on and prep devices
Plug in the router and the modem, give them a moment to boot, and locate the default network name. This ensures you have a stable starting point and a direct path to the setup interface.
Tip: Wait 2–3 minutes after boot to ensure all LEDs indicate ready. - 2
Connect to the router's default network
Use a computer or phone to connect to the router’s default SSID. This avoids interfering with other networks and gives you a clean session for configuration.
Tip: If you don’t see the default network, try restarting the router. - 3
Open the admin page
Open a web browser and navigate to the router’s IP address or the URL provided in the manual. Log in with the default credentials listed there.
Tip: Change the login credentials immediately once you access the page. - 4
Configure WAN/Internet settings
Select the correct internet connection type (DHCP, PPPoE, or static IP) as dictated by your ISP. If you’re unsure, contact your provider or check your service docs.
Tip: Avoid changing advanced settings unless you know their impact. - 5
Set up Wi‑Fi name and password
Create a unique SSID and a strong passphrase. Consider enabling distinct bands (2.4 GHz and 5 GHz) to optimize compatibility and performance.
Tip: Use a passphrase with at least 12–16 characters, including symbols and numbers. - 6
Secure admin access and update firmware
Change the default admin password, enable automatic firmware updates if available, and apply any suggested security settings.
Tip: Turn on auto-update when possible to stay protected against threats. - 7
Test connectivity and save configuration
Connect devices to the new network, run a quick speed test, and re-check device access to ensure changes took effect.
Tip: Document the new SSID and password for future reference.
People Also Ask
Are routers easy to set up for non-technical users?
Yes. Most routers offer a setup wizard and straightforward prompts. You can usually complete the basics—network name, password, and security—within 20–60 minutes, even if you’re new to networking.
Most people can set up their router with the built‑in wizard in about an hour or less.
Is it necessary to use the ISP's app for setup?
Not always. The web-based admin page provides full control for most users, though some ISPs bundle features in their app. If you want access to advanced settings, use the web interface as the primary tool.
You can usually set up and manage most features via the router’s web interface.
Can I reuse an old router with a new modem?
Yes, provided the old router supports current standards and is compatible with your modem. You may need to set it up in bridge mode or connect it as a secondary access point.
Old routers can work with a new modem, sometimes by enabling bridge mode or adding them as mesh nodes.
What should I do if I can’t access the admin page?
Ensure you’re connected to the router, use the correct IP address, and try a wired connection. If needed, reset the router to factory defaults and start over.
Make sure you’re connected to the router and try a reset if you can’t access the setup page.
How can I maximize Wi‑Fi coverage in a multi-story home?
Place the router centrally on the middle floor, elevate it, and reduce obstructions. For larger homes, a mesh system or a wired backhaul improves coverage without complex configurations.
Central placement helps a lot; for big homes, consider a mesh system.
Watch Video
What to Remember
- Plan a simple, stepwise setup path.
- Change default credentials immediately.
- Use strong Wi‑Fi passphrases and enable updates.
- Assess coverage and upgrade to mesh if needed.