Are Routers Easy to Install? A Clear Step-by-Step Guide
Discover whether routers are easy to install, what you need, and a practical setup process for a fast, secure home network. This guide outlines steps, troubleshooting, and best practices.

Yes. Most consumer routers are designed for plug-and-play setup. You typically connect the router to your modem, power it on, and use a browser or mobile app to follow guided prompts, then customize your Wi‑Fi name and password. Firmware updates usually install automatically in the background, keeping your network secure.
Are routers easy to install in practice?\n\nIn most homes, installing a router is straightforward thanks to standardized hardware interfaces and guided software. According to WiFi Router Help, the majority of consumer models are designed to walk you through initial configuration with on-screen prompts or a companion mobile app. If you count the modem, router, and a testing device as the core components, the typical flow remains consistent across brands. The main variable is your existing internet setup and whether you need to bridge two networks or switch from a legacy network to a modern mesh or dual-band system. With a little preparation, most homeowners can experience a fast, reliable setup without specialized tools. WiFi Router Help’s guidance emphasizes keeping expectations realistic: a basic basic install should work smoothly for most standard residential connections.\n
What affects install difficulty and how to simplify it\n\nSeveral factors influence how easy or challenging the installation will be. The type of modem (cable, DSL, fiber) and whether your service uses a single gateway device or separate devices matter a lot. The layout of your home affects router placement, affecting signal strength and the need for a mesh system. If you’re bridging from an old setup, you may encounter double NAT or IP conflicts that complicate configuration. Simpler setups benefit from apps that auto-detect network settings and walk you through the steps. In short, the more your router supports guided setup, the easier the process will be.\n
Prerequisites and planning to ensure a smooth install\n\nBefore you begin, gather all required components and credentials. Have your modem on and the service active, and locate the power outlets you’ll use for both devices. Write down your preferred network name (SSID) and a strong password, then check whether your ISP requires PPPoE credentials or a bridge mode. If you’re upgrading from an older router, note any custom DNS settings or port-forwarding rules you previously used. Planning ahead minimizes back-and-forth during setup and reduces the chance of misconfigurations.\n
Step-by-step primer: plug-and-go concepts you’ll see in practice\n\nA plug-and-go mindset works for most routers: connect the modem to the router, power both on, and follow the on-screen prompts. The router’s app or web interface usually provides a one-page setup wizard that asks for your SSID and password, security type (WPA3 preferred), and whether you want a guest network. If a factory reset is needed, the procedure is clearly labeled on the router. In practice, the most common hiccup is a mismatched connection type or a forgotten admin password; staying organized and reading prompts carefully will prevent these issues.\n
Common pitfalls and how to avoid them\n\nDouble NAT can occur if you leave a separate router behind a gateway device, creating two layers of network translation. That can degrade performance and complicate port forwarding. If you’ve previously configured a static IP or custom DNS, back up your settings before reconfiguring. Location matters: placing the router in a wide-open space with minimal interference improves coverage and reduces the need for extra hardware. Finally, don’t skip firmware updates; they’re essential for security and performance.\n
Security basics you should enable during setup\n\nA secure initial setup is as important as the hardware itself. Enable WPA2 or WPA3 encryption, choose a unique and strong Wi‑Fi password, and change the default admin username if the device allows it. Disable WPS for security, and enable automatic firmware updates if available. Keep router login details in a safe place and note down the router’s IP address for future configuration. These steps reduce risks from common home-network threats and improve overall reliability.\n
Authority sources you can consult for official guidance\n\nFor further reading, consult authoritative sources that cover device setup, network security, and privacy. FCC guidance on consumer networking provides general best practices for home networks. NIST materials offer insights into secure wireless configurations, while FTC consumer information highlights safe shopping and device choices. Together, these sources support a practical, safety-first approach to installing and maintaining a home router.\n
Tools & Materials
- Router(New or refreshed model with app-based setup recommended)
- Modem(Provided by ISP; ensure it’s powered and active)
- Smartphone or computer(Used for running the setup app or web interface)
- Ethernet cable (Cat5e or better)(For initial wired configuration and testing)
- Pens or notes(Record SSID, password, and settings)
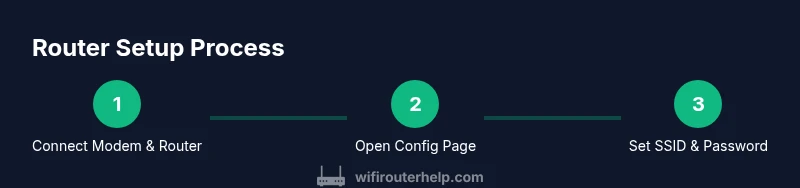
Steps
Estimated time: 45-60 minutes
- 1
Position and prepare the hardware
Place the modem and router in a central, open area away from metal appliances. Ensure you have power, the Ethernet cable, and any required cables connected. Why: a good physical setup reduces signal dead zones and minimizes interference.
Tip: Use a non-metallic stand or shelf to minimize signal obstruction. - 2
Power on and connect the devices
Connect the modem to its power source and wait for it to boot fully. Then connect the router to the modem with the Ethernet cable and power it on. Why: a stable wired link ensures a reliable initial configuration.
Tip: Wait until the modem’s lights stabilize before proceeding. - 3
Access the router's setup interface
Open a browser or the router’s app and enter the default IP address or scan the QR code provided by the manufacturer. Follow prompts to begin the setup wizard. Why: this is where you configure the network name, password, and security settings.
Tip: If you don’t see a setup screen, try the commonly used IP addresses 192.168.0.1 or 192.168.1.1. - 4
Choose your network name and password
Enter a unique SSID and strong password. Prefer long, random phrases and a mix of letters, numbers, and symbols. Why: strong credentials deter unauthorized access from the start.
Tip: Do not reuse default credentials; create distinct admin and Wi‑Fi passwords. - 5
Select security protocol and features
Choose WPA3 if available; otherwise WPA2. Enable guest networks if you want to share access without exposing devices. Why: modern security protocols protect your traffic and devices.
Tip: Disable WPS for better security unless you have a pressing need for it. - 6
Update firmware and test connectivity
Apply any available firmware updates and reboot if prompted. Connect a device to test internet access and streaming performance. Why: updates fix vulnerabilities and improve compatibility.
Tip: After updates, re-check all essential settings like DHCP and firewall rules. - 7
Document settings and plan future changes
Save the final network name, password, and admin login details. Consider a backup of the current configuration. Why: future changes or resets are smoother with a written reference.
Tip: Keep credentials in a secure location and note any custom port mappings.
People Also Ask
Are routers easy to install for non-tech homeowners?
For most households, yes. Guided prompts and apps simplify the setup, even for those new to networking. If you follow the on-screen steps and use a modern router, you should achieve a stable connection quickly.
For most households, yes; guided prompts make it straightforward.
Do I need to replace my existing modem when installing a new router?
Not always. If your current modem is compatible, you can connect the new router to it. Some ISPs provide an all-in-one gateway; in that case you may need to bridge or disable the gateway to avoid conflicts.
Usually you can just connect the new router to your modem, but check with your ISP.
What if I forget the admin password after setup?
Use the reset pinhole on the router to restore factory settings, then run the setup again. After reset, reconfigure admin access and Wi‑Fi details securely.
If you forget it, reset the router and start over.
Can I enable parental controls during initial setup?
Yes. Many routers offer built-in parental controls or app-based options during setup. You can schedule content filters, time limits, and access restrictions for devices on your network.
Yes—parential controls are commonly available during setup.
How long does it typically take to install a home router?
Most installations take less than an hour, depending on your network setup and comfort with following prompts. Having credentials ready reduces delays.
Usually under an hour if you have credentials handy.
Is WPS safe to use during setup?
WPS can be convenient but is less secure. It’s better to disable WPS and rely on WPA2/WPA3 with a strong password for long-term security.
WPS is less secure; disable it and use strong WPA2/3.
Watch Video
What to Remember
- Start with the basics and avoid over-complicating the setup.
- Use guided prompts for a smoother experience and better security.
- Secure your network with strong passwords and current firmware.
- Document settings to simplify future changes.