How to Use a Router as Extender
Learn how to use a router as extender to boost Wi‑Fi coverage. This step-by-step guide covers wired and wireless backhaul, placement, security, troubleshooting, and when to upgrade to mesh.

By the end of this guide you’ll learn how to use router as extender to broaden your home Wi‑Fi coverage. You’ll need a spare router, an Ethernet cable if possible for a wired backhaul, and access to both routers’ admin pages. Follow the step-by-step instructions to configure, place, and secure the setup.
Why Using a Router as Extender Matters
According to WiFi Router Help, turning a spare router into an extender can significantly improve coverage without purchasing a new device. A properly configured extender creates a second access point that shares the same network, or a dedicated backhaul link if supported. The result is fewer dead zones in living rooms, hallways, and basements. The goal is to balance performance with convenience, using existing hardware to maximize your home network's reach. For homeowners and tech enthusiasts, this approach provides a flexible upgrade path without expensive new gear. It also helps you learn more about your existing equipment and how wireless signals behave through walls and floors.
In practice, you’ll often pair a 2.4 GHz signal for broad coverage with a faster 5 GHz signal for devices closer to the router. Be mindful that not all routers support every extender feature, which is why clarity on mode names (Repeater, Bridge, AP) matters when planning your setup. The key takeaway is to prioritize a backhaul that doesn’t bottleneck your main router’s performance.
Understanding AP Modes: Repeater, Bridge, and Access Point
Routers can operate in several modes that affect how they extend coverage. A repeater or wireless bridge typically uses wireless backhaul to connect to the main router, repeating the signal to new areas. An access point (AP) is usually wired to the main router via Ethernet and creates a new wired-backed wireless node. The performance impact varies: AP mode often yields the best stability and speed, while repeater mode is simpler and avoids extra cables. When choosing a mode, consider your home layout, the location of the main router, and whether you can run an Ethernet cable to the extender location. If reliability matters most, aim for AP mode with a wired backhaul where possible.
Understanding these modes helps you set expectations: AP mode with wired backhaul delivers steady performance, while repeater/bridge modes sacrifice some throughput for convenience. If you must use wireless only, plan for potential speed attenuation and plan clear placement to minimize interference.
Prerequisites and Site Survey
Before updating settings, map your home’s layout and identify likely dead zones. Note where your main router sits, what walls or large appliances stand in the way, and how far you can realistically place the extender. A quick site survey can save time later: walk through your home with a mobile device to measure signal strength in target rooms. Tools like built‑in signal meters or simple speed tests can help you decide on an extender location. Also ensure you have administrative access to both routers and that you can physically reach power outlets at the intended placement spot. By planning first, you reduce backtracking later and keep the configuration streamlined.
Gather Tools and Materials
Collect everything you need before starting the configuration. You’ll want: a spare router that can run in AP, repeater, or bridge mode; an Ethernet cable (at least 1–2 meters, Cat5e or better if you can run a wired link); a computer or smartphone to access admin pages; and a power source near both devices. Having notebook paper to jot IPs and settings helps avoid misconfigurations. If you plan to run a wired backhaul, also ensure you have a compatible Ethernet switch if your layout requires more cables or devices. Having these items on hand keeps the setup methodical rather than rushed.
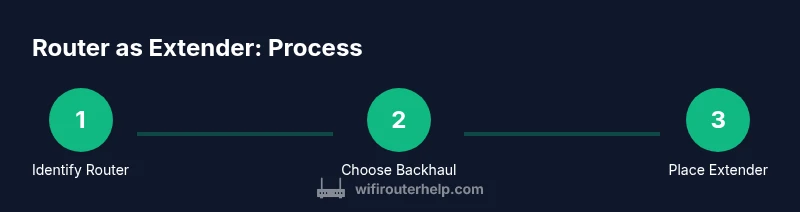
Step-by-Step Overview of the Process
A well‑structured plan reduces mistakes and speeds up installation. Let’s outline the core phases you’ll encounter: (1) identify a suitable spare router and confirm its compatibility with bridge/repeater/AP modes; (2) reset devices to factory defaults to ensure a clean starting point; (3) decide on backhaul (wired preferred) and gather necessary cables; (4) connect the spare router to the main router using Ethernet if wired; (5) adjust IP and DHCP settings to avoid conflicts; (6) choose extender mode and configure the SSID and security; (7) optimize placement for best signal and roaming; (8) test the extended network, measure speeds, and refine placement if needed. Each phase reduces risk and clarifies next steps.
Configuration Details: IP, DHCP, and Security
Key network settings must be aligned to prevent IP conflicts and ensure devices obtain addresses correctly. On the extender, disable DHCP so only the main router issues IP addresses. Assign a static IP to the extender within the main router’s subnet (for example, if the main router uses 192.168.1.x, set the extender to 192.168.1.2). Use a strong, unique admin password and enable WPA3 or WPA2‑AES security on the extended network. If you’re reusing the main SSID, make sure the security settings and password match so devices can roam seamlessly; if not, you can run two networks with clear names and test which offers smoother handoffs in your space.
SSID, Roaming, and Passwords: How to Manage Your Extended Network
Decide whether you want a single, seamless network name (SSID) across both devices or distinct SSIDs for easier troubleshooting. A single SSID can enable smoother roaming, but some devices may cling to the closer access point rather than jumping to the stronger link. If you opt for two networks, ensure both use the same security protocol and a similar password to avoid user confusion. Consider enabling guest network isolation if you share your home with visitors. Document the exact SSIDs and passwords for quick reference during future changes.
Placement Strategies for Maximum Coverage
Placement matters more than most people realize. Elevate the extender off the floor, avoiding metal appliances or thick walls that absorb signals. Position it midway between the main router and the furthest living area, but avoid stale “dead zones” near stairwells or dense furniture. If your home has multiple floors, test on a stairwell landing or hallway to evaluate speed at various heights. Use a smartphone to scan signal strength in each room and adjust accordingly. A simple rule of thumb: higher is better than tucked in a cabinet.
Wired Backhaul: Why It Matters and How to Do It
Whenever possible, a wired backhaul provides the strongest, most reliable extension. Run an Ethernet cable from the main router to the extender and configure the extender in AP mode so it behaves like a dedicated access point. This setup often yields speeds closer to the main router’s own performance and minimizes interference. If wiring is impractical, a quality wireless bridge with a strong backhaul can still deliver good results, particularly in smaller spaces. Plan cable routes carefully to avoid trip hazards and ensure cables don’t become a visual nuisance.
Troubleshooting Common Issues
If the extender is visible but offers no internet, double‑check the DHCP setting on the extender and its IP address. Ensure you’re using the correct backhaul mode (AP vs repeater) and that the IP you assign won’t clash with the main router. If devices can connect but run slowly, test close to both routers to determine if placement is the bottleneck. Interference from neighboring networks can degrade speed; try different channels or adjust the 2.4 GHz vs 5 GHz usage. Finally, confirm firmware versions on both devices are current; outdated firmware can hinder compatibility and performance.
Advanced Options: Mesh vs Extender vs Access Point
For larger homes, a dedicated mesh system can offer more consistent coverage with simpler management. A traditional extender or AP setup can be cheaper and tailor‑made to specific areas. If your main router plus extender approach isn’t delivering the stability you expect, compare cost, installation effort, and roaming behavior to decide whether a mesh network or a hardware upgrade is more appropriate. Each path has trade‑offs in performance, ease of use, and future scalability.
Maintenance, Firmware Updates, and Backups
Keep firmware updated on both devices to improve stability and security. Enable automatic updates if available, and periodically check release notes for fixes that may impact compatibility with your devices. Back up your configuration settings after a successful install so you can restore quickly if you need to reset either device. Document changes and keep a copy of key details like IP addresses, SSIDs, and passwords in a secure location.
Real-World Scenarios: Apartments, Houses, and Multi‑Story Homes
In apartments, a compact extender near the living area might solve the most noticeable dead zones, while in multi‑story homes you may need multiple extenders or a mesh system for consistent cross‑floor coverage. Small spaces benefit from tight placement and short cables, whereas larger homes benefit from multiple wired backhauls and strategic AP placement on each level. In every scenario, start with a wired backhaul if possible, then adjust placement based on measured signal strength and real‑world speeds. This hands‑on testing is essential to understand how your space behaves and where to place devices for optimal performance.
Tools & Materials
- spare router(Must support repeater, bridge, or AP mode)
- Ethernet cable (Cat5e+)(For wired backhaul when available)
- computer or smartphone(Admin access to both routers)
- power outlet or surge protector(Near each router)
- paper and pen(Record IPs, SSIDs, and passwords)
- optional switch(If you need extra Ethernet ports near the extender)
Steps
Estimated time: 60-90 minutes
- 1
Identify the spare router
Inspect the spare router’s label and admin interface to confirm it supports Repeater/Bridge/AP modes. If unclear, consult the firmware page or user guide. This step sets the foundation for a smooth configuration.
Tip: Check for terms like Repeater, Bridge, WDS, or AP mode in the admin UI. - 2
Reset both devices to factory defaults
Reset the spare router and, if needed, the main router to a known baseline. This avoids conflicts from old settings and ensures a clean slate for the new configuration.
Tip: Back up current configs if you plan to revert later. - 3
Decide on the backhaul method
Choose wired backhaul if possible; it maximizes stability and speed. If wiring isn’t feasible, plan for a strong wireless link and adjust placement accordingly.
Tip: Wired backhaul reduces interference and keeps speeds high. - 4
Connect Ethernet backhaul (LAN to LAN)
Run an Ethernet cable from a LAN port on the main router to a LAN port on the spare router. This creates a stable, fast link for the extender to use as its backhaul (AP mode).
Tip: Avoid crossing through doorways or under heavy furniture that can crush the cable. - 5
Configure IP and disable DHCP on extender
Assign a fixed IP to the extender within the main router’s subnet and disable DHCP on the extender so only the main router handles IP allocation.
Tip: Choose an IP outside the main router’s DHCP range to prevent conflicts. - 6
Set extender mode and security
Enable AP mode if using wired backhaul or the appropriate extender option for wireless backhaul. Apply WPA2 or WPA3 security with a strong password; mirror the main network’s password if using a single SSID.
Tip: Use a unique admin password for the extender to protect it from misconfigurations. - 7
Configure SSID and roaming strategy
Decide whether to use the same SSID across both devices for seamless roaming, or separate SSIDs for easier troubleshooting. If you keep one SSID, ensure consistent security settings.
Tip: Test roaming behavior with a few devices and switch approaches if roaming feels unstable. - 8
Test, tune placement, and verify performance
After setup, run speed tests in multiple rooms and adjust extender placement for better coverage. Iterate until you achieve acceptable speeds and minimal dead zones.
Tip: Use real devices (phones, laptops) to simulate daily usage during testing.
People Also Ask
Can I use any router as an extender?
Not every router supports extender modes such as Repeater, Bridge, or AP. Check the admin UI for mode options; if unsupported, use AP mode with a wired backhaul or consider a dedicated extender or mesh system.
Not every router can function as an extender; look for Repeater, Bridge, or AP mode in the settings.
Should I use wired backhaul or rely on wireless?
Wired backhaul generally provides the most stable and fastest performance. Wireless backhaul is easier to set up but may reduce overall speeds and increase latency.
Wired backhaul usually offers the best stability; wireless backhaul is simpler but slower.
Is it better to use the same SSID on the extender?
Using the same SSID can help devices roam, but not all devices handle roaming smoothly. If you experience drops, try separate SSIDs and DNS/roaming tweaking, then test again.
You can use the same SSID, but separate SSIDs can be easier to manage.
What is the difference between a repeater and an access point?
A repeater extends wireless coverage using wireless backhaul, potentially reducing speed. An access point connects via Ethernet and creates a new wireless node with typically better performance.
Repeater uses wireless backhaul; AP uses Ethernet for strong backhaul.
Why is my speed slower near the extender?
Distance, interference, and backhaul limitations reduce performance. Improve placement, reduce obstacles, and consider a wired backhaul if needed.
Slower speeds usually come from distance or interference; adjust position or use wired backhaul.
Do I need to update firmware on both routers?
Yes. Keeping firmware up to date helps with compatibility, security, and performance. Enable automatic updates if available.
Keep firmware current on both devices.
Watch Video
What to Remember
- Plan topology before configuring devices
- Use wired backhaul when possible for stability
- Match security settings to the main network
- Test coverage and adjust placement for optimal signal