How to Set Up a WiFi Router: A Step-by-Step Guide
Learn how to plan, unbox, connect, configure, and secure a home WiFi router. This practical guide covers hardware prep, basic and advanced settings, guest networks, firmware updates, and troubleshooting for reliable network performance.

Setting up a WiFi router correctly improves coverage, speeds, and reliability across your home. This guide covers essential steps from unboxing and hardware connection to configuring security and guest networks. You will need a device to configure the router and an active internet connection. By following these steps, you can minimize dropouts and achieve stable wireless performance.
Why a Solid Setup Matters
A well-executed WiFi router setup directly influences your home network performance. When you plan placement, choose secure defaults, and keep firmware current, you’ll notice fewer dead zones, steadier speeds, and better reliability for streaming, gaming, and video calls. A strong setup also reduces interference from neighboring networks and household devices. According to WiFi Router Help, investing a bit of time upfront yields long-term gains in consistency and ease of use for all connected devices.
Beyond speed, security is a crucial reason to start with a solid foundation. A router that broadcasts a strong password, uses up-to-date encryption, and has admin access locked down helps protect every device on your network. This section sets the stage for the practical steps that follow, explaining why each decision matters and how it contributes to a smoother daily online experience.
Prepare Your Equipment and Network Plan
Before touching any cables, outline a simple network plan. Decide on an SSID that is easy to recognize but not personally identifying, choose a password you can remember but others cannot guess, and determine whether you want a separate guest network for visitors. Gather all necessary items in one place to avoid interruptions.
Inventory what you’ll need: the WiFi router, its power adapter, a device to configure the router (phone, tablet, or computer), a web browser, and an optional Ethernet cable for a wired setup during configuration. If you already have a modem, identify the correct port on the router to connect the modem and ensure you have a stable power source. WiFi Router Help emphasizes planning the layout to minimize dead zones and optimize coverage throughout your living space.
Initial Hardware Setup: Connect and Power On
Start by unboxing the router and verifying that you have all required components. Place the router in a central, elevated location away from walls and metal objects, which can obstruct signal. Connect the modem to the router’s WAN or Internet port using an Ethernet cable, and plug the power adapter into a surge-protected outlet. Give the device a few minutes to boot fully; the indicator lights should stabilize before you proceed.
If you’re using a wired configuration, connect your configuring device to the router with an Ethernet cable. This can make the initial setup faster and more reliable, especially on busy networks. If you can’t access the router via Ethernet, proceed with a wireless connection but expect the setup page to load more slowly.
Accessing the Admin Interface and Changing the Password
Open a web browser on the configuring device and enter the router’s default IP address or a setup URL printed on the router’s label. You’ll typically be prompted to log in with a default username and password—these credentials are often printed on the bottom of the device or inside the user manual. Once logged in, immediately change the admin password to a strong, unique passphrase.
Disable remote management unless you explicitly need it, keep a local admin account, and consider enabling two-factor authentication if your router supports it. WiFi Router Help recommends documenting the new login details in a secure location so you don’t lose access after firmware updates or resets.
Configuring Wireless Settings: SSID, Security, and Password
Navigate to the wireless or WiFi settings section and set your network name (SSID) to something memorable but not personally identifying. Choose the highest security available, typically WPA2 or WPA3 depending on router capabilities. Use a strong passphrase that is long and unique, mixing letters, numbers, and symbols. It’s a good practice to disable WPS if the option exists, as it can be a security weakness.
Consider enabling both 2.4 GHz and 5 GHz bands with the same password for seamless client devices compatibility. If your router supports band steering, enable it to help devices automatically connect to the most appropriate band for their activity. Save changes and, if prompted, reboot the router to apply the new network configuration.
Optional: Guest Network, QoS, and Parental Controls
Many routers offer guest network functionality to isolate visitors from your main network and devices. Enable a separate SSID for guests and assign a different password, keeping your primary network secure. If your router has QoS (Quality of Service) settings, you can prioritize bandwidth for latency-sensitive tasks like gaming or video conferencing. Parental controls can help manage access times and content filtering for family safety.
Set clear rules for guest access (e.g., access windows, device limits) and test both guest and main networks to confirm they work as expected. These features are optional but can greatly improve security, performance, and peace of mind in households with multiple users.
Firmware Updates, Backups, and Safety Considerations
Check for firmware updates after the initial setup. Updating to the latest firmware improves security, fixes bugs, and sometimes adds features. If your router offers a backup or export feature, save a copy of your configuration after you’ve completed setup so you can restore quickly if needed. Always perform updates over a stable connection and avoid power interruptions during the process. A power outage during an update can corrupt firmware and require a reset.
If you must reset the router, perform a factory reset only as a last resort and reapply your settings carefully. Keep a printed or digital note of your essential configuration details in a secure location to simplify future changes or troubleshooting.
Testing, Troubleshooting, and Optimization
After configuring the router, test connectivity from several devices across different rooms to identify dead zones. Use speed tests to verify that your measured performance aligns with your internet plan and expectations. If speeds are inconsistent, try repositioning the router, updating firmware, or rebooting devices. Check for interference from microwaves, cordless phones, or other electronics that operate on the same 2.4 GHz band.
For persistent issues, verify that the WAN/Internet light is solid and that devices receive an IP address from the router. Release and renew the DHCP lease on a problematic device or reset its network settings if needed. If you still encounter problems, consult your router’s support site for model-specific guidance or contact customer support.
After Setup: Maintenance and Next Steps
Maintain your router’s performance by scheduling periodic reboots and firmware checks. Change the admin password periodically and review connected devices to detect unauthorized access. Consider enabling automatic firmware updates if available, and keep documentation of your network configuration. Plan routine checks to refresh your security practices and consider upgrading hardware when your household grows or speeds become insufficient for your needs. A well-maintained setup reduces future headaches and helps you enjoy consistent home networking.
Tools & Materials
- WiFi router(New or existing router with power adapter)
- Power adapter(Should be included with router)
- Ethernet cable (Cat5e or better)(Optional for wired setup during configuration)
- Computer, smartphone, or tablet(Used to access the router admin page)
- Web browser(Chrome/Edge/Safari or equivalent)
- Active internet connection(Test connectivity after setup)
- Pen and notebook or password manager(Record SSID and password)
Steps
Estimated time: 60-90 minutes
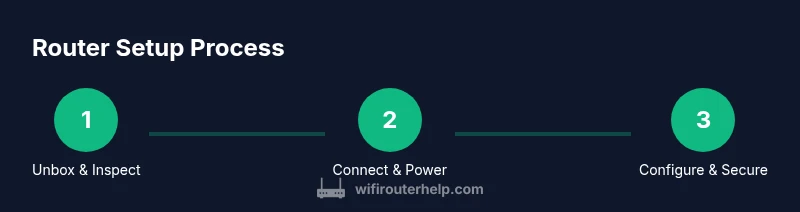
- 1
Unbox and inspect
Unearth the router, power supply, and any included manuals. Verify all components are present and undamaged, and note any model-specific setup requirements. This avoids mid-process surprises and helps you plan wiring or placement.
Tip: Keep the box contents near the work area to verify cables and adapters quickly. - 2
Choose a central location
Place the router on a shelf or table roughly in the center of your living space, elevated from the floor. Avoid placing it near thick walls, metal appliances, or large mirrors, which can obstruct signals.
Tip: A higher shelf with open space on all sides improves coverage. - 3
Connect modem to router and power on
Connect the modem to the router’s WAN/Internet port using an Ethernet cable. Plug in the router and wait for the LED indicators to stabilize. If you’re using a wired setup, connect your configuring device to the router with an Ethernet cable for reliability.
Tip: If the lights seem off, unplug, wait 30 seconds, and plug back in. - 4
Access the admin interface
From your configuring device, open a web browser and enter the router’s default IP address or setup URL printed on the bottom label. Log in with the default credentials and prepare to update the login information.
Tip: If you can’t access the login page, confirm you’re connected to the router and try a factory reset as a last resort. - 5
Change the admin password
In the admin panel, locate the password or security settings and replace the default admin password with a strong, unique passphrase. Save changes and log out, then log back in with the new credentials.
Tip: Use a password manager to store this securely. - 6
Configure wireless settings
Set a clear SSID for each band (2.4 GHz and 5 GHz if available). Choose the strongest available encryption (WPA2 or WPA3) and create a robust network password. Consider enabling band steering if offered by your router.
Tip: Do not reuse your admin password as the WiFi password. - 7
Enable guest network and controls
If available, enable a guest network with a separate password to isolate visitors from your main devices. Explore QoS settings to prioritize essential activities and enable parental controls if needed.
Tip: Limit guest network access to internet only if possible. - 8
Update firmware and back up settings
Check for firmware updates and install them if available. After configuration, export or back up your settings for quick restoration if needed.
Tip: Backup before major updates to avoid losing custom configurations. - 9
Test connectivity and optimize
Test across multiple devices and rooms, run speed tests, and identify any dead zones. Adjust antenna orientation or relocate the router if you notice weak coverage.
Tip: If problems persist, reboot all devices and re-check basic settings.
People Also Ask
Do I need to reset the router before starting the setup?
If you’re setting up a new router or restoring an older one, a factory reset ensures you start with default settings. This helps avoid conflicts with existing configurations. Remember to reconfigure security and network details from scratch.
If you’re starting fresh or encountering setup issues, a factory reset can help. Then reconfigure your network security and password.
Can I set up a guest network?
Yes. A guest network creates a separate access point that isolates guests from your main devices. Enable it in the router’s wireless or guest network section and provide a distinct password. This improves security and keeps your private devices protected.
Absolutely. A guest network keeps visitors separate and protects your main devices. Enable it and set a unique password.
What security settings should I enable?
Use the strongest available encryption, typically WPA2 or WPA3. Disable WPS if possible, keep admin credentials unique, and regularly update firmware to patch vulnerabilities. Consider enabling automatic security updates if your device supports it.
Choose WPA2 or WPA3, disable WPS if you can, and keep firmware up to date for best security.
How do I change the default admin password?
Log in to the router admin page and locate the administration or security area. Replace the default password with a strong, unique passphrase. Save changes and log out, then log back in with the new credentials.
Open the admin page, go to security settings, and replace the default password with a strong one.
What should I do if I can’t access the admin interface?
First, confirm you’re connected to the router. If necessary, perform a factory reset while following manufacturer instructions and then re-run the setup. If issues persist, consult the manufacturer’s support site or contact customer service.
Make sure you’re connected to the router, try a reset if needed, and consult support if it’s still not accessible.
Is wired setup always better than wireless for initial configuration?
A wired connection during initial setup is often more reliable and faster, reducing the risk of configuration errors due to a flaky WiFi link. If a cable isn’t available, wireless setup works, though it may take longer to complete.
Wired setup is usually more reliable for people new to configuring routers; wireless works too if you don’t have a cable.
How often should I check for firmware updates?
Check for updates at least every few months or enable automatic updates if your router supports it. Updates improve security, fix bugs, and sometimes add new features. Back up your settings before applying major updates.
Check for updates regularly and back up your settings before installing any firmware changes.
Watch Video
What to Remember
- Plan network names and passwords before setup
- Use strong encryption and unique admin credentials
- Test coverage in all living spaces and adjust placement
- Keep firmware updated and back up configurations
- Utilize guest networks and parental controls when appropriate